Mercury Sable (2009 year). Manual - part 6


  Index      Mercury     Mercury Sable (2009 year) - manual in english


Search            copyright infringement  


Content      ..     4      5      6      7     ..


Mercury Sable (2009 year). Manual - part 6


HOMELINK

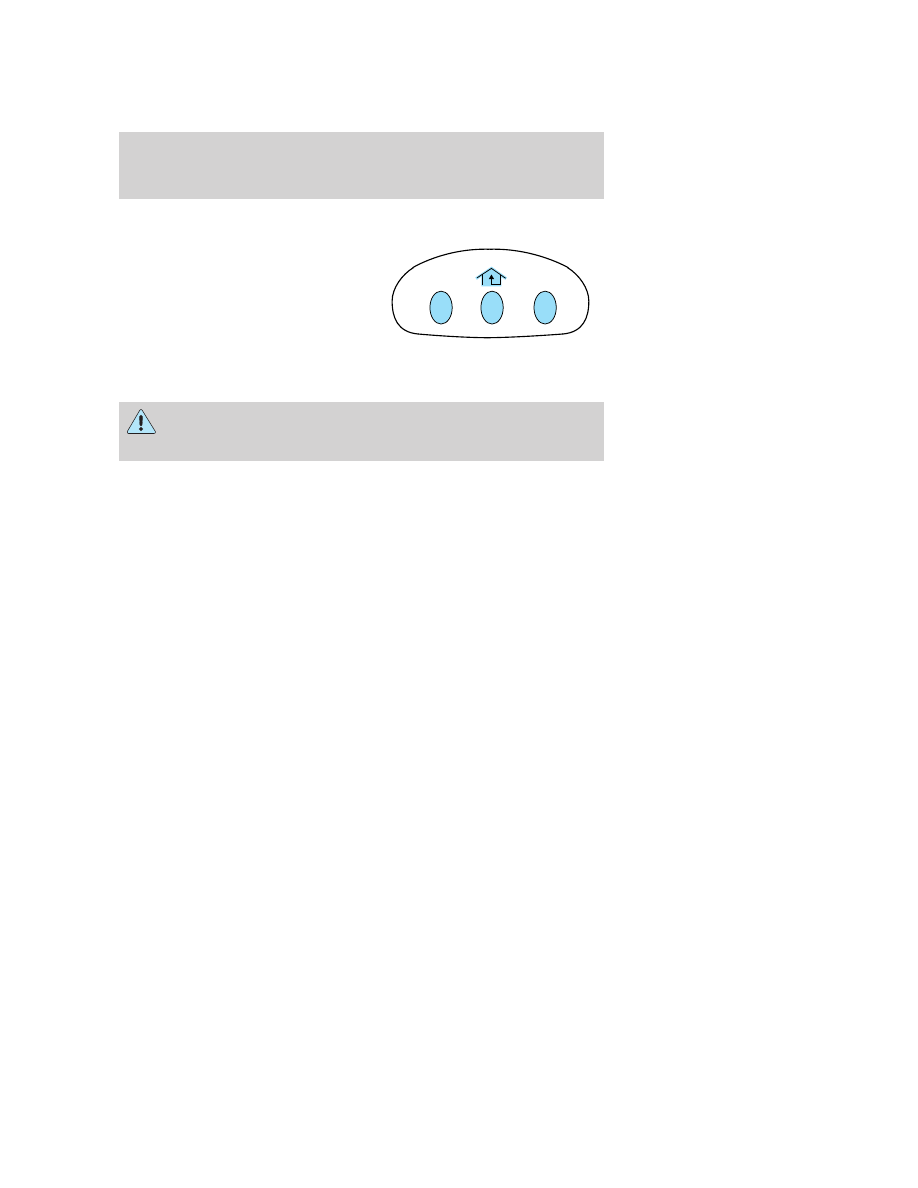
姞 WIRELESS CONTROL SYSTEM (IF EQUIPPED)

The HomeLink

威 Wireless Control

System, located on the driver’s visor,
provides a convenient way to
replace up to three hand-held
transmitters with a single built-in
device. This feature will learn the
radio frequency codes of most
transmitters to operate garage
doors, entry gate operators, security systems, entry door locks, and
home or office lighting.

WARNING: When programming your HomeLink

威 Wireless

Control System to a garage door or gate, be sure that people and

objects are out of the way to prevent potential injury or damage.

Do not use the HomeLink

威 Wireless Control System with any garage

door opener that lacks safety stop and reverse features as required by
U.S. federal safety standards (this includes any garage door opener
model manufactured before April 1, 1982). A garage door which cannot
detect an object, signaling the door to stop and reverse, does not meet
current U.S. federal safety standards. For more information, contact
HomeLink

威 at: www.homelink.com or 1–800–355–3515.

Retain the original transmitter for use in other vehicles as well as for
future programming procedures (i.e. new HomeLink

威 equipped vehicle

purchase). It is also suggested that upon the sale of the vehicle, the
programmed Homelink

威 buttons be erased for security purposes, refer to

Programming in this section.

Programming

Do not program HomeLink

威 with the vehicle parked in the garage.

Note: Your vehicle may require the ignition switch to be turned to the
accessory position for programming and/or operation of the HomeLink

威.

It is also recommended that a new battery be placed in the hand-held
transmitter of the device being programmed to HomeLink

威 for quicker

training and accurate transmission of the radio-frequency signal.

2009 Sable (mgo)
Owners Guide, 2nd Printing
USA 
(fus)

Driver Controls

81

-------------------------------------------------------------------------------------------------------------------------------------------------------------

1. Position the end of your
hand-held transmitter 1–3 inches
(2–8 cm) away from the HomeLink

button you wish to program (located
on your visor) while keeping the
indicator light in view.

2. Simultaneously press and hold
both the chosen HomeLink

威 and

hand-held transmitter buttons until the HomeLink

威 indicator light

changes from a slow to a rapidly blinking light. Now you may release
both the HomeLink

威 and hand-held transmitter buttons.

Note: Some entry gates and garage door openers may require you to
replace Step 2 with procedures noted in the Gate Operator and
Canadian Programming 
in this section for Canadian residents.

3. Firmly press and hold for five seconds and release the
programmed HomeLink

威 button up to two separate times to activate the

door. If the door does not activate, press and hold the just-trained
HomeLink

威 button and observe the indicator light.

• If the indicator light stays on constantly, programming is complete
and your device should activate when the HomeLink

威 button is pressed

and released.

• If the indicator light blinks rapidly for two seconds and then turns
to a constant light continue with “Programming” Steps 4 through
to complete programming of a rolling code equipped device (most
commonly a garage door opener).

4. At the garage door opener receiver (motor-head unit) in the garage,
locate the “learn” or “smart” button (usually near where the hanging
antenna wire is attached to the unit).

5. Firmly press and release the “learn” or “smart” button. (The name and
color of the button may vary by manufacturer.)

Note: There are 30 seconds in which to initiate Step 6.

6. Return to the vehicle and firmly press, hold for two seconds and
release 
the programmed HomeLink

威 button. Repeat the

press/hold/release sequence again and, depending on the brand of the
garage door opener (or other rolling code equipped device), repeat this
sequence a third time to complete the programming.

HomeLink

威 should now activate your rolling code equipped device. To

program additional HomeLink

威 buttons begin with Step 1 in this section.

For questions or comments, please contact HomeLink

威 at

www.homelink.com or 1–800–355–3515.

2009 Sable (mgo)
Owners Guide, 2nd Printing
USA 
(fus)

Driver Controls

82

-------------------------------------------------------------------------------------------------------------------------------------------------------------

Gate Operator & Canadian Programming

During programming, your
hand-held transmitter may
automatically stop transmitting —
not allowing enough time for
HomeLink

威 to accept the signal

from the hand-held transmitter.

After completing Step 1 outlined in
the Programming section, replace
Step 2 with the following:

Note: If programming a garage door opener or gate operator, it is
advised to unplug the device during the “cycling” process to prevent
overheating.
• Continue to press and hold the HomeLink威 button (note Step 2 in the

Programming section) while you press and release —

every two

seconds (“cycle”) your hand-held transmitter until the frequency
signal has been accepted by the HomeLink

威. The indicator light will

flash slowly and then rapidly after HomeLink

威 accepts the radio

frequency signal.

• Proceed with Step 3 in the Programming section.

Operating the HomeLink

姞 Wireless Control System

To operate, simply press and release
the appropriate HomeLink

威 button.

Activation will now occur for the
trained product (garage door, gate
operator, security system, entry
door lock, or home or office lighting
etc.). For convenience, the
hand-held transmitter of the device
may also be used at any time. In the event that there are still
programming difficulties, contact HomeLink

威 at www.homelink.com or

1–800–355–3515.

2009 Sable (mgo)
Owners Guide, 2nd Printing
USA 
(fus)

Driver Controls

83

-------------------------------------------------------------------------------------------------------------------------------------------------------------

Erasing HomeLink

姞 buttons

To erase the three programmed
buttons (individual buttons cannot
be erased):
• Press and hold the two outer

HomeLink

威 buttons until the

indicator light begins to
flash-after 20 seconds. Release
both buttons. Do not hold for
longer that 30 seconds.

HomeLink

威 is now in the train (or learning) mode and can be

programmed at any time beginning with Step 1 in the Programming
section.

Reprogramming a single HomeLink

姞 button

To program a device to HomeLink

威 using a HomeLink威 button previously

trained, follow these steps:

1. Press and hold the desired HomeLink

威 button. Do NOT release the

button.

2. The indicator light will begin to flash after 20 seconds. Without
releasing the HomeLink

威 button, follow Step 1 in the Programming

section.

For questions or comments, contact HomeLink

威 at www.homelink.com

or 1–800–355–3515.

MESSAGE CENTER

With the ignition in the on position,
the message center, located on your
instrument cluster, displays
important vehicle information
through a constant monitor of
vehicle systems. 
You may select
display features on the message center for a display of status. The
system will also notify you of potential vehicle problems with a display of
system warnings followed by a long indicator chime.

2009 Sable (mgo)
Owners Guide, 2nd Printing
USA 
(fus)

Driver Controls

84

-------------------------------------------------------------------------------------------------------------------------------------------------------------

Selectable features

Reset

Press this control to select and reset functions shown in the INFO menu
and SETUP menu.

Info menu

This control displays the following
control displays:
• Odometer
• Trip Odometer
• Distance to Empty
• Average Fuel Economy
• Trip Elapsed Drive Time
• Compass Display
• Compass Zone Adjustment
• Compass Calibration Adjustment
Odometer/Trip odometer

Refer to Gauges in the Instrument Cluster chapter.

Distance to empty (DTE)

Selecting this function from the
INFO menu estimates approximately
how far you can drive with the fuel
remaining in your tank under
normal driving conditions.
Remember to turn the ignition off
when refueling to allow this feature to correctly detect the added fuel.

The DTE function will display FUEL LEVEL LOW and a single tone
when you have approximately 50 miles (80 km) to empty. If you RESET
this warning message, this display and tone will return within
10 minutes.

DTE is calculated using a running average fuel economy, which is based
on your recent driving history of 500 miles (800 km). This value is not
the same as the average fuel economy display. The running average fuel
economy is reinitialized to a factory default value if the battery is
disconnected.

2009 Sable (mgo)
Owners Guide, 2nd Printing
USA 
(fus)

Driver Controls

85

-------------------------------------------------------------------------------------------------------------------------------------------------------------

Average fuel economy (AFE)

Select this function from the INFO
menu to display your average fuel
economy in miles/gallon or
liters/100 km.

If you calculate your average fuel
economy by dividing 100 miles traveled by gallons of fuel used
(kilometers traveled by liters used), your figure may be different than
displayed for the following reasons:
• Your vehicle was not perfectly level during fill-up

• Differences in the automatic shut-off points on the fuel pumps at

service stations

• Variations in top-off procedure from one fill-up to another

• Rounding of the displayed values to the nearest 0.1 gallon (liter)
1. Drive the vehicle at least 5 miles (8 km) with the speed control
system engaged to display a stabilized average.
2. Record the highway fuel economy for future reference.
It is important to press the RESET control after setting the speed
control to get accurate highway fuel economy readings.
For more information refer to Essentials of good fuel economy in the
Maintenance and Specifications chapter.

Trip elapsed drive time

Select this function from the INFO
menu to display a timer.

To operate the Trip Elapsed Drive
Time perform the following:

1. Press and release RESET in order
to start the timer.
2. Press and release RESET to pause the timer.
3. Press and hold RESET for two seconds in order to reset the timer.

Compass display
The compass heading is displayed in the lower left corner of the message
center next to the odometer.
The compass reading may be affected when you drive near large
buildings, bridges, power lines and powerful broadcast antenna. Magnetic
or metallic objects placed in, on or near the vehicle may also affect
compass accuracy.

2009 Sable (mgo)
Owners Guide, 2nd Printing
USA 
(fus)

Driver Controls

86

-------------------------------------------------------------------------------------------------------------------------------------------------------------

Usually, when something affects the compass readings, the compass will
correct itself after a few days of operating your vehicle in normal
conditions. If the compass still appears to be inaccurate, a manual
calibration may be necessary. Refer to Compass zone/calibration
adjustment.

Most geographic areas (zones) have a magnetic north compass point that
varies slightly from the northerly direction on maps. This variation is four
degrees between adjacent zones and will become noticeable as the
vehicle crosses multiple zones. A correct zone setting will eliminate this
error. Refer to Compass zone/calibration adjustment.

Compass zone adjustment

Perform the following steps on an open area free from steel structures
and high voltage lines. For optimum calibration, turn off all electrical
accessories (heater / air conditioning, wipers, etc.) and make sure all
vehicle doors are shut.

1. Turn ignition to the on position.

2. Start the engine.

3. Determine your magnetic zone by
referring to the zone map.

4. Press the SETUP control
repeatedly until the message center
says “RESET FOR ZONE SETTING”.

5. Press the RESET control to enter
Zone Setting mode.

6. Press RESET repeatedly until the
desired zone setting is displayed.
The message center will
automatically exit zone setting mode
if enough time passes without
pressing a button.

1

2

3

4

5

6

7 8 9 1011

12

13

14

15

2009 Sable (mgo)
Owners Guide, 2nd Printing
USA 
(fus)

Driver Controls

87

-------------------------------------------------------------------------------------------------------------------------------------------------------------

Compass calibration adjustment

Perform the following steps on an open area free from steel structures
and high voltage lines. For optimum calibration, turn off all electrical
accessories (heater / air conditioning, wipers, etc.) and make sure all
vehicle doors are shut.

1. Turn ignition to the on position.

2. Start the engine.

3. Press the SETUP button
repeatedly until the message center
displays “RESET FOR
CALIBRATION”.

4. Press RESET to enter compass
calibration mode which will display
“CIRCLE SLOWLY TO CALIBRATE”.

5. Drive the vehicle in circles up to
three times until the message

⬙CALIBRATION COMPLETED⬙
appears and one of the eight valid
headings (N, NE, E, SE, S, SW, W,
NW) is displayed.

6. Verify that the calibration process has taken place by driving the
vehicle in at least one circle, confirming that the heading changes
accordingly. If this happens, the compass has been calibrated
successfully. Otherwise, if the display shows only one heading as the
vehicle is being driven around, repeat the procedure from Step 3.

2009 Sable (mgo)
Owners Guide, 2nd Printing
USA 
(fus)

Driver Controls

88

-------------------------------------------------------------------------------------------------------------------------------------------------------------

Setup menu

Press this control for the following
displays:
• System Check
• Oil Life
• Language
• Units (English/Metric)
• Autolamp Delay (if equipped)
• Autolock (if equipped)
• Autounlock (if equipped)
• Easy entry/exit seat (if equipped)
System check

Selecting this function from the
SETUP menu causes the message
center to cycle through each of the
systems being monitored. For each
of the monitored systems, the
message center will indicate either
an OK message or a warning message for two to four seconds.

Pressing the RESET control cycles the message center through each of
the systems being monitored.

The sequence of the system check report is as follows:

1. OIL LIFE

2. CHARGING SYSTEM

3. WASHER FLUID LEVEL

4. DOORS CLOSED

5. TRUNK CLOSED

6. BRAKE SYSTEM

7. TIRE PRESSURE MONITORING SYSTEM (if equipped and warning is
present)

8. DISTANCE TO EMPTY

2009 Sable (mgo)
Owners Guide, 2nd Printing
USA 
(fus)

Driver Controls

89

-------------------------------------------------------------------------------------------------------------------------------------------------------------

Oil life

An oil change is required whenever indicated by the message center.
USE ONLY RECOMMENDED ENGINE OILS.

To reset the oil monitoring system to 100% after each oil change
(approximately 7,500 miles [12,000 km] or six months) perform the
following:

1. Press the SETUP control to enter
SYSTEM CHECK, then press SETUP
control again to display “OIL LIFE =
XXX% HOLD RESET = NEW”.

2. Press and hold the RESET
control for two seconds and release.
Oil life is set to 100% and “OIL LIFE
SET TO 100%” is displayed.

3. While “OIL LIFE SET TO 100%”
is displayed, if a lower oil life is
desired, press and release the RESET control to reduce the value. Each
press of the RESET control reduces the value by 10%.

Note: Oil life of 100% equals 7,500 miles (12,000 km) or six months. For
example, setting oil life to 60% sets the oil life value to 4,500 miles
(7,200 km) and 108 days.

Language

1. Select this function from the
SETUP menu for the current
language to be displayed.

2. Pressing the RESET control
cycles the message center through
each of the language choices.

3. Press and hold the RESET control to set the language choice.

Units (English/Metric)

1. Select this function from the
SETUP menu for the current units
to be displayed.

2. Press the RESET control to
change from English to Metric.

2009 Sable (mgo)
Owners Guide, 2nd Printing
USA 
(fus)

Driver Controls

90

-------------------------------------------------------------------------------------------------------------------------------------------------------------

Autolamp delay (if equipped)

This feature keeps your headlights on for up to three minutes after the
ignition is switched off.

1. To disable/enable the autolamp
delay feature, select this function
from the SETUP control for the
current display mode.

2. Press the RESET control to select
the new Autolamp delay values of 0,
10, 20, 30, 60, 90, 120 or 180 seconds.

Autolock (if equipped)

This feature automatically locks all vehicle doors when the vehicle is
shifted into any gear, putting the vehicle in motion.

1. To disable/enable the autolock
feature, select this function from the
SETUP control for the current
display mode.

2. Press the RESET control to turn
the autolock ON or OFF.

Autounlock (if equipped)

This feature automatically unlocks all vehicle doors when the driver’s
door is opened within 10 minutes of the ignition being turned off.

1. To disable/enable the autounlock
feature, select this function from the
SETUP control for the current
display mode.

2. Press the RESET control switch
to turn the autounlock ON or OFF.

Easy entry/exit seat (if equipped)

This feature automatically moves the drivers seat backwards for easy exit
from the vehicle.

1. To disable/enable the easy
entry/exit seat feature, select this
function from the SETUP control for
the current display mode.

2. Press the RESET control to turn
the easy entry/exit seat ON or OFF.

2009 Sable (mgo)
Owners Guide, 2nd Printing
USA 
(fus)

Driver Controls

91

-------------------------------------------------------------------------------------------------------------------------------------------------------------

System warnings
System warnings alert you to possible problems or malfunctions in your
vehicle’s operating systems.
In the event of a multiple warning situation, the message center will
cycle the display to show all warnings by displaying each one for several
seconds.
The message center will display the last selected feature if there are no
more warning messages. This allows you to use the full functionality of
the message center after you acknowledge the warning by pressing the
RESET control and clearing the warning message.
Warning messages that have been reset are divided into three categories:
• They will not disappear until a condition is changed.

• They will reappear on the display 10 minutes from the reset.

• They will not reappear until an ignition OFF-ON cycle has been

completed.

This acts as a reminder that these warning conditions still exist within
the vehicle.

Warnings

Status

Driver door ajar

Warning cannot be reset (CLOSE
DOOR TO RESET) will be displayed

Passenger door ajar

Rear left door ajar

Rear right door ajar

Fuel level low

Warning returns after 10 minutes

Check charging system

Check brake system

Brake fluid level low

Warning returns after the ignition key
is turned from OFF to RUN

Park brake engaged

Low tire pressure

Tire pressure monitor fault

Tire pressure sensor fault

Trunk ajar

Washer fluid level low

Oil life change soon

Oil change required

DRIVER DOOR AJAR — Displayed when the driver’s door is not
completely closed.

2009 Sable (mgo)
Owners Guide, 2nd Printing
USA 
(fus)

Driver Controls

92

-------------------------------------------------------------------------------------------------------------------------------------------------------------

PASSENGER DOOR AJAR — Displayed when the passenger side door
is not completely closed.

REAR LEFT DOOR AJAR — Displayed when the left rear door is not
completely closed.

REAR RIGHT DOOR AJAR — Displayed when the right rear door is
not completely closed.

FUEL LEVEL LOW — Displayed as an early reminder of a low fuel
condition.

CHECK CHARGING SYSTEM — Displayed when the electrical system
is not maintaining proper voltage. If you are operating electrical
accessories when the engine is idling at a low speed, turn off as many of
the electrical loads as possible. If the warning stays on or comes on when
the engine is operating at normal speeds, contact your authorized dealer
as soon as possible.

CHECK BRAKE SYSTEM — Displayed when the brake system needs
servicing. If the warning stays on or continues to come on, contact your
authorized dealer as soon as possible.

BRAKE FLUID LEVEL LOW — Indicates the brake fluid level is low
and the brake system should be inspected immediately. Refer to Brake
fluid 
in the Maintenance and Specifications chapter.

PARK BRAKE ENGAGED — Displayed when the park brake is
engaged. If the warning stays on after the park brake is off, contact your
authorized dealer as soon as possible.

LOW TIRE PRESSURE — Displayed when one or more tires on your
vehicle have low tire pressure. Refer to Inflating your tires in the Tires,
Wheels and Loading 
chapter.

TIRE PRESSURE MONITOR FAULT — Displayed when the Tire
Pressure Monitoring System is malfunctioning. If the warning stays on or
continues to come on, contact your authorized dealer as soon as
possible.

TIRE PRESSURE SENSOR FAULT — Displayed when a tire pressure
sensor is malfunctioning, or your spare tire is in use. For more
information on how the system operates under these conditions, refer to
Tire Pressure Monitoring System (TPMS) in the Tires, Wheels and
Loading 
chapter. If the warning stays on or continues to come on,
contact your authorized dealer as soon as possible.

TRUNK AJAR — Displayed when the trunk is not completely closed.

2009 Sable (mgo)
Owners Guide, 2nd Printing
USA 
(fus)

Driver Controls

93

-------------------------------------------------------------------------------------------------------------------------------------------------------------

WASHER FLUID LEVEL LOW — Indicates the washer fluid reservoir
is less than one quarter full. Check the washer fluid level. Refer to
Windshield washer fluid in the Maintenance and Specifications
chapter.

OIL LIFE CHANGE SOON — Displayed when the engine oil life
remaining is 10% or less. When oil life left is between 10% and 0%, the
XX% OIL LIFE CHANGE SOON message will be displayed.

OIL CHANGE REQUIRED — Displayed when the oil life left reaches
0%, the OIL CHANGE REQUIRED message will be displayed.

INTERIOR TRUNK CONTROL

Press the remote trunk release
control on the instrument panel to
the left of the steering wheel.

Rear sunshade (if equipped)

Your vehicle may be equipped with a rear sunshade that covers the rear
window of your vehicle.

To install the shade: Pull the
shade up and hook the shade into
the headliner clips in the rear roof
panel.

To stow the shade: Unhook the
shade from the headliner clips in
the rear roof panel and let the
shade roll back into the package
tray.

WARNING: To reduce the risk of injuries, the sunshade must be
properly attached to the headliner clips in the rear roof panels.

2009 Sable (mgo)
Owners Guide, 2nd Printing
USA 
(fus)

Driver Controls

94

-------------------------------------------------------------------------------------------------------------------------------------------------------------

CARGO AREA FEATURES

Cargo net (if equipped)

The cargo net secures lightweight
objects in the cargo area. Attach the
net to the anchors provided. Do not
put more than 50 lb. (22 kg) in the
net.

WARNING: This net is not
designed to restrain objects

during a collision.

2009 Sable (mgo)
Owners Guide, 2nd Printing
USA 
(fus)

Driver Controls

95

-------------------------------------------------------------------------------------------------------------------------------------------------------------

KEYS

Your vehicle is equipped with two
Integrated Keyhead Transmitters
(IKTs). The IKT functions as both a
programmed ignition key that
operates all the locks and starts the
vehicle, and a remote keyless entry
transmitter.

Your IKTs are programmed to your vehicle; using a non-programmed key
will not permit your vehicle to start. If you lose your authorized dealer
supplied IKTs, replacement IKTs are available through your authorized
dealer. Standard SecuriLock™ keys without remote entry transmitter
functionality can also be purchased from your authorized dealer if
desired.

Always carry a spare key with you in case of an emergency.

For more information regarding programming replacement IKTs, refer to
the SecuriLock™ passive anti-theft system section later in this chapter.

Note: Your vehicle’s IKTs were
issued with a security tag on them
that provides important vehicle key
cut information. It is recommended
that you maintain the tag in a safe
place for future reference.

Recommended handling of the Integrated Keyhead Transmitter
(IKT)

To avoid inadvertently activating the remote entry functions of your
vehicle, it is recommended that the Integrated Keyhead Transmitter
(IKT) be handled properly when starting and turning off your vehicle.

2009 Sable (mgo)
Owners Guide, 2nd Printing
USA 
(fus)

Locks and Security

96

-------------------------------------------------------------------------------------------------------------------------------------------------------------


Content      ..     4      5      6      7     ..