Ford F150 Pickup. Instruction - part 1010


  Index      Ford     Ford F150 Pickup - service and repair instruction 2003 year


Search            copyright infringement  


Content   ..  1008  1009  1010  1011   ..


Ford F150 Pickup. Instruction - part 1010


4. Check the coolant system conditions: 

z

If the intercooler fluid is low, add the specified coolant mixture only.  

z

If the intercooler coolant fluid tests weak, add straight engine coolant until the readings are 
within acceptable levels.  

z

If the engine coolant tests strong, remove some of the engine coolant and add water until 
readings are within acceptable levels.  

5. If the concern remains after the inspection, determine the symptom(s). GO to SYMPTOM CHART .  

6. Verify the cooling system is correctly filled and bled. Refer to SUPERCHARGER COOLING 

SYSTEM DRAINING, FILLING & BLEEDING .  

SYMPTOM CHART 

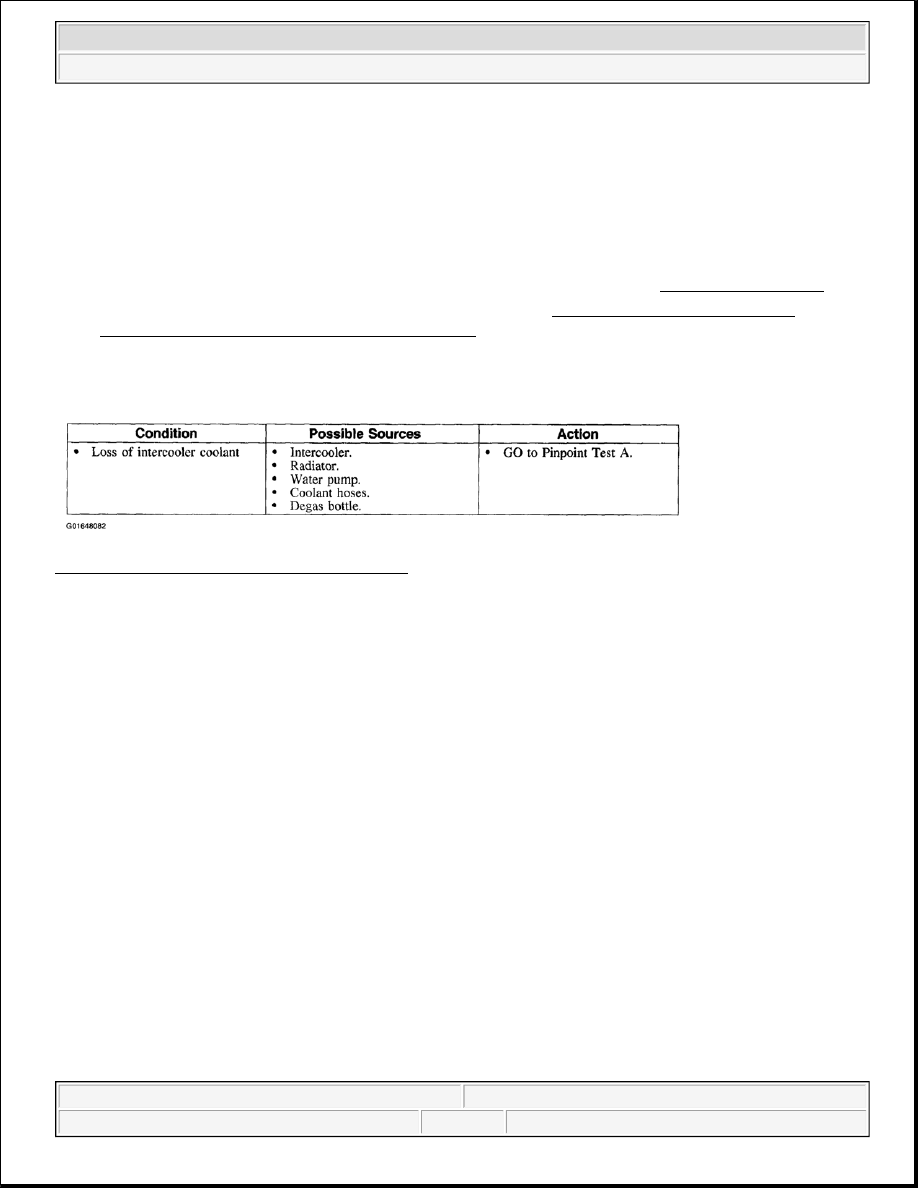
Fig. 6: Supercharger Cooling Symptom Chart 
Courtesy of FORD MOTOR CO. 

PINPOINT TESTS 

Pinpoint Test A: Loss Of Coolant 


2003 Ford Pickup F150 

2003 ENGINE Supercharger Cooling - F150 Pickup


Fig. 7: Pinpoint Test A: Loss Of Coolant (Steps A1 - A2) 
Courtesy of FORD MOTOR CO. 

Fig. 8: Pinpoint Test A: Loss Of Coolant (Step A3) 
Courtesy of FORD MOTOR CO. 


2003 Ford Pickup F150 

2003 ENGINE Supercharger Cooling - F150 Pickup


COMPONENT TESTS 

Pressure Test 

1. Turn the engine OFF. 

2. Check the intercooler coolant level. For additional information, refer to SUPERCHARGER COOLING 

SYSTEM DRAINING, FILLING & BLEEDING .  

3. Connect the Radiator/Heater Core Pressure Tester to the degas bottle nipple. Install a pressure test pump 

to the quick-connect fitting of the test adapter. 

4. Slowly depress the plunger of the pressure test pump until the pressure gauge reading stops increasing 

and note the highest pressure reading obtained.  

5. If the pressure relief cap does not hold pressure, remove and wash the pressure relief cap in clean water to 

dislodge all foreign particles from the gaskets. Check the sealing surface in the filler neck.  

6. If 69 kPa (10 psi) cannot be reached, install a new pressure relief cap. If more than 12 kPa (18 psi) shows 

on the gauge, install a new pressure relief cap. 

7. Pressurize the intercooler cooling system as described in Step 4 (using a pressure relief cap that operates 

within the specified upper and lower pressure limits). Observe the gauge reading for approximately two 
minutes; refer to GENERAL SPECIFICATIONS . Pressure should not drop during this time. 

z

If the pressure drops and no external leak is found, the intercooler may be the cause. Remove and 
inspect the intercooler. Install a new intercooler if necessary.  

8. Release the system pressure by loosening the pressure relief cap. Check the coolant level and replenish, if 

WARNING:

Never remove the pressure relief cap under any conditions while the 
engine is operating. Failure to follow these instructions could result 
in damage to the cooling system or engine and/or personal injury. 
To avoid having scalding hot coolant or steam blow out of the 
cooling system, never remove the pressure relief cap from a hot 
degas bottle. Wait until the engine has cooled, then wrap a thick 
cloth around the pressure relief cap and turn it slowly one turn 
(counterclockwise). Step back while the pressure is released from 
the cooling system. When certain all the pressure has been 
released, remove the pressure relief cap (still with a cloth).

NOTE:

If the plunger of the pump is depressed too fast, an erroneous pressure 
reading will result.

CAUTION: If the pressure drops, check for leaks at the intercooler hoses or 

other system components and connections. Any leaks which are 
found must be corrected and the system rechecked.

NOTE:

Intercooler system is not connected to the main engine cooling system.


2003 Ford Pickup F150 

2003 ENGINE Supercharger Cooling - F150 Pickup


necessary, with the correct coolant mixture. For additional information, refer to SUPERCHARGER 
COOLING SYSTEM DRAINING, FILLING & BLEEDING
 .  

Cap 

1. Immerse the pressure relief cap in water and install it on the shallow filler neck of Radiator/Heater Core 

Pressure Tester and Radiator Cap Adapter, part of Radiator/Heater Core Pressure Tester.  

2. Immerse the filler neck seal in water and install it in the filler neck adapter.  

3. Install the filler neck adapter with the filler neck seal to the Radiator Cap Adapter.  

4. Connect the female quick-connect fitting of the pressure test pump to the male quick-connect fitting of 

the filler neck adapter. 

5. Slowly depress the plunger of the pressure test pump until the pressure gauge reading stops increasing 

and note the highest pressure reading obtained.  

6. Release the pressure by turning the relief screw counterclockwise. Then tighten the pressure relief screw 

and repeat Step 6 (at least twice) to make sure the reading is repeatable within the specifications of the 
pressure relief cap.  

7. If the pressure test gauge readings are not within specifications, install a new pressure relief cap. If the 

pressure test gauge readings are within specifications, carry out the cooling system pressure test.  

Radiator Leak Test, Removed From The Vehicle 

WARNING:

Never remove the pressure relief cap under any conditions while the 
engine is operating. Failure to follow these instructions could result in 
damage to the cooling system or engine and/or personal injury. To avoid 
having scalding hot coolant or steam blow out of the cooling system, use 
extreme care when removing the pressure relief cap from a hot degas 
bottle. Wait until the engine has cooled, then wrap a thick cloth around 
the pressure relief cap and turn it slowly one turn (counterclockwise). 
Step back while the pressure is released from the cooling system. When 
certain all the pressure has been released, remove pressure relief cap 
(still with a cloth).

NOTE:

If the plunger of the pump is depressed too fast, an erroneous pressure 
reading will result.

CAUTION: Never leak test an aluminum radiator or intercooler in the same water that 

copper/brass radiators are tested in. Flux and caustic cleaners may be 
present in the cleaning tank and they will damage aluminum radiators and 
intercoolers.

NOTE:

Clean the radiator or intercooler before leak testing to avoid contamination of 
tank.


2003 Ford Pickup F150 

2003 ENGINE Supercharger Cooling - F150 Pickup


Content   ..  1008  1009  1010  1011   ..