Chrysler Le Baron, Dodge Dynasty, Plymouth Acclaim. Manual - part 333


  Index      Dodge     Chrysler Le Baron, Dodge Dynasty, Plymouth Acclaim - service repair manual 1993 year


Search            


Content   ..  331  332  333  334   ..


Chrysler Le Baron, Dodge Dynasty, Plymouth Acclaim. Manual - part 333


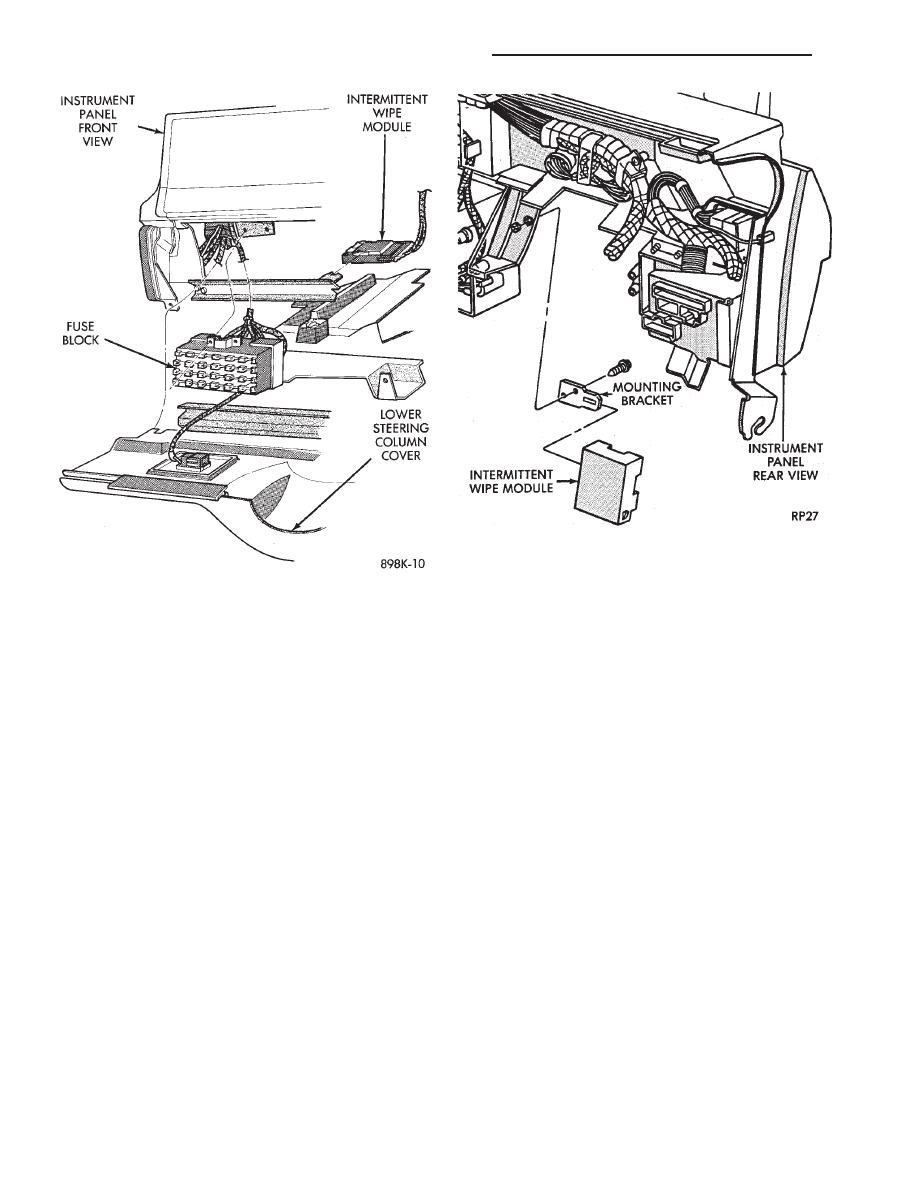
Fig. 27 PIWWC Location AA-Body

Fig. 28 PIWWC Location AP-Body

8K - 16

WINDSHIELD WIPER AND WASHER SYSTEMS

Ä

WINDSHIELD WASHERS

INDEX

page

page

General Information

. . . . . . . . . . . . . . . . . . . . . . . 17

Washer Nozzle

. . . . . . . . . . . . . . . . . . . . . . . . . . 19

Washer Reservoir Pump

. . . . . . . . . . . . . . . . . . . 18

Washer Reservoirs

. . . . . . . . . . . . . . . . . . . . . . . 17

GENERAL INFORMATION

All models are equipped with electric operated

windshield washer pumps.

The wash function can be accessed in the OFF po-

sition of the wiper control switch. Holding the wash
button depressed when the switch is in the OFF po-
sition will operate the wipers and washer motor
pump continuously until the washer button is re-
leased. Releasing the button will stop the washer
pump but the wipers will complete the current wipe
cycle. Then followed by an average of two more wipe
cycles (

61) before the wipers park and the module

turns off.

Whenever a windshield washer malfunction occurs,

first verify that the windshield washer wire harness
is properly connected to all connectors before starting
normal diagnosis and repair procedures. Refer to
Windshield Washer Diagnosis Chart (Fig. 29).

The electric pump assembly is mounted directly to

the reservoir. A permanently lubricated sealed motor
is coupled to a rotor type pump. Fluid, gravity fed
from the reservoir, is forced by the pump through
rubber hoses to the nozzles which direct the streams
to the windshield.

The pump and reservoir are serviced as separate

assemblies on all vehicles.

WASHER RESERVOIRS

FRONT WASHER RESERVOIR

REMOVAL

(1) Remove cowl top screen on applicable models

(Fig. 30 through 33)

(2) Remove sheet metal screws attaching the reser-

voir in plenum.

Fig. 29 Windshield Washer Diagnosis

Ä

WINDSHIELD WIPER AND WASHER SYSTEMS

8K - 17

(3) Disconnect the wiring harness from the reser-

voir pump.

(4) Disconnect the washer hose and block the liq-

uid outlet to prevent the liquid from running out
while removing the reservoir from engine compart-
ment.

INSTALLATION

(1) Connect washer hose, wiring harness and in-

stall the reservoir in the plenum chamber.

(2) Install sheet metal attaching screws. Tighten to

3 N

Im (24 in. lbs.) torque.

REAR WASHER RESERVOIR

REMOVAL

(1) Unlock and open liftgate.
(2) Remove right rear quarter panel inside trim as

necessary to gain access to reservoir (Fig. 34).

(3) Remove two reservoir mounting screws.
(4) Disconnect wiring harness and filler tube from

reservoir and pump assembly.

(5) Disconnect the washer hose and block the

pump outlet to prevent liquid from running out.

(6) Remove reservoir and pump assembly from

rear quarter panel.

INSTALLATION

(1) Position reservoir and pump assembly into the

right rear quarter panel.

(2) Connect washer hose, wire harness and filler

tube to the reservoir and pump assembly.

(3) Install two reservoir mounting screws.
(4) Install right rear quarter panel inside trim.

WASHER RESERVOIR PUMP

FRONT WASHER RESERVOIR PUMP

REMOVAL

(1) Remove liquid from reservoir.
(2) Remove reservoir mounting screws and remove

reservoir and pump assembly (Fig. 30 through 33).

(3) Disconnect electrical lead and rubber hose from

bottom of pump.

(4) Gently pry pump away from reservoir and out

of grommet. Care must be taken not to puncture res-
ervoir.

(5) Remover rubber grommet from reservoir and

throw away.

INSTALLATION

(1) Install new rubber grommet on reservoir.
(2) Position pump into place, and push in firmly

until it locks into grommet.

Fig. 30 Windshield Washer System—AG and AJ Bodies

8K - 18

WINDSHIELD WIPER AND WASHER SYSTEMS

Ä

(3) Connect electrical lead and rubber hose to pump.
(4) Position reservoir into place and install mount-

ing screws.

(5) Fill reservoir.

REAR WASHER RESERVOIR PUMP

REMOVAL

(1) Remove washer reservoir and pump assembly,

refer to Washer Reservoir Removal.

(2) With mechanical fingers, loosen pump filter

and nut through liquid filler opening.

(3) Disconnect the outside portion of the pump.
(4) Remove inner and outer portions of the pump,

and remove pump.

INSTALLATION

(1) Install rubber grommet into place in bottom of

reservoir.

(2) Position pump into place, install nut through

filler opening and tighten with mechanical fingers.

(3) Install reservoir and pump assembly, refer to

Reservoir Installation.

WASHER NOZZLE

FRONT WASHER NOZZLE

These models are equipped with the washer nozzles

attached to the wiper arms. Each arm emit five

streams across the wiper pattern. These washer sys-
tems requires no adjustment. If nozzle performance is
unsatisfactory, they should be replaced. The right
and left nozzles are identical.

REMOVAL

To remove unsnap nozzle from wiper arm and dis-

connect hose.

INSTALLATION

To install make sure that both the nozzle and the

hose guard are securely snapped into position.

REAR WASHER NOZZLE

REMOVAL

(1) Pull washer nozzle out of mounting grommet

(Fig. 35).

(2) Disconnect hose from nozzle.

INSTALLATION

(1) Connect the hose to the nozzle.
(2) Moisten the nozzle and hose.
(3) Insert nozzle into mounting grommet.
(4) Align nozzle.
(5) Open liftgate.
(6) Verify engagement of hose grommets to vehicle

body and liftgate.

Fig. 31 Windshield Washer System—AC and AY Bodies

Ä

WINDSHIELD WIPER AND WASHER SYSTEMS

8K - 19


Content   ..  331  332  333  334   ..