DAF CF65, CF75, CF85 Series . Manual - part 984


  Index      DAF     DAF CF65, CF75, CF85 Series - service repair manual


Search            


Content   ..  982  983  984  985   ..


DAF CF65, CF75, CF85 Series . Manual - part 984


©

 200423

2-19

Inspection and adjustment

FRONT AXLE/LEADING REAR AXLE

ΧΦ65/75/85 series

7

6

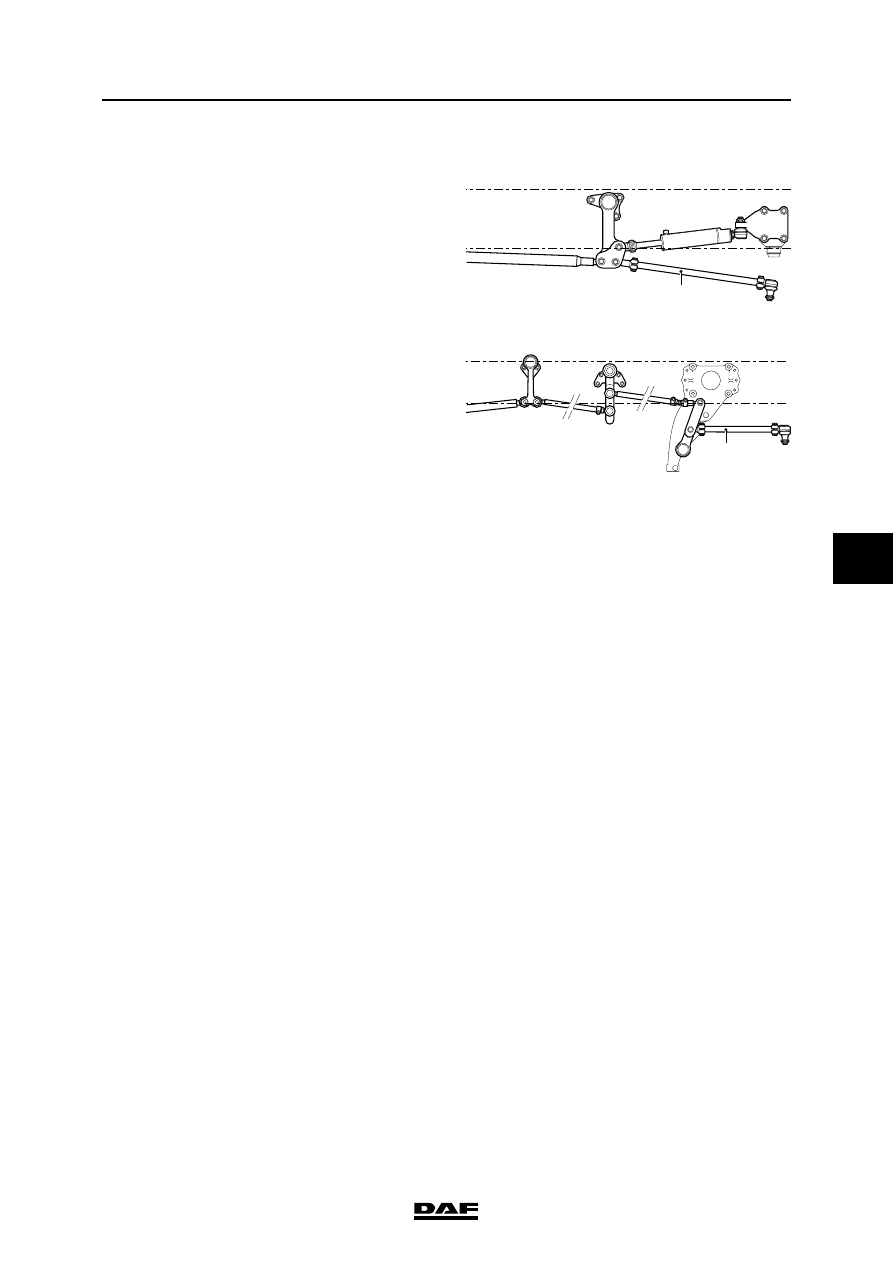
Adjusting the steerable front axles and 
leading rear axle alignment
1.

If the position of the front axle wheel is 

outside the specified tolerance (see 

'Technical data') , this should be corrected by 

lengthening or shortening the rear steering 

rod (A on double front axle and B on leading 

rear axle).

2.

After adjusting the steering rod make sure 

that the clamping brackets of this steering 

rod do not come into contact with other 

components. Check this by turning the 

steering wheels carefully from one end stop 

to another.

3.

Thoroughly clean and check the clamping 

bracket bolts. Corroded or damaged bolts 

should be replaced.

Replace the self-locking nut.

4.

Tighten the locking bolts of the clamping 

brackets to the specified tightening torque. 

See 'Technical data'.

5.

After tightening the clamping brackets, check 

the wheel alignment once again.

A

S7 00 713

B

FRONT AXLE/LEADING REAR AXLE

2-20

©

 200423

Inspection and adjustment

6

ΧΦ65/75/85 series

7

2.9 INSPECTION OF THE STEERING BALL JOINT

Inspection of the steering ball joint screw 
thread with a self-locking nut
1.

Check the ball end thread for damage before 

fitting a new self-locking nut.

2.

To do so, hand-tighten a new non-self-

locking nut on the ball end.

3.

If the new nut cannot be fully hand-screwed 

onto the entire thread, the ball end must be 

replaced.

Fitting a new self-locking nut to a 

ball end with a damaged thread may 

lead to dangerous situations.

Inspection of locking with castle nut
1.

If a castle nut is fitted, check that the locking 

devices are present and undamaged.

Inspection of dust cover
1.

Check that the steering ball joint dust cover 

or seal is not damaged. Replace the steering 

ball joint if damaged.

}

S7 00 592

©

 200423

2-21

Inspection and adjustment

FRONT AXLE/LEADING REAR AXLE

ΧΦ65/75/85 series

7

6

Inspection of axial steering ball joint play
1.

Check the axial steering ball joint play using 

special tool (DAF no. 1329426).

2.

First jack up the axle until the wheels come 

off the ground and put the axle on stands.

3.

Make sure that the castle nut split pin (if 

fitted) at the nut does not come into contact 

with the head of the threaded end.

4.

Screw the thrust washer (8) onto the 

threaded spindle.

5.

Fit the spring retainer (3), spring (4) and 

pressure sleeve (6) into bracket (1).

Fit the locking screw (5). It should be 

possible to move the pressure sleeve (6) 

freely.

Note:

Fit the correct pressure sleeve (6).

The pressure sleeve (6) must abut the outer 

edge of the steering ball joint (7).

6.

Loosen thrust bolt (2) until the flange of the 

pressure sleeve (6) abuts the bracket (A=0 

mm).

7.

Fit the special tool over the steering ball 

joint (7) and turn the threaded spindle (9) by 

hand until the special tool is tight around the 

steering ball joint (7).

8.

Tighten thrust bolt (2) until its head abuts 

bracket (1).

9.

Measure play "A" between the pressure 

sleeve and the bracket using a feeler gauge.

Compare the reading with the maximum 

permissible steering ball joint play, see 

'Technical data'. 

If necessary, replace the steering ball joint.

9

8

7

6

5

4

3

2

A

1

S700426

FRONT AXLE/LEADING REAR AXLE

2-22

©

 200423

Inspection and adjustment

6

ΧΦ65/75/85 series

7

2.10 INSPECTION OF AXLE HOUSING

General
When the vehicle has been involved in a collision 

or when abnormal deviations are measured 

during the inspection of the wheel alignment, it 

may be wise to inspect the axle housing.

A number of the following measurements can 

also be carried out using alignment equipment. 

Consult the alignment equipment manual for this.

The special tools required cannot be obtained 

from DAF and should be manufactured by 

yourself.

Inspection of axle housing
1.

Remove the vehicle's axle and both swivel 

axles. See 'Removal and installation'.

2.

Place a straight edge over the spring seats of 

the axle housing and check whether they are 

aligned.

3.

Place a straight edge over both spring seats 

and check whether they are parallel with 

each other.

S7 00 119

S7 00 151

S7 00 152


Content   ..  982  983  984  985   ..