DAF 95XF. Manual - part 592


  Index      DAF     DAF 95XF Series - service repair manual


Search            


Content   ..  590  591  592  593   ..


DAF 95XF. Manual - part 592


8

TANDEM REAR AXLE 1355 T

Removal and installation

3-2

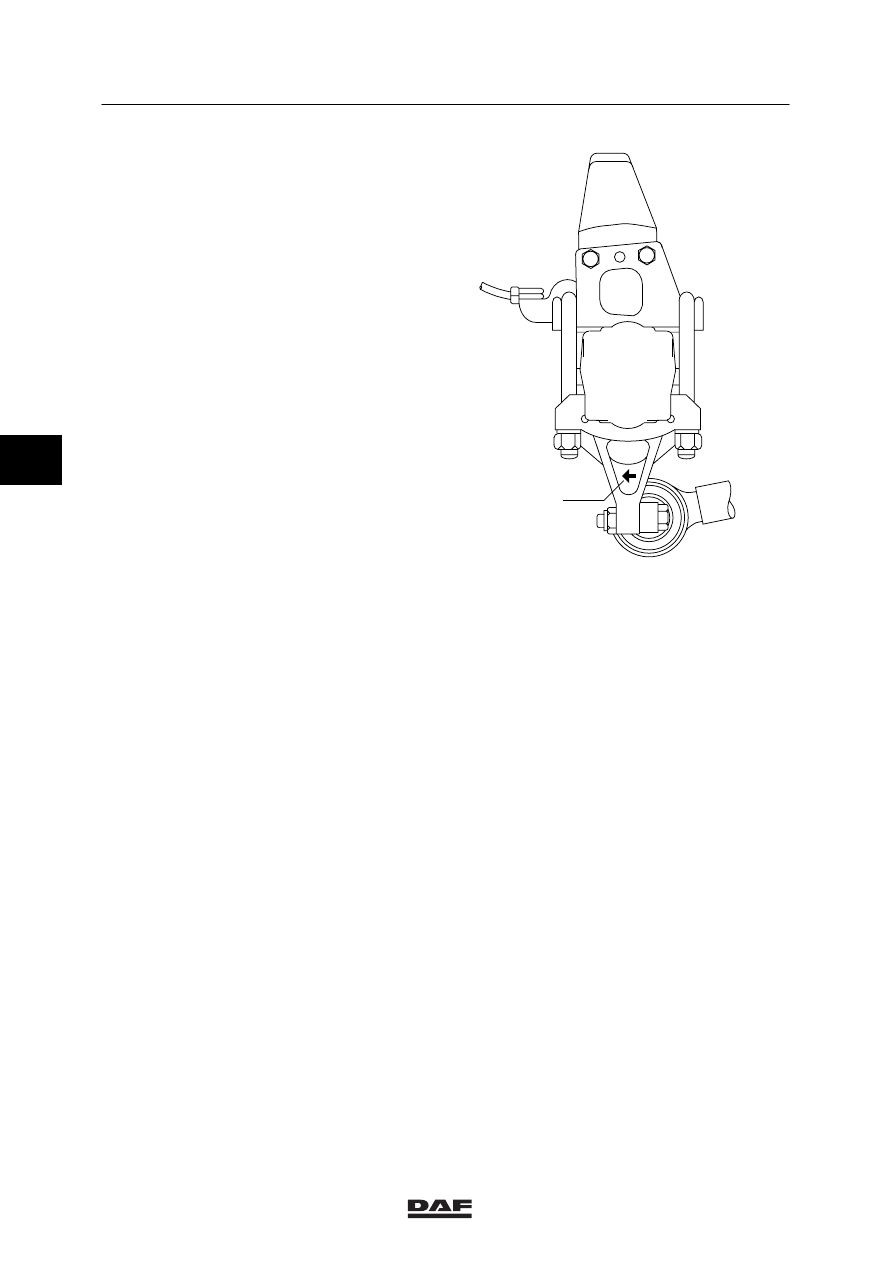
Installation of the entire rear axle
1.

Install the entire rear axle with wheels under
the vehicle.

2.

Install the axle suspension/axle guide.
Make sure that the torque-rod supports are
fitted such that arrow A on the support
points in the driving direction.

3.

Install the control rod of the load-sensing
valve.
Note:
Check the adjustment of the load-sensing
valve after you have installed the rear axle.

4.

Install the shock absorbers (if fitted).

5.

Fit the drive shaft to the drive flange.

6.

Connect the electrical wiring and fit the air
pipes.

7.

Fasten the central bolt of the spring-brake
cylinder.

A

A800045

4

ǹ 0001

8

Removal and installation

TANDEM REAR AXLE 1355 T

3-3

3.2 REMOVAL AND INSTALLATION, AXLE SHAFTS

Removal of the axle shafts
1.

Jack up the rear axle and support the axle
on stands.

2.

Activate the differential lock and install the
special tool (DAF no. 0694836) at the
location of the switch.

3.

Drain the hub oil, see chapter “Draining and
filling”.

4.

Remove the attachment bolts from the hub
cover and remove the hub cover.

5.

Pull the axle shaft from the wheel hub.

A800046

A800289

4

ǹ 0001

8

TANDEM REAR AXLE 1355 T

Removal and installation

3-4

Installation of the axle shafts
1.

Fit the axle shaft into the wheel hub.

2.

Rotate the planet-wheel shafts so that the
blunt sides point outward.

3.

Check the O ring in the hub cover. If
required, replace the O ring and apply
silicone paste to it.

4.

Install the hub cover. Tighten the fixing bolts
to the specified tightening torque. See main
group “Technical data”.

5.

Fill the hub with oil, see chapter “Draining
and filling”.

6.

Remove the special tool from the differential
lock and fit the switch again.

A800040

A800046

4

ǹ 0001

8

Removal and installation

TANDEM REAR AXLE 1355 T

3-5

3.3 REMOVAL AND INSTALLATION, WHEEL HUB

Removal of the wheel hub
1.

Jack up the rear axle and support the axle
on stands.

2.

Remove the wheels.

3.

Release the brakes and remove the brake
drum.

4.

Mark the position of the planetary gear
relative to the hub at the semicircular hole in
the cover.

5.

Drain the oil, see chapter “Draining and
filling”.

6.

Remove the hub cover.

7.

Remove the axle shaft.

8.

Remove the attachment nuts and conical
spring washers.
Push the planet-wheel gear from the hub
using three jack screws.

Note:
Make sure that the planetary gear is
installed with the circlips upward. This will
prevent the pins from falling out.

9.

Remove the thrust washer from the axle
stub.

10. Remove the attachment bolts from the

locking plate and remove the locking plate.

11. Remove the hub nut using the special tool

(DAF no. 0535705) and a torque amplifier
(ratio 1:5).

12. Support the hub and pull it from the axle

stub. The annular gear holder with the
annular gear, the bearings and the bearing
sleeve with spacers will also come out with
the hub.

13. Remove the annular gear holder and the

annular gear from the hub.

A800290

A800107

A800038

4

ǹ 0001


Content   ..  590  591  592  593   ..