Citroen C6 Dag (2008 year). Instruction - part 1
4
IN
BR
IEF
E X T E R I O R
115
75
76
45
51
78
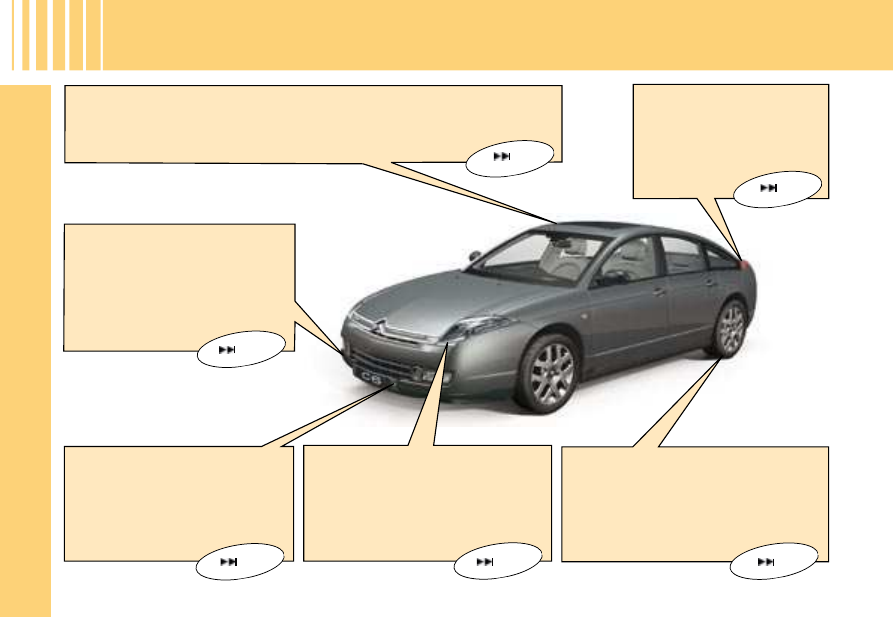
Glass sun roof
The sun roof provides you with improved ventilation and brightness in the
passenger compartment.
Piloted Defl ector
This defl ector enhances
the aerodynamics and the
braking oaf your vehicle.
Parking assistance
(display and sound)
This function warns you, whilst
manoeuvring,
by
detecting
obstacles located in front of and
behind the vehicle.
Lane Departure Warning
System
This driving assistance device
warns you when you unwittingly
cross a lane marking.
The Xenon dual-function
directional headlamps
This additional lighting automati-
cally provides you with enhanced
visibility on bends.
Tyre defl ation detection
This function monitors the pressure of
each tyre and warns you of tyres that
are punctured or defl ated.