Index Chrysler Chrysler New Yorker - service repair manual 1997-1999 year
Search
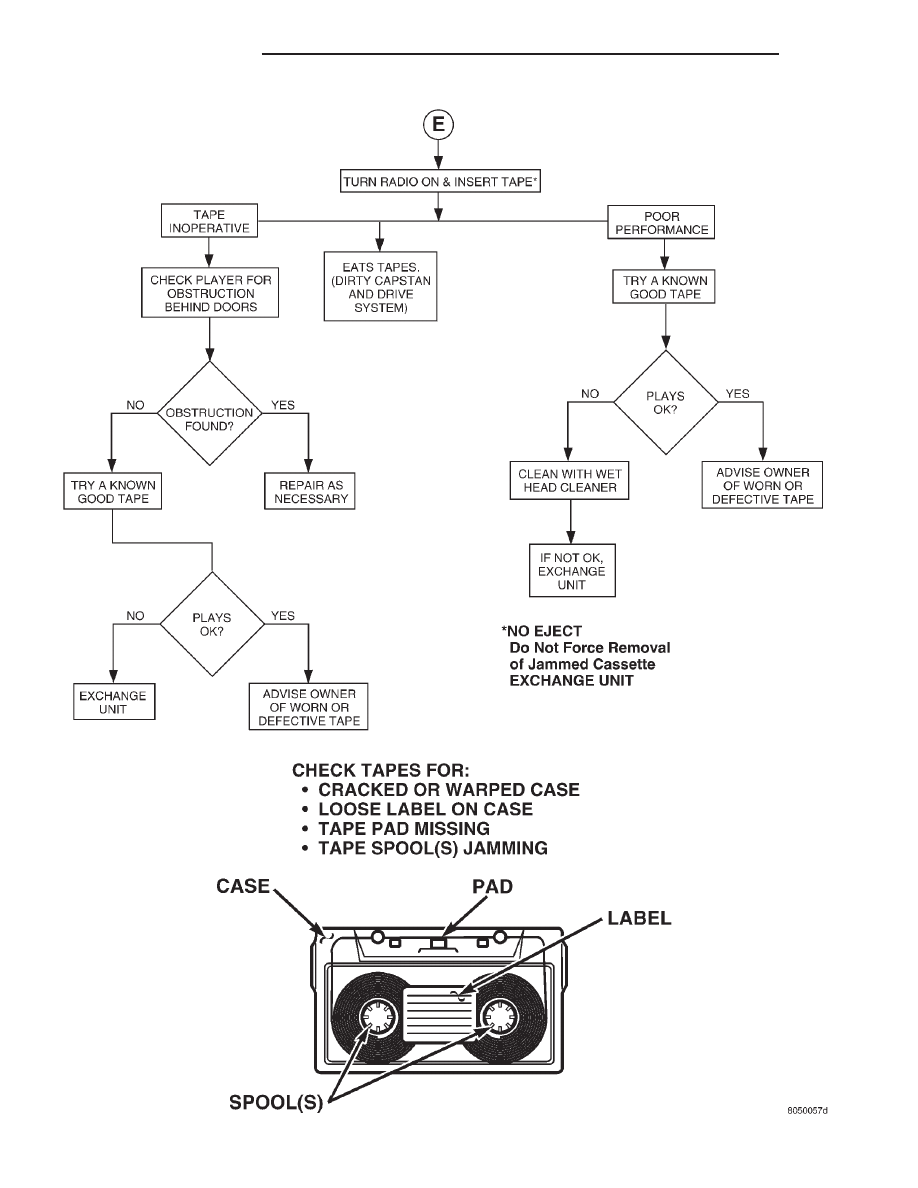
Content .. 71 72 73 74 ..
Chrysler New Yorker. Manual - part 73
AMPLIFIED (CONTINUED)
8F - 12
AUDIO SYSTEMS
300M
DIAGNOSIS AND TESTING (Continued)