Content .. 2153 2154 2155 2156 ..
Chrysler 300/300 Touring/300C, Dodge Magnum. Manual - part 2155
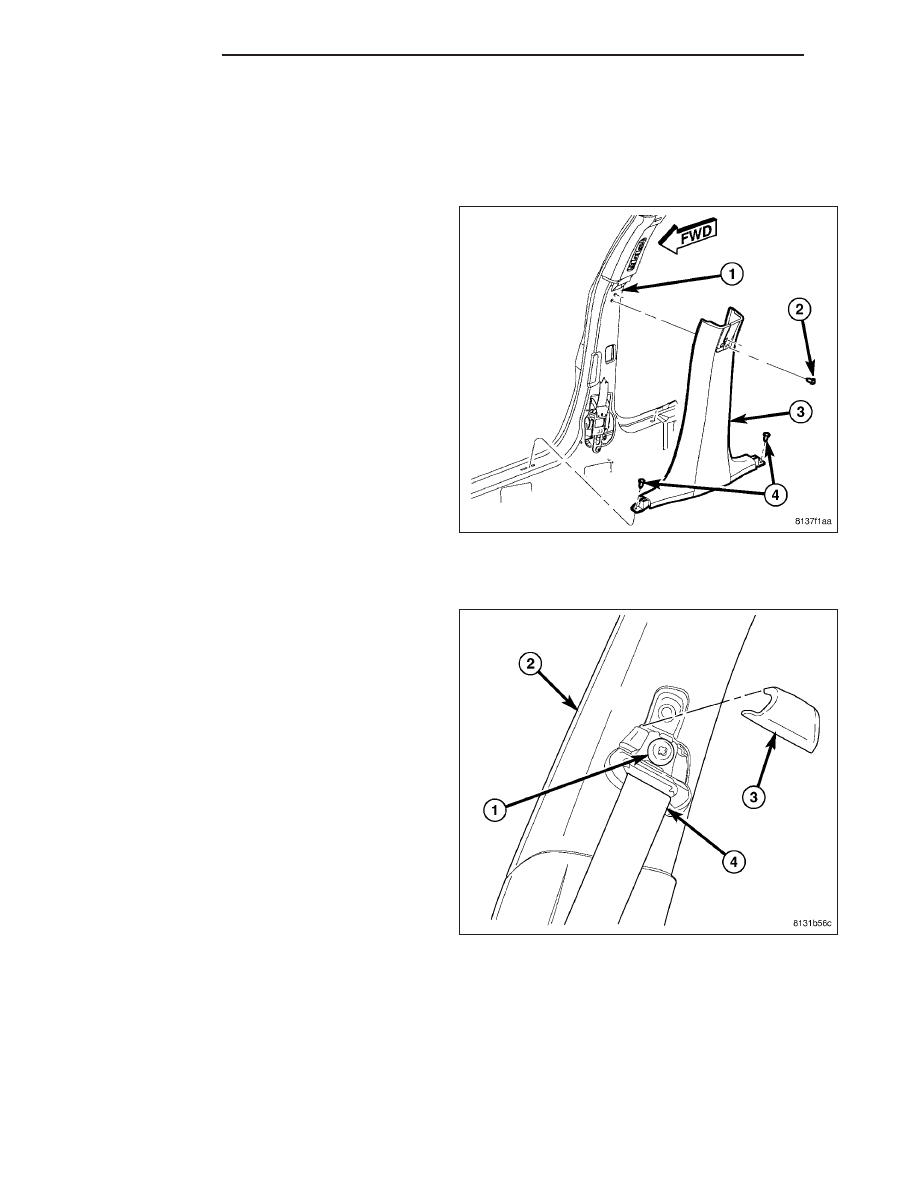
B-PILLAR TRIM
REMOVAL
LOWER
1. Loosen the front door sill portion of the lower cowl
trim at the rear of the front door opening for access
to the forward lower B-pillar trim screw. (Refer to
23 - BODY/INTERIOR/COWL TRIM - REMOVAL).
2. Loosen the front of the scuff plate trim from the
rear door sill for access to the rearward lower B-pil-
lar trim screw. (Refer to 23 - BODY/INTERIOR/
DOOR SILL SCUFF PLATE - REMOVAL).
3. Move aside the seat belt webbing to access and
remove the two screws (2) that secure the upper
end of the lower B-pillar trim (3) to the inside of the
B-pillar (1).
4. Remove the two screws (4) that secure the lower
end of the B-pillar trim to the front and rear door
sills.
5. Disengage the seat belt webbing from the slot in
the upper end of the lower B-pillar trim through the
slit in the trim and remove the trim from the inside
of the B-pillar.
UPPER
1. Remove the lower trim from the inside of the B-pil-
lar (2). (Refer to 23 - BODY/INTERIOR/B-PILLAR
TRIM - REMOVAL).
2. Unsnap and remove the trim cover (3) from the
seat belt turning loop on the inside of the upper
B-pillar.
3. Remove the screw (1) that secures the turning loop
to the seat belt height adjuster on the upper B-pil-
lar.
4. Lower the seat belt (4) and turning loop from the
B-pillar.
23 - 168
INTERIOR
LX