Content .. 2967 2968 2969 2970 ..
Chevrolet Silverado / GMC Sierra. Manual - part 2969

Fig. 7: View Of Front Door Sealing Weatherstrips & Side Reveal Molding Screws
Courtesy of GENERAL MOTORS CORP.
7. Reposition the front door sealing weatherstrips (1) in order to access the side reveal
molding screws. You do not have to remove the front door sealing weatherstrip completely
from the vehicle.
Fig. 8: Removing/Installing Screws From Window Side Reveal Moldings
Courtesy of GENERAL MOTORS CORP.
CAUTION: Refer to Cracked Window Caution .
2008 Chevrolet Silverado 1500
2008 ACCESSORIES & EQUIPMENT Fixed and Moveable Windows - Cab & Chassis Sierra, Cab & Chassis Silverado,
Sierra & Silverado

8. Remove the screws from the left and the right sides of window side reveal moldings.
Fig. 9: View Of Reveal Molding
Courtesy of GENERAL MOTORS CORP.
9. Remove the reveal moldings from the vehicle.
10. Cover the following parts to protect from broken glass:
CAUTION: If broken glass falls into the defroster outlets, it can be
blown into the passenger compartment and cause
personal injury.
2008 Chevrolet Silverado 1500
2008 ACCESSORIES & EQUIPMENT Fixed and Moveable Windows - Cab & Chassis Sierra, Cab & Chassis Silverado,
Sierra & Silverado

1. The upper dash pad
2. The defroster outlets and A/C outlets
3. The seats and the carpeting
Fig. 10: Using Utility Knife To Remove Reveal Molding
Courtesy of GENERAL MOTORS CORP.
11. Remove the upper window reveal molding (1).
IMPORTANT: The upper window reveal molding fills the cavities between
the body and window. If the reveal molding is stretched or
damaged, replace the molding.
2008 Chevrolet Silverado 1500
2008 ACCESSORIES & EQUIPMENT Fixed and Moveable Windows - Cab & Chassis Sierra, Cab & Chassis Silverado,
Sierra & Silverado
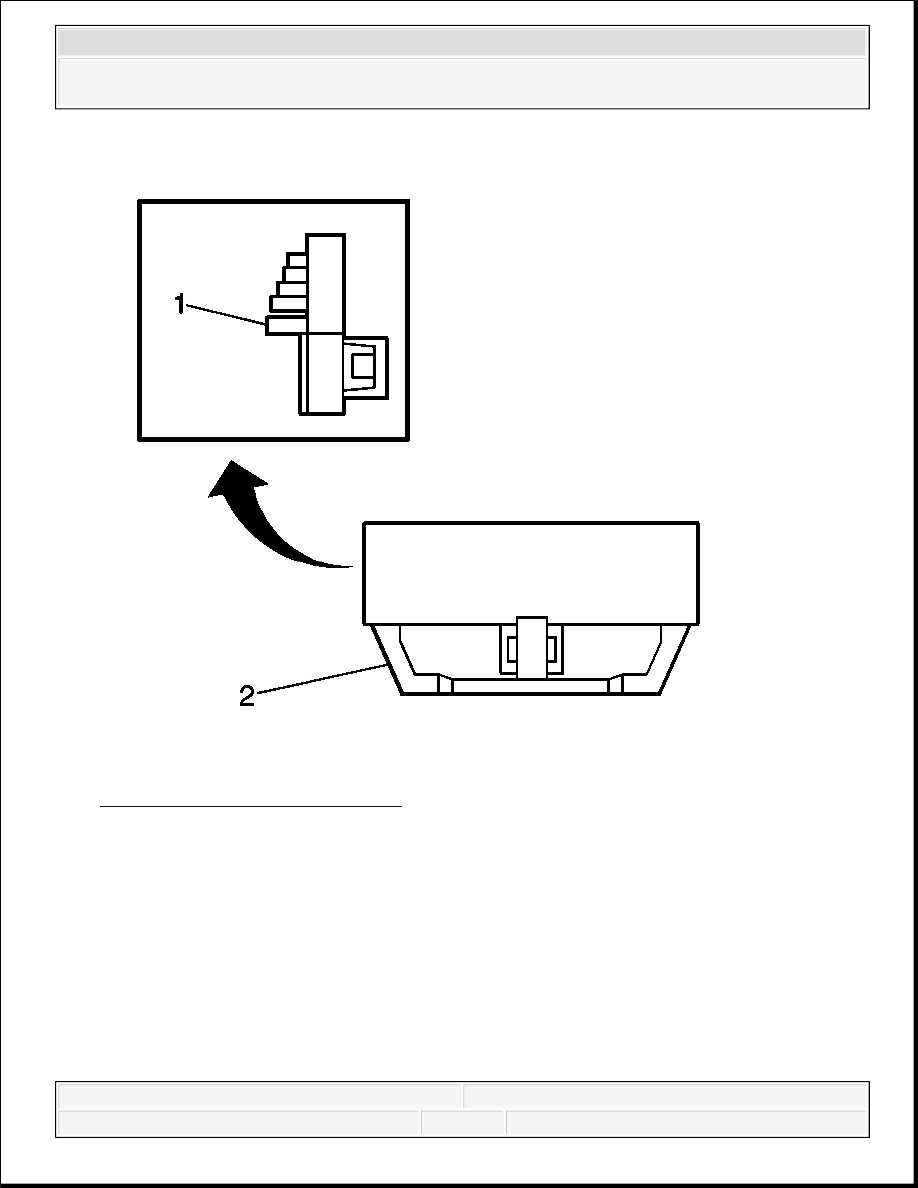
Fig. 11: Window Lower Supports
Courtesy of GENERAL MOTORS CORP.
12. Remove the window lower supports (1) by using a flat-bladed tool, lightly prying upward in
the middle until the support releases.
IMPORTANT: The window lower supports have molded locks with an
urethane adhesive strip on the back side. Once the window
lower stops have been removed, the stops must be replaced.
2008 Chevrolet Silverado 1500
2008 ACCESSORIES & EQUIPMENT Fixed and Moveable Windows - Cab & Chassis Sierra, Cab & Chassis Silverado,
Sierra & Silverado
Content .. 2967 2968 2969 2970 ..