Content .. 1798 1799 1800 1801 ..
Chevrolet Silverado / GMC Sierra. Manual - part 1800
EXHAUST MANIFOLD REPLACEMENT - RIGHT SIDE (4.3L)
Removal Procedure
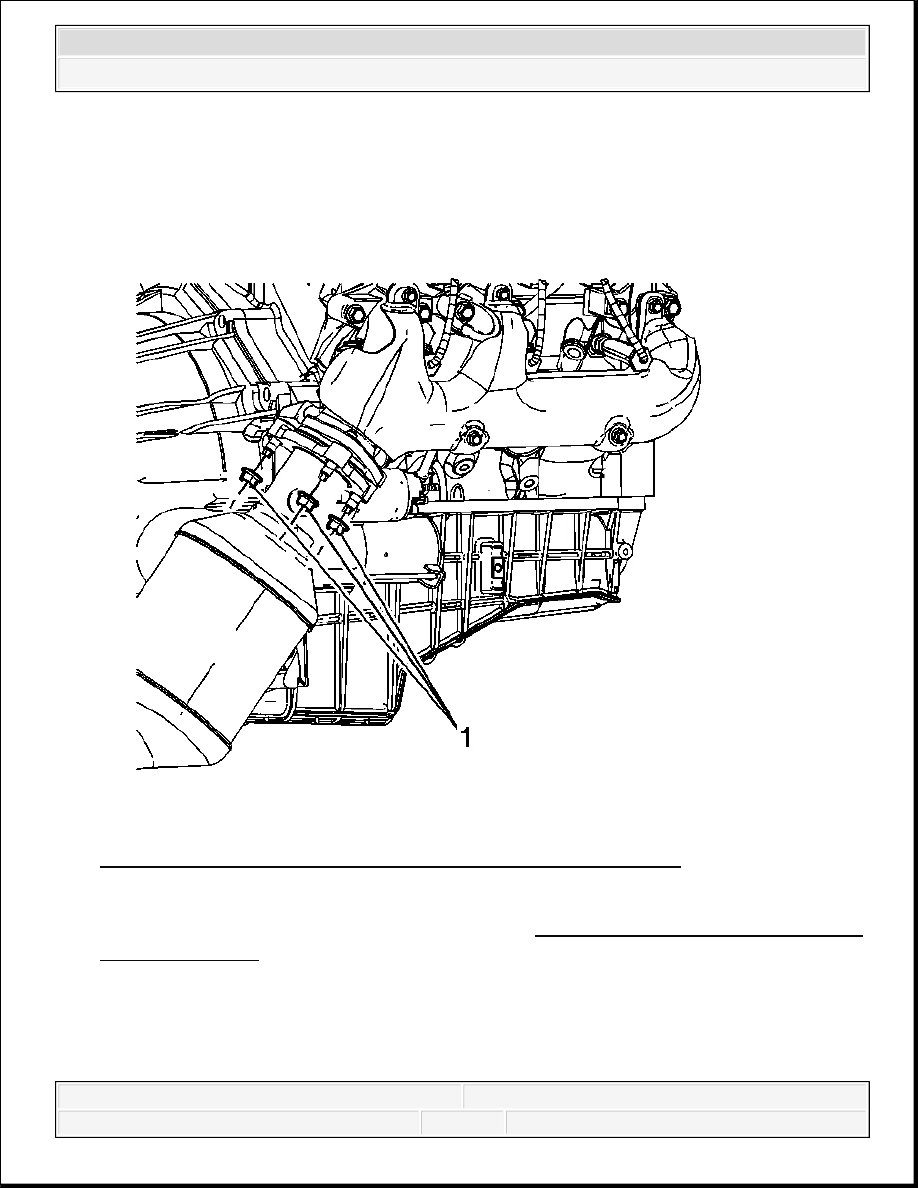
Fig. 29: View Of Catalytic Converter To Exhaust Manifold Nuts
Courtesy of GENERAL MOTORS CORP.
1. Remove the heated oxygen sensor (HO2S). Refer to Heated Oxygen Sensor Replacement
- Bank 2 Sensor 1 .
2. Remove the catalytic converter to exhaust manifold nuts (1).
3. Lower the vehicle.
2008 Chevrolet Silverado 1500
2008 ENGINE Engine Exhaust - Cab & Chassis Sierra, Cab & Chassis Silverado, Sierra & Silverado
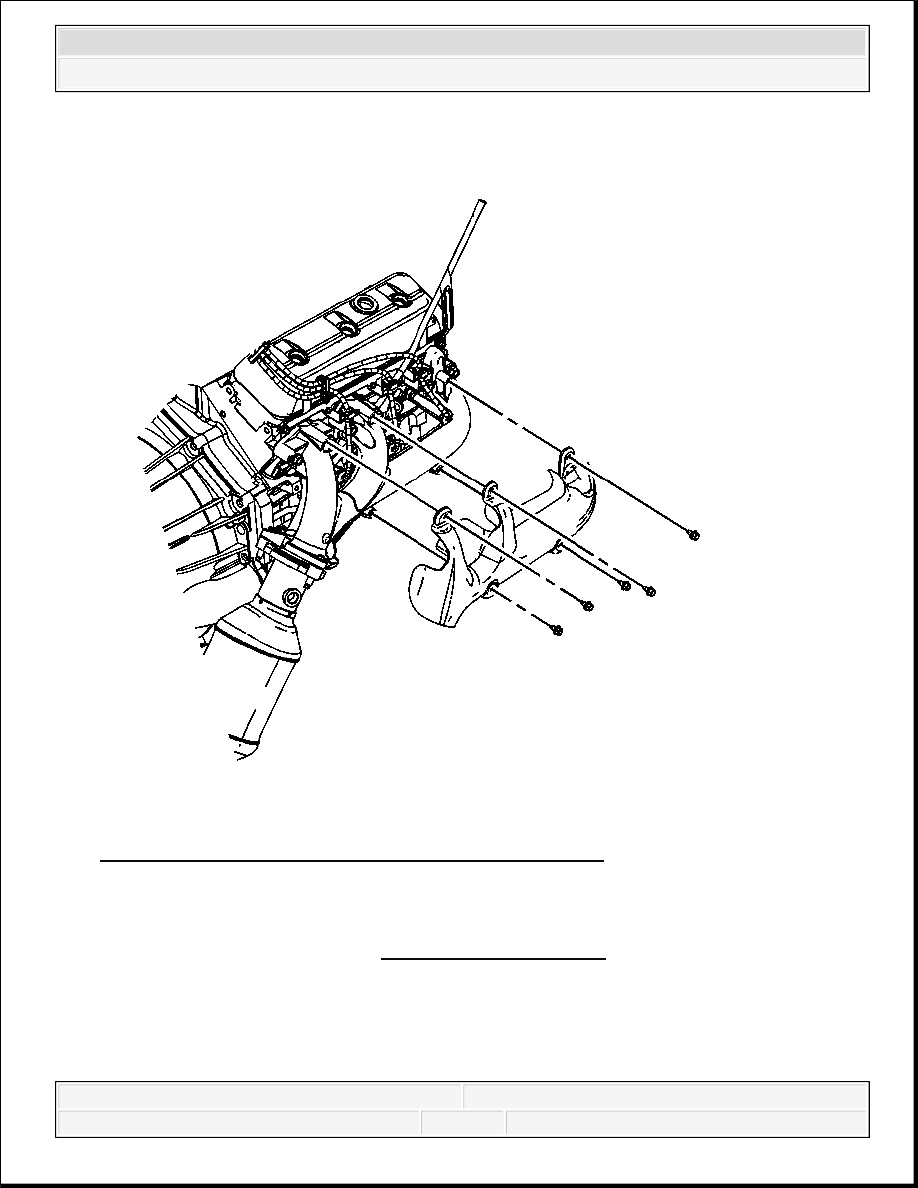
Fig. 30: View Of Exhaust Manifold Heat Shield & Bolts
Courtesy of GENERAL MOTORS CORP.
4. Remove the exhaust manifold heat shield bolts and shield.
5. Remove the spark plugs. Refer to Spark Plug Replacement .
6. Reposition the spark plug wires out of the way, if necessary.
2008 Chevrolet Silverado 1500
2008 ENGINE Engine Exhaust - Cab & Chassis Sierra, Cab & Chassis Silverado, Sierra & Silverado

Fig. 31: View Of Catalytic Converter Seal & Exhaust Manifold Components
Courtesy of GENERAL MOTORS CORP.
7. Remove the exhaust manifold bolts.
8. Remove the exhaust manifold and gaskets (1). Discard the gaskets.
9. Remove the exhaust manifold to catalytic converter seal (2). Discard the seal.
Installation Procedure
2008 Chevrolet Silverado 1500
2008 ENGINE Engine Exhaust - Cab & Chassis Sierra, Cab & Chassis Silverado, Sierra & Silverado
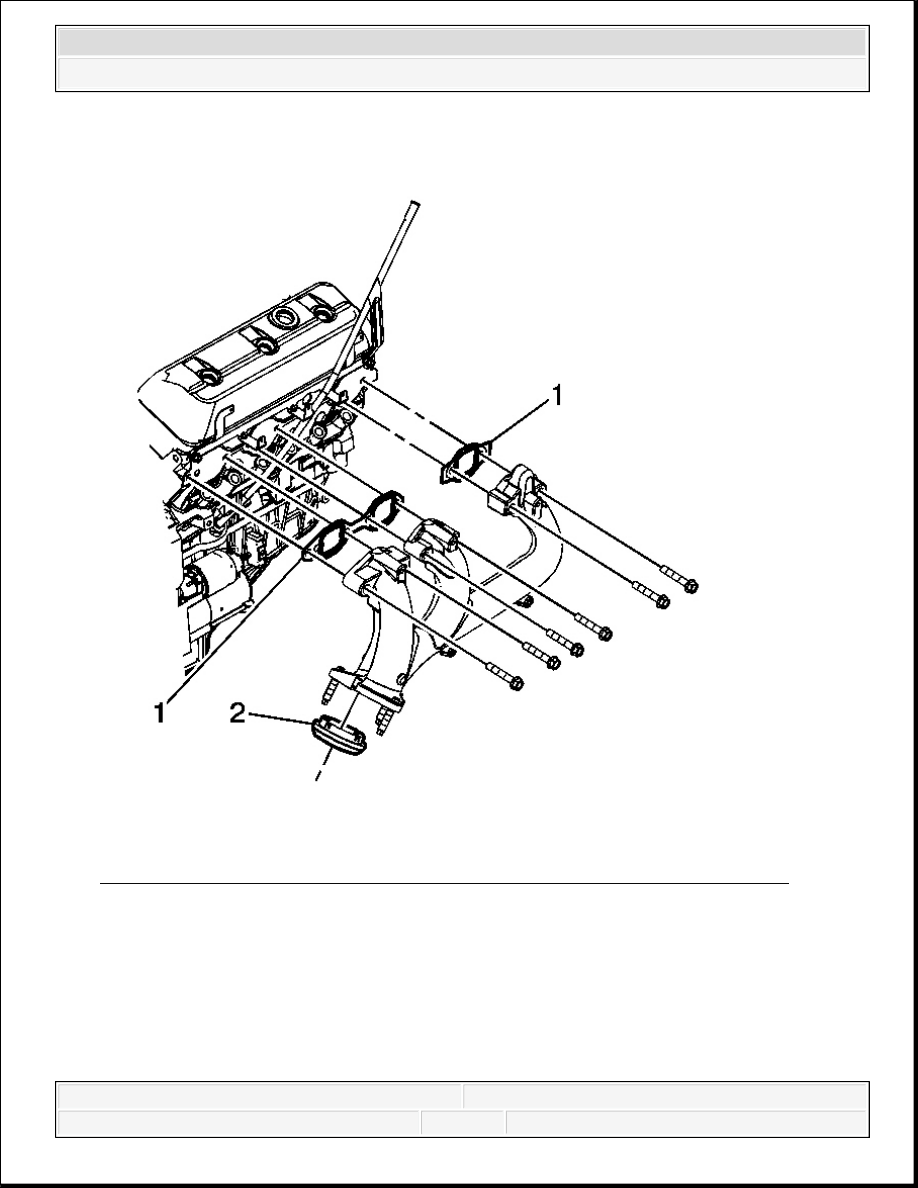
Fig. 32: View Of Catalytic Converter Seal & Exhaust Manifold Components
Courtesy of GENERAL MOTORS CORP.
1. Install a NEW exhaust manifold to catalytic converter seal (2) into the exhaust manifold.
2. Place the exhaust manifold into position and install the manifold studs to the catalytic
converter.
3. Place the NEW exhaust manifold gaskets (1) between the manifold and the cylinder head.
2008 Chevrolet Silverado 1500
2008 ENGINE Engine Exhaust - Cab & Chassis Sierra, Cab & Chassis Silverado, Sierra & Silverado
Content .. 1798 1799 1800 1801 ..