BMW 325xi Sedan (2006 year). Instruction - part 8
131
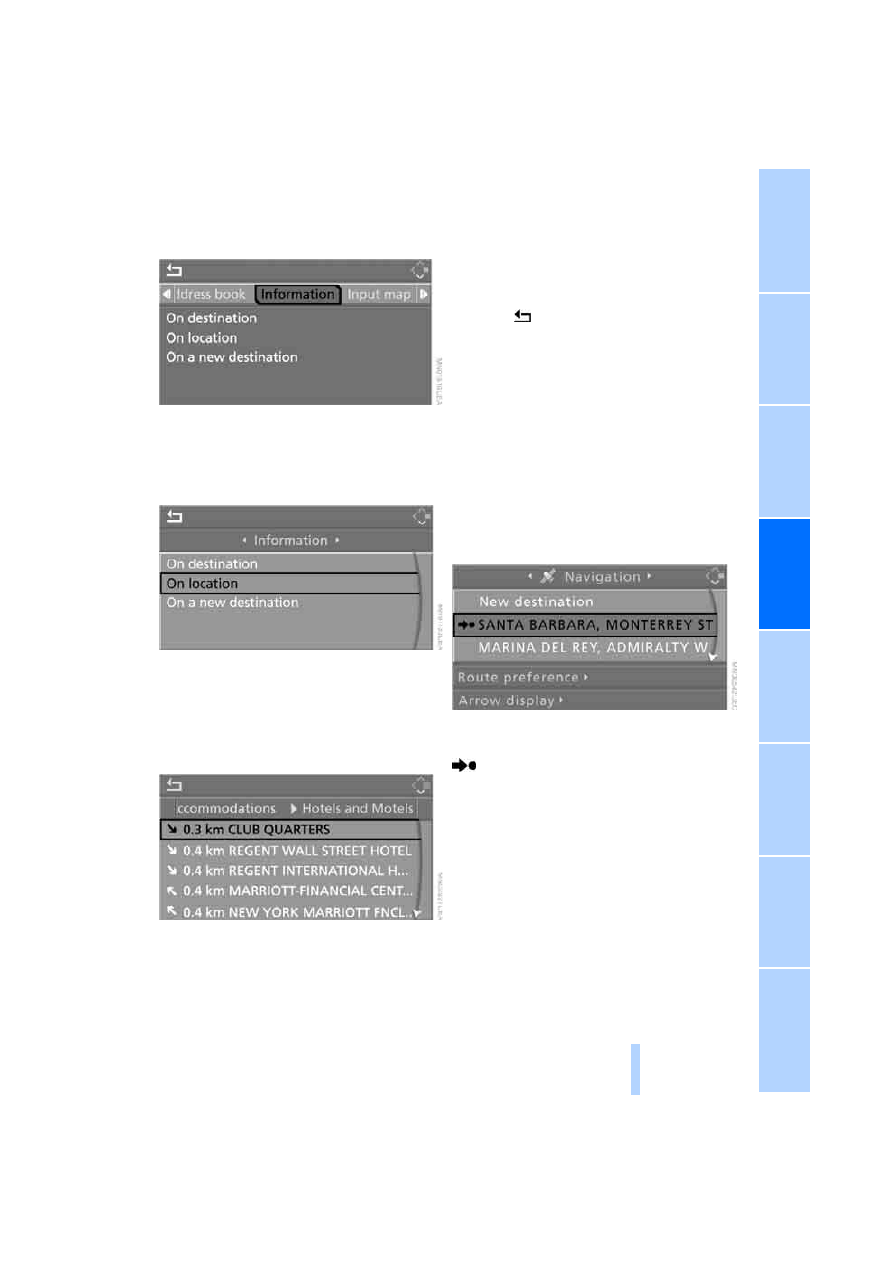
3.
Select "Information" and press the control-
ler.
4.
Selecting location:
>
"On destination"
>
"On location"
>
"On a new destination"
5.
Press the controller.
6.
Make your selection, e.g. "Hotels and res-
taurants", and press the controller.
Destinations appear on the Control Display,
which are sorted alphabetically or accord-
ing to distance.
7.
Select a destination and press the control-
ler.
8.
Select a menu item:
>
To transfer the address to the destina-
tion list and start destination guidance:
Select "Select as destination" and press
the controller.
>
To establish a telephone connection:
Select "Call" and press the controller.
To exit from the menu:
Select the
arrow and press the controller.
Destination list
The last 20 destinations entered into the sys-
tem are shown in the destination list. You can
call up these destinations and adopt them for
destination guidance.
If you are planning a longer journey, for exam-
ple, you can store all the destinations you wish
to drive to in the destination list in advance,
refer to Entering a destination manually on
page
Select "Navigation" and press the controller.
The destination last entered is listed first in the
destination list.
This symbol indicates the current destina-
tion.
To show other destinations in the destination
list:
Turn the controller.