Acura RSX Honda Integra. Manual - part 376
+
−
+
−
01
02
S6M6A22J34200040901MBAT01
01
02
S6M6A22J34200040901KBAT01
+
−
+
−
20-40
20-40
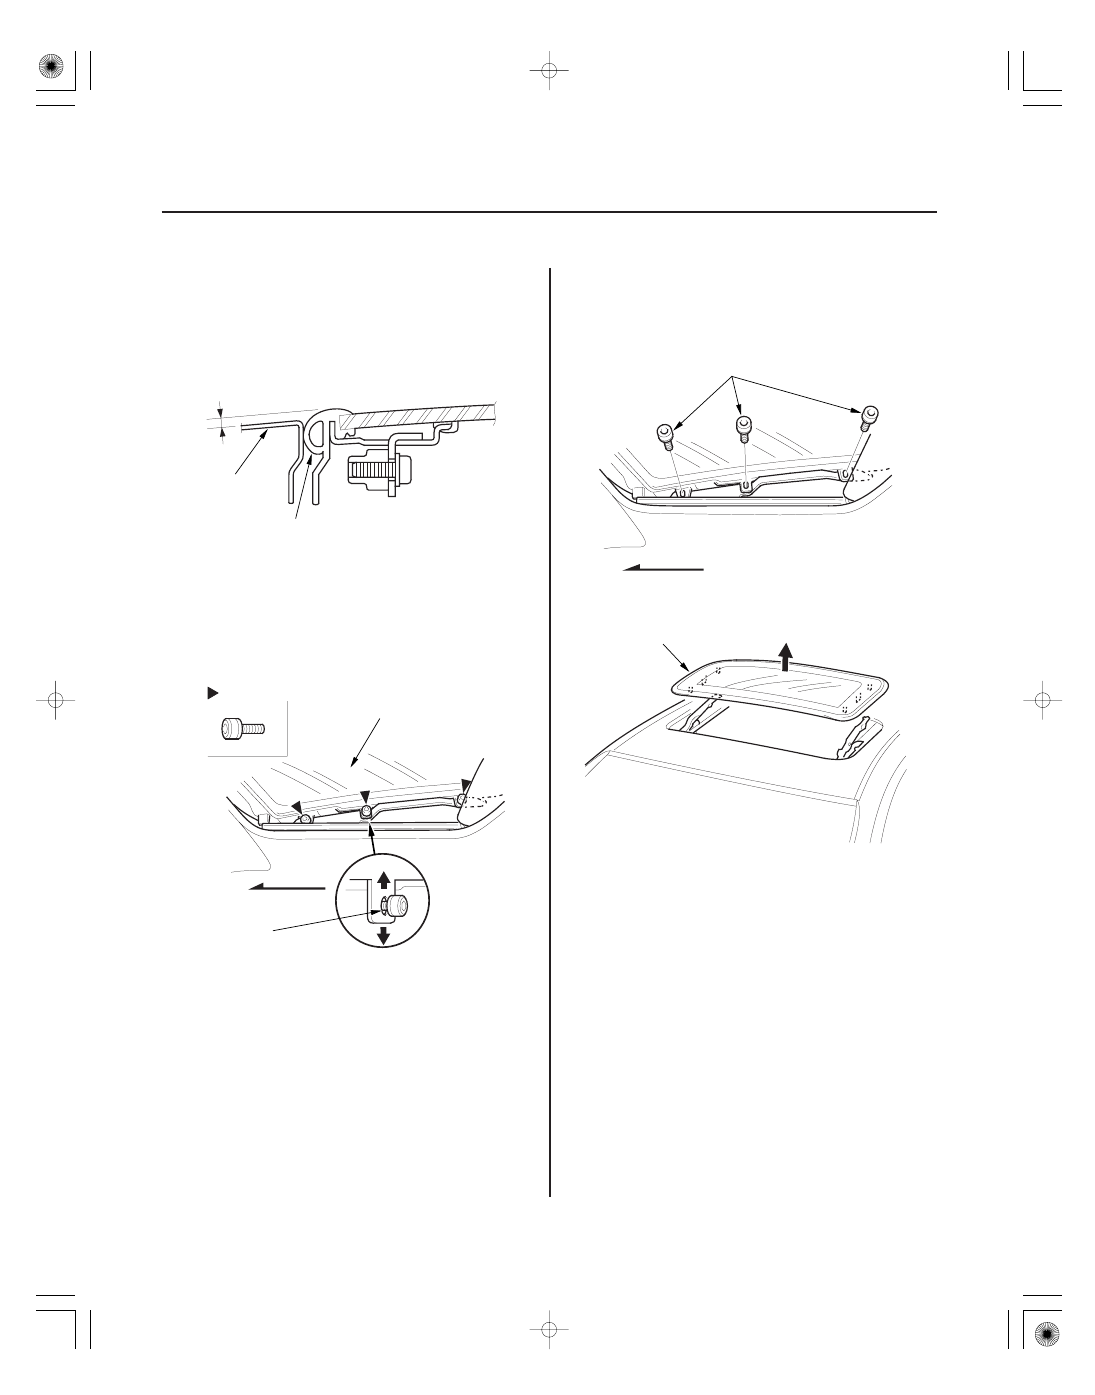
Moonroof
Glass Height Adjustment
Glass Replacement
B
A
2
0.5/
1 mm
(0.08
0.02/
0.04 in.)
Fastener Locations
: Bolt, 6
A
Forward
6 x 1.0 mm
9.8 N·m
(1.0 kgf·m, 7.2 lbf·ft)
6 x 1.0 mm
9.8 N·m
(1.0 kgf·m, 7.2 lbf·ft)
Forward
A
The roof panel (A) should be even with the glass
weatherstrip (B), to within 2
0.5/
1 mm
(0.08
0.02/
0.04 in.) all the way around. If not, make
the following adjustment:
1. Tilt-up the glass.
2. Loosen the bolts on each side, and adjust the glass
(A).
3. If necessary, repeat on opposite side.
4. The side-to-side fit of the glass weatherstrip can be
adjusted by loosening the frame mounting bolts
and moving the frame right or left and forward or
backward by hand (see page 20-43).
1. Tilt-up the glass.
2. Remove the bolts from both sides.
3. Remove the glass (A) by lifting it up. Do not
damage the roof panel.
4. Install the glass in the reverse order of removal,
and adjust the glass height (see page 20-40).
5. Check for water leaks. Use free-flowing water from
a hose without a nozzle. Do not use high-pressure
water.
05/06/27 18:22:58 61S6M040_200_0041