Acura RL (1996-2004 year). Manual - part 338
Valve Guides
Reaming
NOTE: For new valve guides only.
1. Coat both the reamer and valve guide with cutting
oil.
2. Rotate the reamer clockwise the full length of the
valve guide bore.
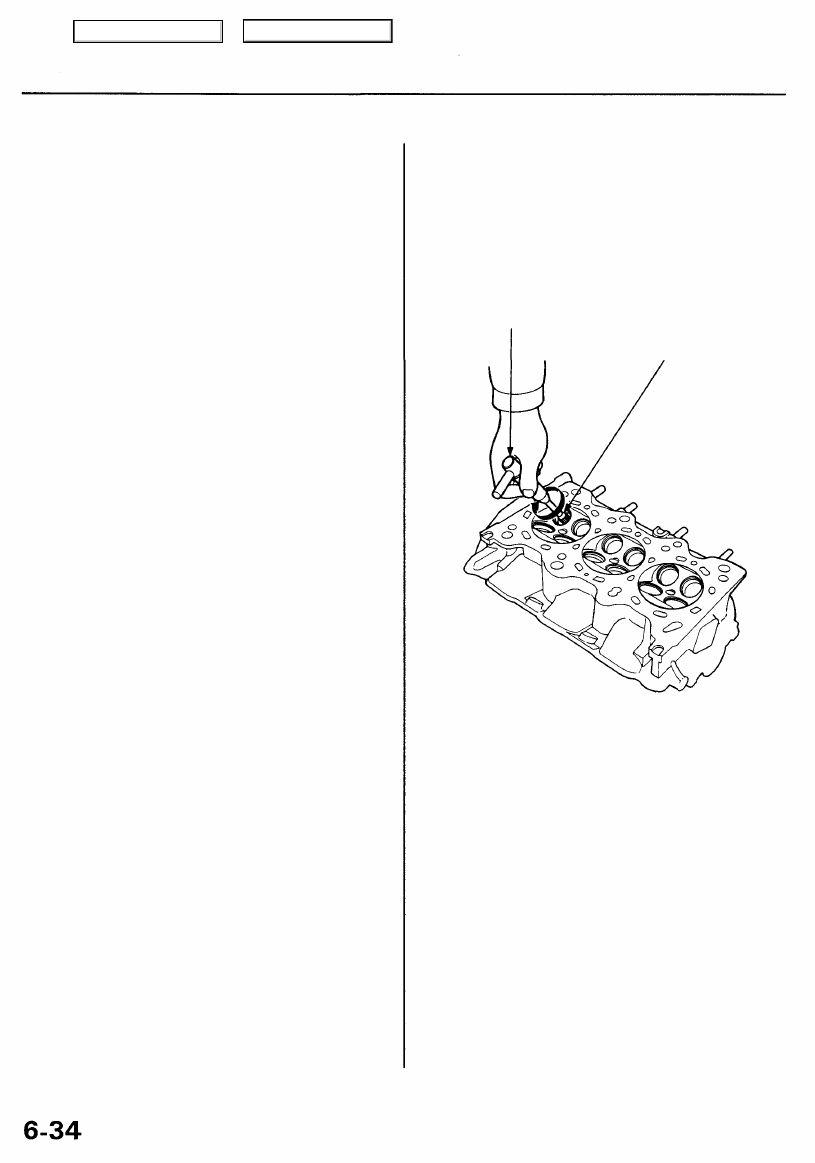
REAMER HANDLE
VALVE GUIDE
REAMER, 5.5 mm
Turn reamer in
clockwise direction
only.
3. Continue to rotate the reamer clockwise while
removing it from the bore.
4. Thoroughly wash the guide in detergent and water
to remove any cutting residue.
5. Check the clearance with a valve (see page
).
Verify that the valve slides in the valve guide with-
out exerting pressure.
Main Menu
Table of Contents