Acura RL. Manual - part 822


  Index      Acura     Acura RL - service repair manual 2005-2008 year


Search            


Content   ..  820  821  822  823   ..


Acura RL. Manual - part 822


(B). 

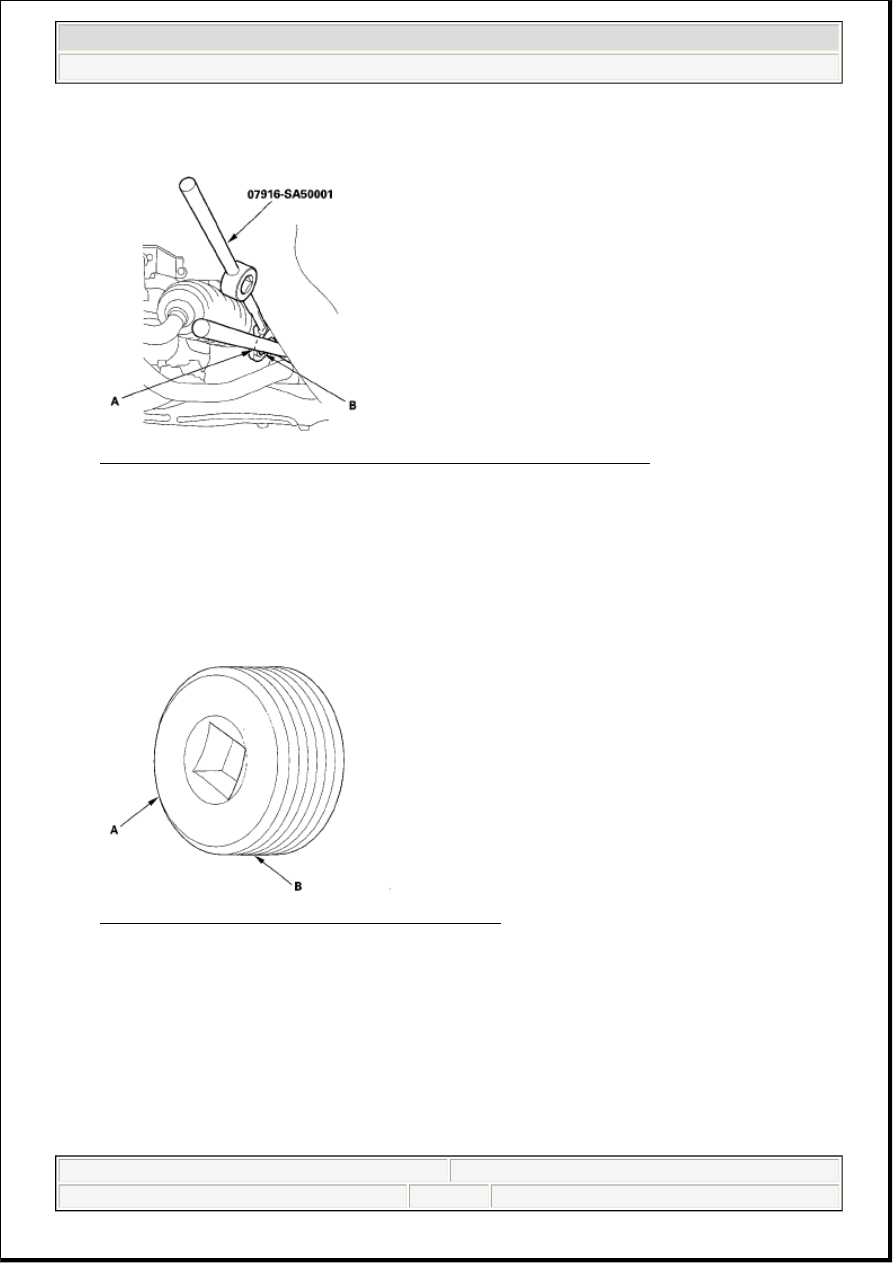
Fig. 55: Identifying Rack Guide Screw Locknut And Rack Guide Screw 
Courtesy of AMERICAN HONDA MOTOR CO., INC. 

3. Remove the old sealant from the rack guide screw (A), and apply new sealant (Three Bond 1141 or 

Loctite 5699) to the middle of the threads (B). Loosely install the rack guide screw on the steering 
gearbox. 

Fig. 56: Identifying Rack Guide Screw And Threads 
Courtesy of AMERICAN HONDA MOTOR CO., INC. 

4. Tighten the rack guide screw (A) to 25 N.m (2.5 kgf.m, 18 lbf.ft), then loosen it. 

NOTE:

If the within 5 minutes has passed after applying the sealant, remove 
the old sealant and residue, then reapply new sealant.


2007 Acura RL 

2005-08 STEERING Steering - RL


me 


Friday, June 05, 2009 2:20:15 PM

Page 39 

© 2005 Mitchell Repair Information Company, LLC. 

Fig. 57: Installing Rack Guide Screw With Torque Specifications 
Courtesy of AMERICAN HONDA MOTOR CO., INC. 

5. Retighten the rack guide screw to 3.9 N.m (0.4 kgf.m, 4 lbf.ft), then back it off to the specified angle. 

Specified return angle: 15° ± 5°  

6. Hold the rack guide screw stationary with a wrench, and tighten the locknut by hand until it's fully 

seated.  

7. Install the locknut wrench on the locknut (B), and hold the rack guide screw stationary with a wrench. 

Tighten the locknut an additional 30 "with the special tool.  

8. Check for unusual steering effort through the complete turning range.  

9. Check the steering wheel rotational play (see STEERING WHEEL ROTATIONAL PLAY 

CHECK ) and the power assist (see POWER ASSIST CHECK ).  

STEERING GEARBOX REMOVAL 

Special Tools Required  

Ball joint remover, 32 mm 07MAC-SL0A102 

Note these items during removal: 

Using solvent and a brush, wash any oil and dirt off the valve body unit, its lines, and the end of the 
gearbox. Blow dry with compressed air.  

Make sure to remove the steering wheel before disconnecting the steering joint. Damage to the cable 
reel can occur.  

1. Remove the right upper fender trim (A) (see UPPER FENDER TRIM REPLACEMENT ). 


2007 Acura RL 

2005-08 STEERING Steering - RL


me 


Friday, June 05, 2009 2:20:15 PM

Page 40 

© 2005 Mitchell Repair Information Company, LLC. 

Fig. 58: Identifying Left & Right Upper Fender Trim Pieces 
Courtesy of AMERICAN HONDA MOTOR CO., INC. 

2. Drain the power steering fluid (see step 1 ).  

3. Remove the relay box (A), the release the wire harness clips. 

Fig. 59: Identifying Relay Box And Fasteners 
Courtesy of AMERICAN HONDA MOTOR CO., INC. 

4. Remove the front strut brace (see FRAME BRACE REPLACEMENT ).  

5. Raise the front of the vehicle, and support it with safety stands in the proper locations (see LIFT 

AND SUPPORT POINTS ).  

6. Remove the steering wheel (see STEERING WHEEL REMOVAL ).  

7. Remove the steering joint cover A. 


2007 Acura RL 

2005-08 STEERING Steering - RL


me 


Friday, June 05, 2009 2:20:15 PM

Page 41 

© 2005 Mitchell Repair Information Company, LLC. 

Fig. 60: Identifying Steering Joint Cover
Courtesy of AMERICAN HONDA MOTOR CO., INC.
 

8. Remove the steering joint bolts (A), then disconnect the steering joint (B) from the pinion shaft and 

the steering column shaft. 

Fig. 61: Identifying Steering Joint Bolts And Steering Joint 
Courtesy of AMERICAN HONDA MOTOR CO., INC. 

9. Remove the center guide (A). 

Fig. 62: Identifying Center Guide And Steering Joint Cover 
Courtesy of AMERICAN HONDA MOTOR CO., INC. 

10. Remove steering joint cover B. Be careful not to damage the mating surface on joint cover B and the 

pinion shaft grommet. Replace the cover seal (C) if necessary.  

11. Remove the pinion shaft grommet (A) from the top of the valve body unit. 


2007 Acura RL 

2005-08 STEERING Steering - RL


me 


Friday, June 05, 2009 2:20:15 PM

Page 42 

© 2005 Mitchell Repair Information Company, LLC. 


Content   ..  820  821  822  823   ..