Acura RL. Manual - part 325


  Index      Acura     Acura RL - service repair manual 2005-2008 year


Search            


Content   ..  323  324  325  326   ..


Acura RL. Manual - part 325


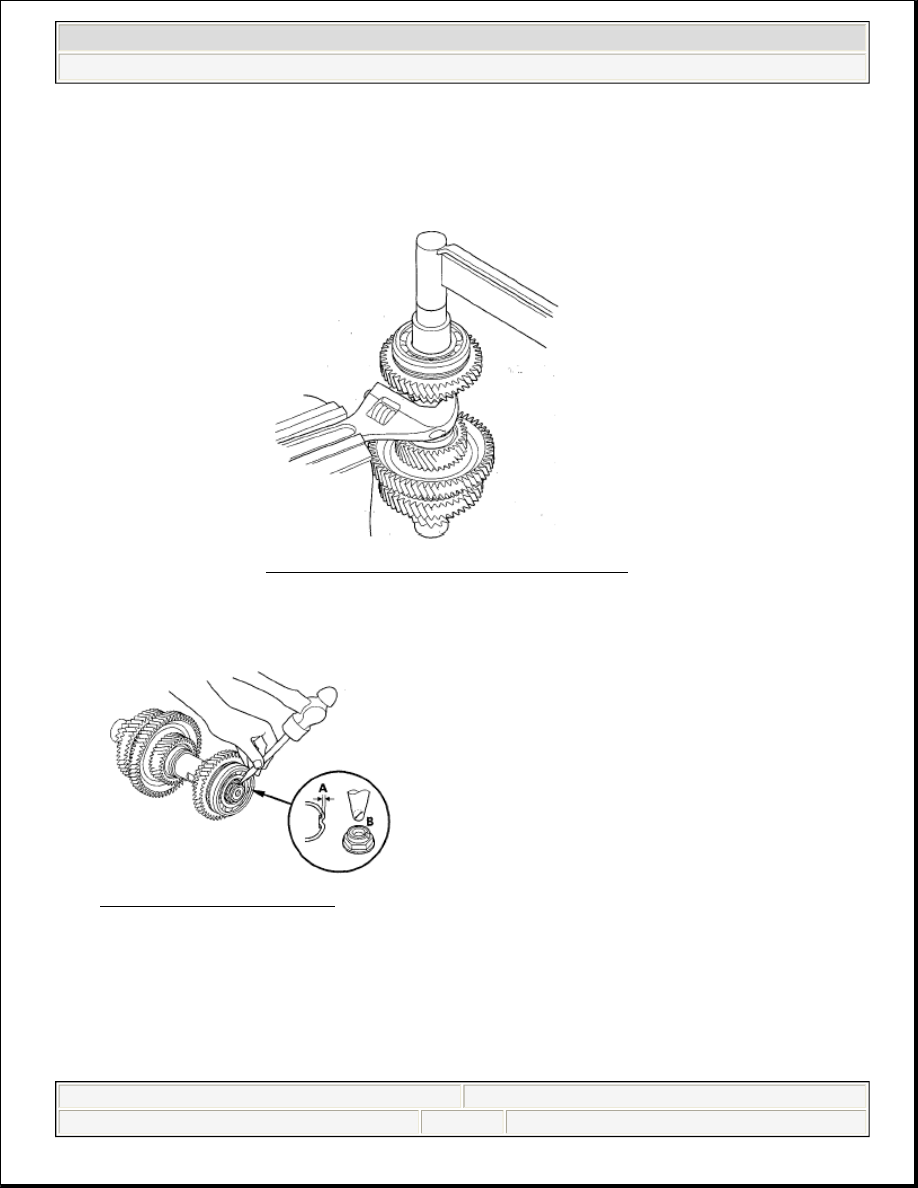
8. Stake the locknut into the shaft to a depth (A) of 0.7-1.3 mm (0.03-0.05 in.) using a 3.5 mm punch (B). 

Fig. 509: Staking The Locknut 
Courtesy of AMERICAN HONDA MOTOR CO., INC. 

SECONDARY SHAFT DISASSEMBLY 

Exploded View 

NOTE:

Use a torque wrench to tighten the locknut. Do not use an impact 
wrench.  

The locknut has left-hand threads. 

Fig. 508: Tightening Countershaft Locknut 
Courtesy of AMERICAN HONDA MOTOR CO., INC. 


2007 Acura RL 

2005-08 TRANSMISSION Automatic Transmission - RL


me 


Friday, June 05, 2009 1:18:17 PM

Page 471 

© 2005 Mitchell Repair Information Company, LLC. 

Fig. 510: Exploded View Of Secondary Shaft With Torque Specifications 
Courtesy of AMERICAN HONDA MOTOR CO., INC. 

Special Tools Required  

Wrench, 40 x 42 mm 07XAA-002010A 

1. Cut the lock tab (A) off the secondary shaft locknut (B) using a chisel (C). 

NOTE:

Refer to the Exploded View as needed during the following procedure.

NOTE:

Keep all of the chiseled particles out of the secondary shaft.


2007 Acura RL 

2005-08 TRANSMISSION Automatic Transmission - RL


me 


Friday, June 05, 2009 1:18:17 PM

Page 472 

© 2005 Mitchell Repair Information Company, LLC. 

Fig. 511: Cutting Locknut 
Courtesy of AMERICAN HONDA MOTOR CO., INC. 

2. Place a V-block (A) on a vise (B), and put the secondary shaft (C) on the V-block and vise. 

Fig. 512: Removing Locknut From Secondary Shaft 
Courtesy of AMERICAN HONDA MOTOR CO., INC. 

3. Attach the wrench (40 x 42 mm) onto the 1st clutch guide, and secure the wrench (40 x 42 mm) with the 

vise to hold the secondary shaft. Loosen the locknut, and remove it. Remove any burrs from splines on 
the shaft and splined washer.  

4. Place the idler gear (A) on press bases (B), and place a shaft protector (C) between the secondary shaft 

(D) and a press to prevent damaging the secondary shaft. 


2007 Acura RL 

2005-08 TRANSMISSION Automatic Transmission - RL


me 


Friday, June 05, 2009 1:18:17 PM

Page 473 

© 2005 Mitchell Repair Information Company, LLC. 

Fig. 513: Pressing Secondary Shaft Out Of Press-Fitted Bearing 
Courtesy of AMERICAN HONDA MOTOR CO., INC. 

5. Support the secondary shaft with one hand, then press the secondary shaft out of the press-fitted bearing 

(E). The secondary shaft will drop down after pressing it shaft out of the press-fitted bearing.  

6. Remove the 1st/1st-hold clutch, 52 mm washer, thrust needle bearing, 1st gear assembly, needle bearing, 

1st gear collar, thrust needle bearing, and idler gear.  

7. Remove the 32 mm snap ring, and remove the 2nd clutch, splined washer, thrust needle bearing, needle 

bearing, 2nd gear/park gear, and thrust needle bearing.  

8. Inspect the bearings for galling and rough movement.  

9. Check the shaft bearing surfaces for scoring and excessive wear, and check shaft splines for excessive 

wear and damage.  

10. Check the 1st gear axial clearance (see SECONDARY SHAFT 1ST GEAR AXIAL CLEARANCE 

INSPECTION ), 1st gear one-way clutch (see 1ST GEAR ONE-WAY CLUTCH INSPECTION ), 
and secondary shaft installation height (see SECONDARY SHAFT INSTALLATION HEIGHT 
INSPECTION/ADJUSTMENT
 ).  

SECONDARY SHAFT 1ST GEAR AXIAL CLEARANCE INSPECTION 

Special Tools Required  

Driver, 40 mm I.D. 07746-0030100  

Attachment, 30 mm I.D. 07746-0030300  

1. Install the idler gear (A), thrust needle bearing (B), 1st gear collar (C), needle bearing (D), 1st gear 

assembly (E), thrust needle bearing (F), the original thickness 52 mm washer (G), and 1st/1st-hold clutch 
(H) on the secondary shaft (I). Install the idler gear and 52 mm washer in the direction shown. Do not 
install the O-rings during inspection. 


2007 Acura RL 

2005-08 TRANSMISSION Automatic Transmission - RL


me 


Friday, June 05, 2009 1:18:17 PM

Page 474 

© 2005 Mitchell Repair Information Company, LLC. 


Content   ..  323  324  325  326   ..