Acura RL. Manual - part 319
SHIFT SOLENOID VALVE REMOVAL AND INSTALLATION
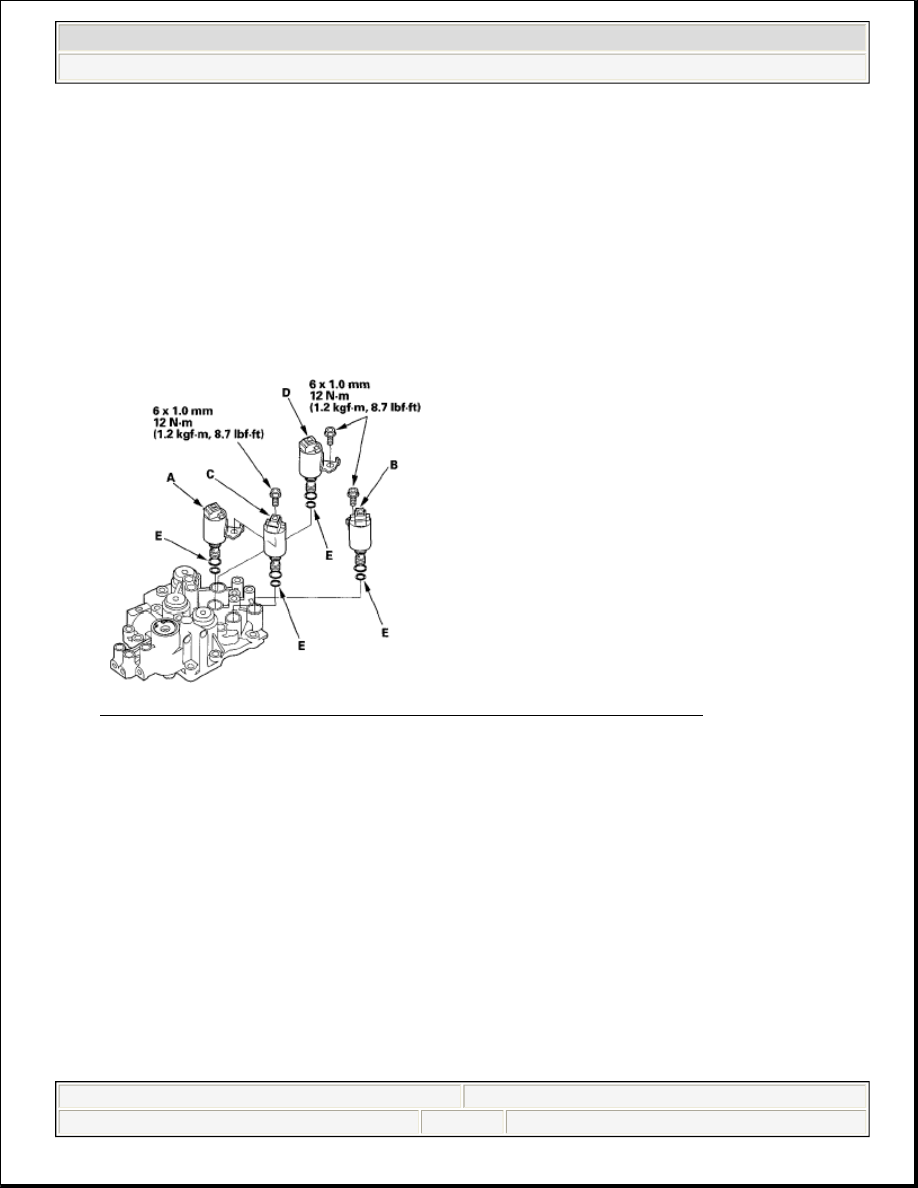
1. Remove the mounting bolts, then remove the solenoid valves by holding the solenoid valve body.
2. Install the new O-rings (E) on each solenoid valve.
Fig. 472: Identifying Solenoid Valve With O-Rings With Torque Specifications
Courtesy of AMERICAN HONDA MOTOR CO., INC.
3. Install shift solenoid valve D (black connector) by holding the shift solenoid valve body; be sure to install
the mounting bracket contacts to the accumulator body.
4. Install shift solenoid valve A (black connector) by holding the shift solenoid valve body; be sure the
mounting bracket contacts to the accumulator body.
5. Install shift solenoid valve C (brown connector) by holding the shift solenoid valve body; be sure the
mounting bracket contacts to the bracket of shift solenoid valve A.
6. Install shift solenoid valve B (brown connector) by holding the shift solenoid valve body; be sure the
mounting bracket contacts to the accumulator body.
TORQUE CONVERTER HOUSING
NOTE:
Do not hold the solenoid valve connector to remove and install the solenoid
valve. Be sure to hold the solenoid valve body.
NOTE:
A new solenoid valve comes with new O-rings. If you install the new
solenoid valve, use the O-rings provided with it.
NOTE:
Do not install shift solenoid valve C before installing shift solenoid valve
A. If shift solenoid valve C is installed before installing shift solenoid valve
A, it may damage to the hydraulic control system.
2007 Acura RL
2005-08 TRANSMISSION Automatic Transmission - RL
me
Friday, June 05, 2009 1:18:17 PM
Page 447
© 2005 Mitchell Repair Information Company, LLC.