Kia Sedona (2008 year). Manual - part 444


  Главная      Kia     Kia Sedona (2008 year) - Service Repair Manual


поиск по сайту           правообладателям


содержание   ..  442  443  444  445   ..


Kia Sedona (2008 year). Manual - part 444
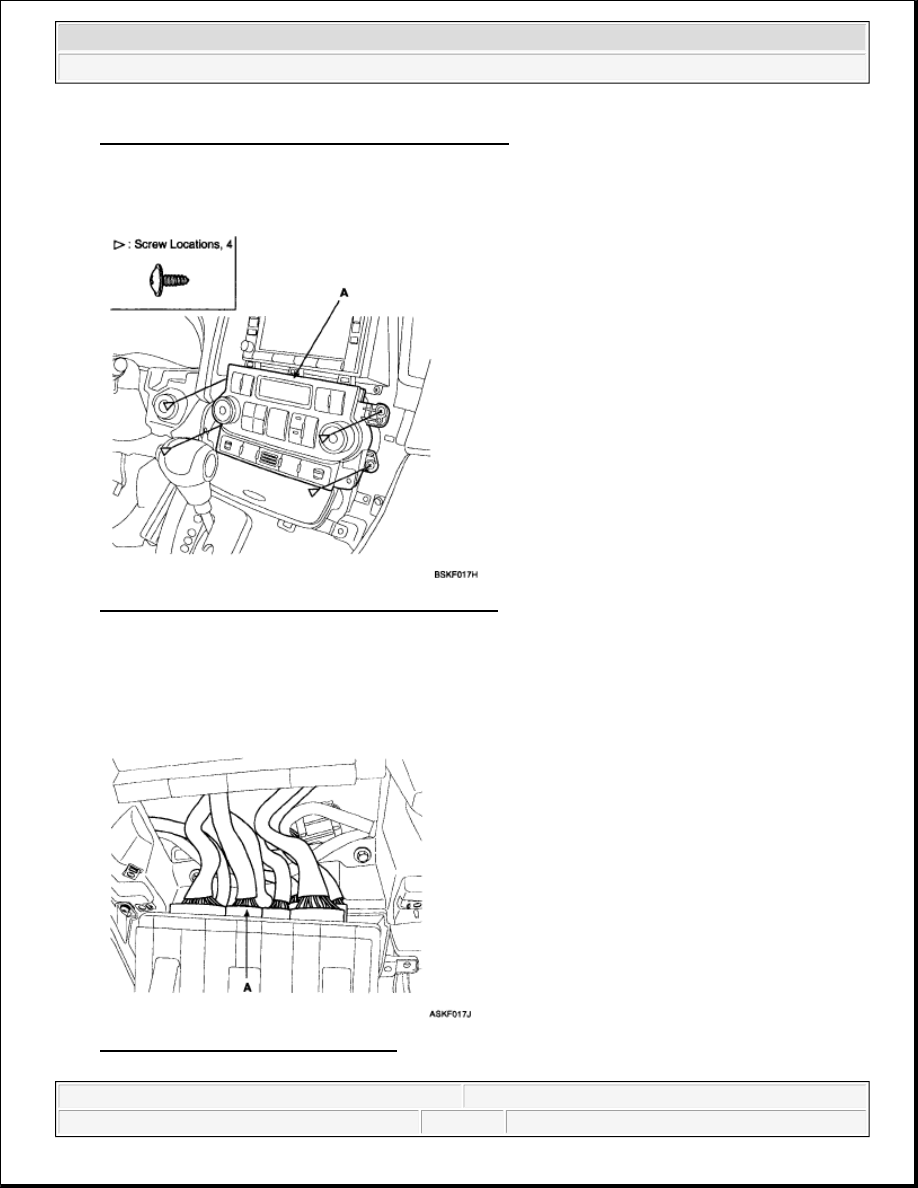


Fig. 14: Identifying Air Vent And Fastener Locations
Courtesy of KIA MOTORS AMERICA, INC.
 

5. After loosening the heater control unit mounting screws, then remove the heater control unit (A). 

Fig. 15: Identifying Heater Control Unit And Screw 
Courtesy of KIA MOTORS AMERICA, INC. 

6. Installation is the reverse of removal. 

Fig. 16: Identifying Connector (1 Of 2) 
Courtesy of KIA MOTORS AMERICA, INC.

NOTE:

Make sure the connector (A) is plugged in properly. 


2008 Kia Sedona EX 

2008 ACCESSORIES & BODY, CAB Interior - Sedona


Microsoft 


Monday, May 24, 2010 4:05:48 PM

Page 11 

© 2006 Mitchell Repair Information Company, LLC. 

Fig. 17: Identifying Connector (2 Of 2) 
Courtesy of KIA MOTORS AMERICA, INC. 

CLUSTER REPLACEMENT 

1. Remove the cluster fascia panel. See REPLACEMENT.  

2. Loosen the screws. 

Fig. 18: Identifying Cluster Panel And Screw 
Courtesy of KIA MOTORS AMERICA, INC. 

3. Disconnect the cluster connectors (A), then remove the cluster (B). 


2008 Kia Sedona EX 

2008 ACCESSORIES & BODY, CAB Interior - Sedona


Microsoft 


Monday, May 24, 2010 4:05:48 PM

Page 12 

© 2006 Mitchell Repair Information Company, LLC. 

Fig. 19: Identifying Cluster Connectors And Cluster 
Courtesy of KIA MOTORS AMERICA, INC. 

4. Installation is the reverse of removal. 

AUDIO ASSEMBLY REPLACEMENT 

1. Remove the center fascia panel. See REPLACEMENT.  

2. Loosen the screws. 

Fig. 20: Identifying Center Fascia Panel And Screw 
Courtesy of KIA MOTORS AMERICA, INC.

NOTE:

Make sure the connector are plugged in properly. 


2008 Kia Sedona EX 

2008 ACCESSORIES & BODY, CAB Interior - Sedona


Microsoft 


Monday, May 24, 2010 4:05:48 PM

Page 13 

© 2006 Mitchell Repair Information Company, LLC. 

3. Disconnect the connector (A), then remove the audio assembly (B). 

Fig. 21: Identifying Connector And Audio Assembly 
Courtesy of KIA MOTORS AMERICA, INC. 

4. Installation is the reverse of removal. 

AIR VENT REPLACEMENT 

1. Remove the side cover. See COVER REPLACEMENT.  

2. Loosen the mounting screws, then remove the air vent (A). 

NOTE:

Make sure the connector are plugged in properly. 

NOTE:

When prying with a flat-tipped screwdriver, wrap it with protective tape, 
and apply protective tape around the related parts, to prevent damage.  

Put on gloves to protect your hands.  


2008 Kia Sedona EX 

2008 ACCESSORIES & BODY, CAB Interior - Sedona


Microsoft 


Monday, May 24, 2010 4:05:48 PM

Page 14 

© 2006 Mitchell Repair Information Company, LLC. 


содержание   ..  442  443  444  445   ..