Seat Mii. Service Manual - part 3
-------------------------------------------------------------------------------------------------------------------------------------------------------------
The essentials
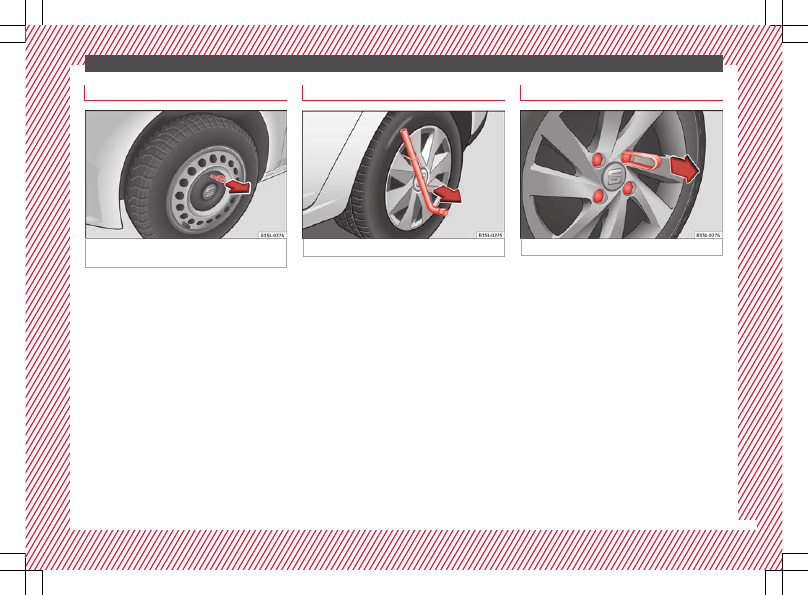
Hubcaps
Fig. 50
Remove the hubcap of the steel wheel
trim
In order to access the wheel bolts, first re-
move the hubcap.
Removing and fitting the hubcap
●
To remove, take the vehicle tool kit wire
hook and attach it to the edge of the wheel
trim
.
●
Remove the trim by pulling it in the direc-
tion of the arrow.
●
To replace the hubcap, press the hubcap
against the trim until it clicks into place.
The caps protect the wheel bolts and should
be remounted after changing the tyre.
Full hubcaps
Fig. 51
Removing the full hubcap
Removing the full hubcap
●
Take the wheel brace and the wire hook
from the vehicle tool kit
›››
●
Hook the wire through one of the grooves
on the hubcap.
●
Insert the wheel brace onto the wire hook
and pull the hub cap in the direc-
tion shown by the arrow.
Fitting hubcaps
●
It is necessary to press the hubcap against
the wheel so that the space for the valve fits
over the tyre valve.
●
Make sure that the hubcap is correctly fit-
ted all the way around the wheel. If you are
using an anti-theft wheel lock, screw it in the
opposite position to the valve.
Wheel bolt caps
Fig. 52
Removing the wheel bolt caps
Removal
●
Fit the plastic clip (vehicle tools
›››
) over the cap until it clicks
into place
.
●
Remove the cap with the plastic clip.
The caps protect the wheel bolts and should
be remounted after changing the tyre.
The
anti-theft wheel bolt has a special cap
which is only compatible with anti-theft bolts
and cannot be used for conventional bolts.
37