Snowmobile Arctic Cat 2-Stroke (2007 year). Manual - part 127
9-21
9
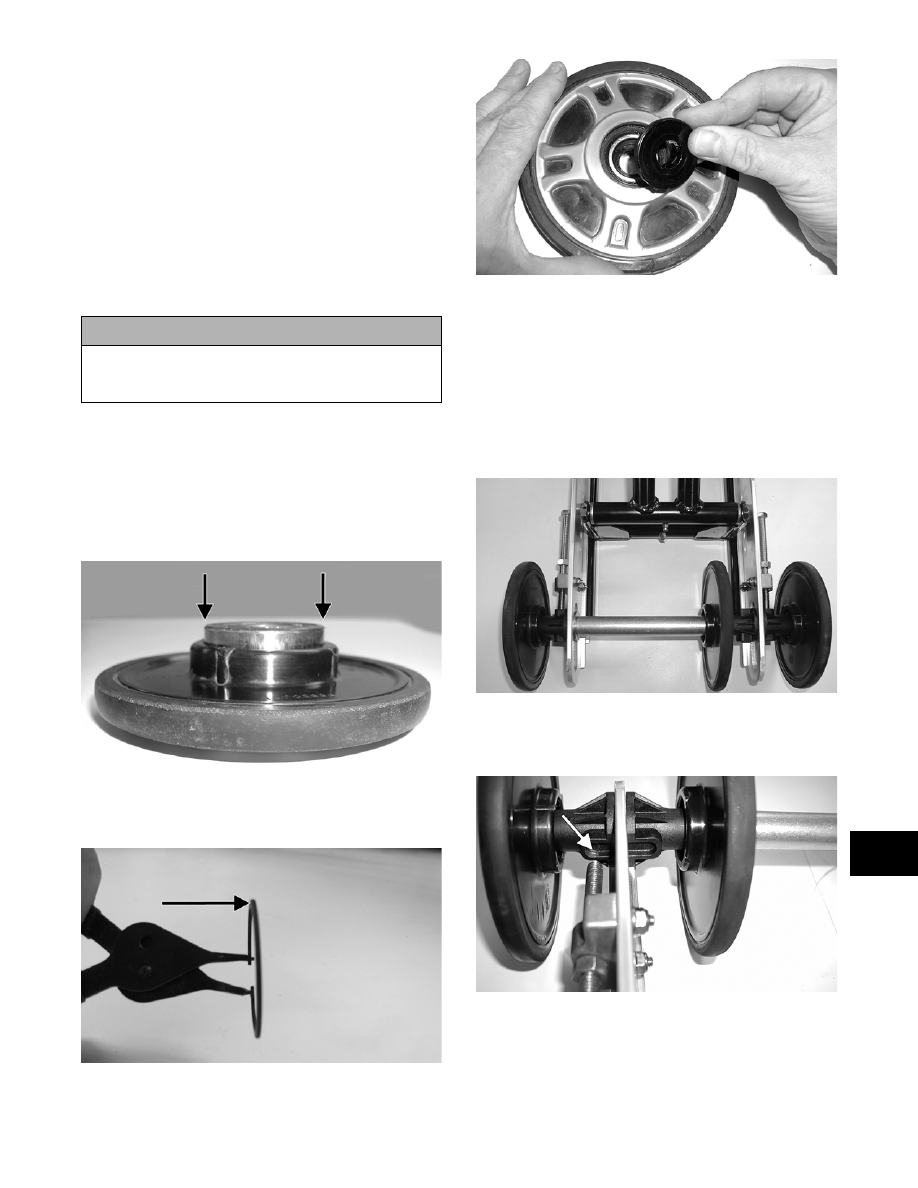
2. Inspect all idler wheel inserts (inner and outer) for
any cracks.
3. Inspect the outer rubber portion of the idler wheels
for cracks and poor bonding.
4. Inspect the plastic insert of each idler wheel for
cracks.
5. Inspect the shaft for wear and damaged threads.
6. Inspect all idler wheel bearings. Turn each bearing
(by hand) and if any roughness or binding is noted,
replace the bearing.
7. If a bearing must be replaced, use this procedure.
A. Remove the wheel insert (if applicable) and the
snap ring.
B. Using a hydraulic press, press the bearing out
the inside of the wheel.
C. Press the new bearing (on its outer race) into
the idler wheel.
MS006A
D. Install the snap ring making sure the “sharp
side” is directed away from the bearing.
MS007A
E. Install the insert (if applicable).
MS008
ASSEMBLING
1. In order from the right-hand side, slide the axle
through the slide rail axle slot; then place a bush-
ing, inner idler wheel with insert (if applicable),
and long spacer with a flat washer on the axle.
Slide the axle through the opposite slide rail axle
slot. Place the plastic adjuster bushings on the axle
(on the outside of each axle slot).
MS022
NOTE: Make sure the slot in the adjuster bushing
is aligned directly with the adjusting bolt.
MS058A
2. Place the outer idler wheels on the axle (with the
large flat of the insert directed inward) and secure
with two cap screws (coated with blue Loctite
#243) and large flat washers. Tighten cap screws
only until snug.
! CAUTION
Do not remove the bearing unless it is absolutely
necessary. The bearing will be damaged during
removal.