Snowmobile Arctic Cat 2-Stroke (2007 year). Manual - part 119
8-96
AF297D
2. Remove the recoil starter rope from the brake
cable bracket.
3. Loosen the jam nut on the brake cable and remove
the cable from the bracket.
4. Loosen and remove the two mounting cap screws
(account for the front alignment ball) and remove
the brake caliper.
AF460D
AF293D
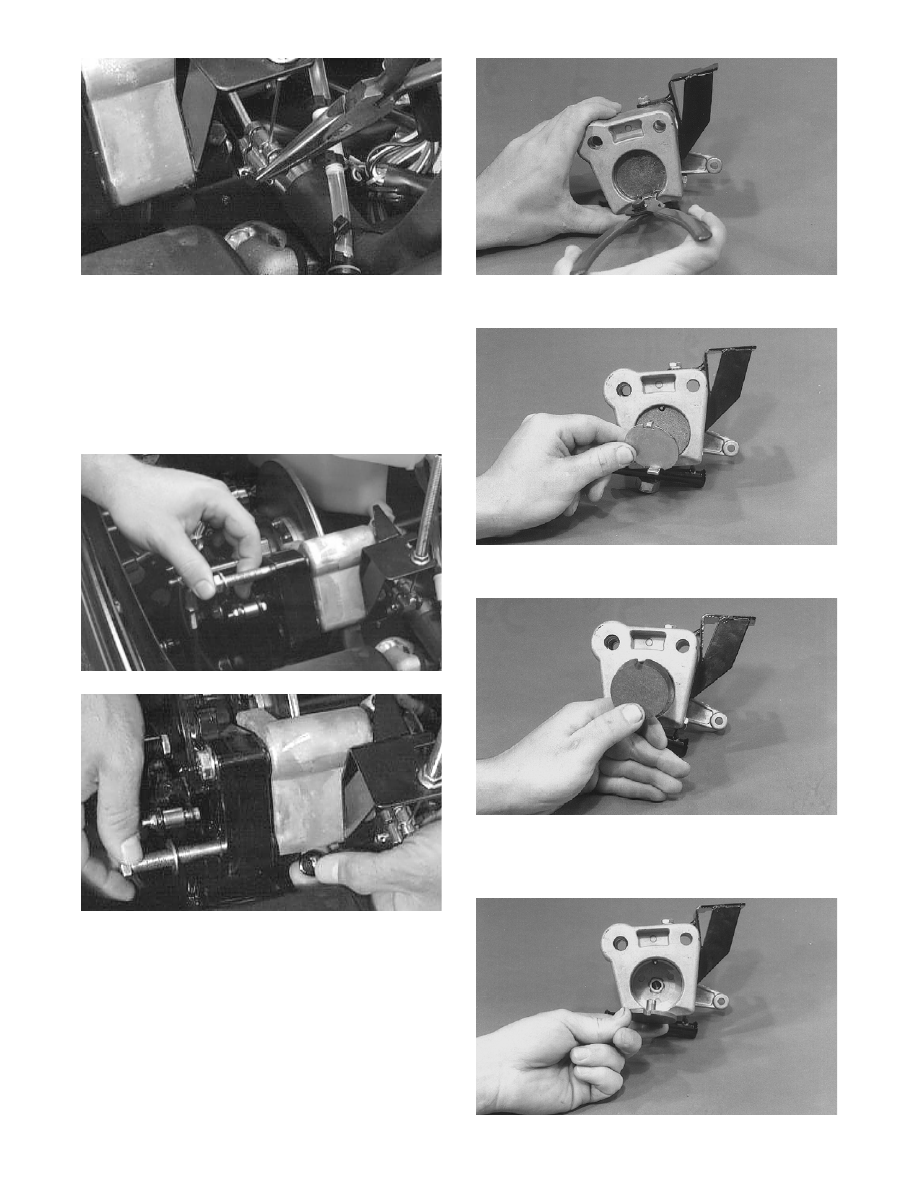
DISASSEMBLING
1. Remove the snap ring on the stationary side of the
caliper.
AF318A
2. Remove the brake pad support plate.
AF356
3. Remove the stationary brake pad.
AF354
4. Remove the movable brake pad.
5. Remove the brake piston.
AF353