Snowmobile Arctic Cat (2009 year). Manual - part 18
MAINTENANCE
65
To either engage or disengage the
spring tension blocks, use the Spring
Block Tool, a spark plug socket, and a
screwdriver to adjust the spring block
to the desired position. Make sure both
spring blocks are in the same position
(either engaged or disengaged).
0739-625
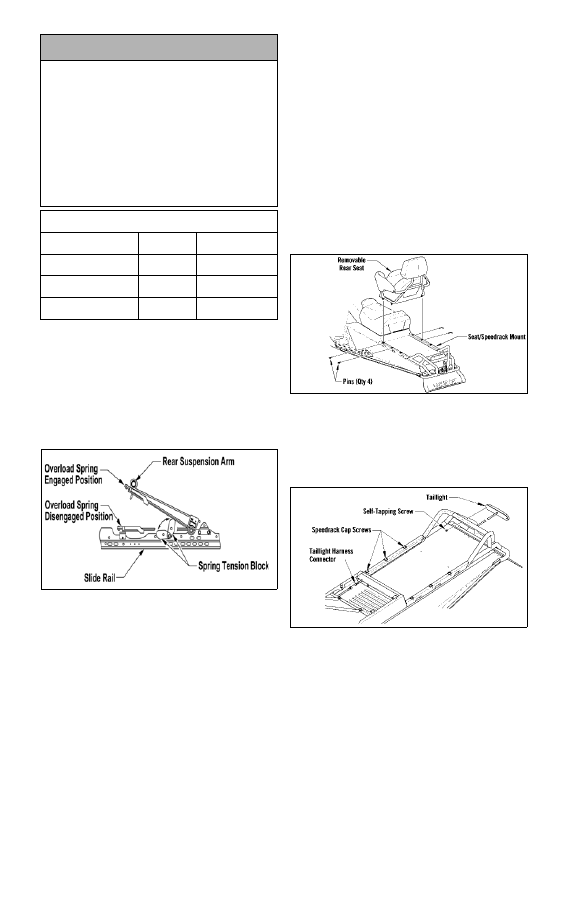
LIGHTS
For the correct headlight bulb and/or
taillight/brakelight bulb/LED, see the
appropriate specifications sheet.
Removing and
Installing Taillight/
Brakelight (Bearcat XT
Models)
These models are equipped with an
LED taillight/brakelight. If the LED
fails, it must be replaced. To remove
and install the LED, use the following
procedure.
1. Remove the four pins securing the
rear seat to the seat/Speedrack
mount; then remove the seat.
0743-329
2. Compress the latch on the right
side of the front seat and lift the
front seat away; then disconnect
the taillight harness connector.
0743-444
3. Loosen (but do not remove) the
three right-side seat/Speedrack
mount cap screws.
4. Carefully route the harness con-
nector through the hole in the stor-
age compartment panel; then
remove the harness from beneath
the seat/Speedrack mount.
! CAUTION
There are weight limitations for
these snowmobiles. If additional
cargo is being added, maximum
weight on the snowmobile (opera-
tor/passenger/cargo) should not
exceed the maximum limitation set
for each snowmobile. See chart for
details. Also, the overload springs
should be engaged.
Maximum Weight Limitations
Bearcat 570
170 kg
375 lb
Bearcat 570 XT
272 kg
600 lb
Bearcat Z1 XT
272 kg
600 lb
T-Series
170 kg
375 lb