Snowmobile Arctic Cat (2007 year). Manual - part 90
8-63
8
6. Inspect the brake hose for cracks and deteriora-
tion and check the condition of the threaded
connectors.
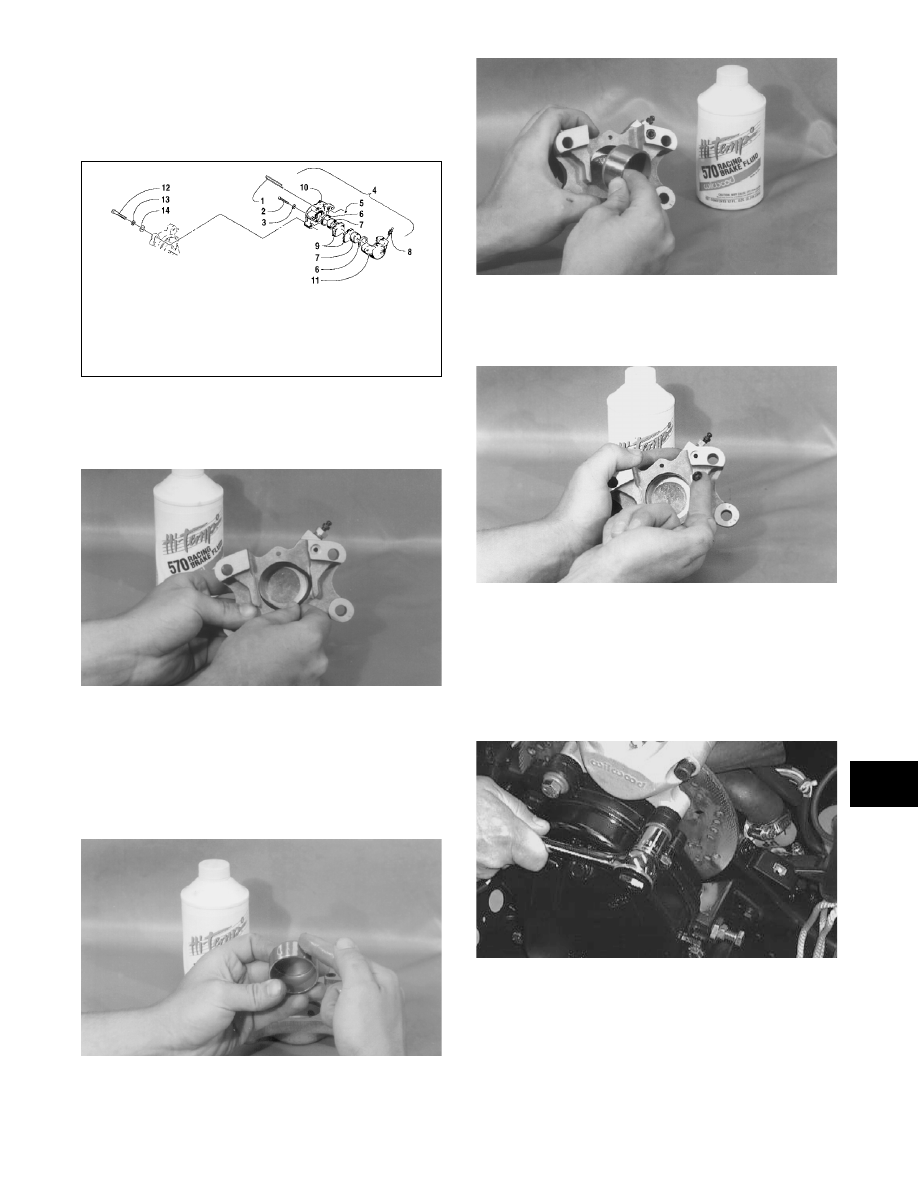
ASSEMBLING
736-850A
1. Apply approved brake fluid to the new O-ring;
then install the O-ring into the groove of each
caliper half.
AF251
NOTE: Always use a new O-ring when assem-
bling the brake caliper.
2. In each caliper half, apply approved brake fluid
to the brake piston; then while twisting, install
the piston with the open side facing out.
AF266
AF269
3. Place the small O-ring into position; then assem-
ble the two caliper halves. Secure with the cap
screws. Do not tighten at this time.
AF264
INSTALLING CALIPER
1. Secure the caliper assembly on the chain case
using two cap screws, lock washers, and flat
washers. Tighten the cap screws to specifica-
tions.
AF261D
2. Install the brake hose on the caliper and tighten
securely.
KEY
1. Retaining Pin
2. Cap Screw
3. Washer
4. Brake Caliper
Assy
5. Housing O-Ring
6. O-Ring
7. Piston
8. Bleed Screw
9. Brake Pad Set
10. Housing
11. Housing
12. Cap Screw
13. Lock Washer
14. Washer