Snowmobile Polaris 600 IQ Touring (2010 year). Manual - part 26


  Index      Snowmobiles / ATV     Snowmobile Polaris 600 IQ Touring - service manual 2010 year


Search            


Content   ..  24  25  26  27   ..


Snowmobile Polaris 600 IQ Touring (2010 year). Manual - part 26


105

MAINTENANCE

Clutch System

n

Drive Belt Condition

Periodically check the condition and tension of the drive belt, and 

always carry a spare. Inspect the belt for signs of excessive wear: frayed 

edges, missing cogs, cracks and excessive looseness. Replace the belt if 

any of these conditions exist. See Drive Belt Troubleshooting on page 

123.
For improved drive-away during extremely cold temperatures, remove 

the belt and warm it to room temperature. Reinstall it before starting the 

snowmobile. 

n

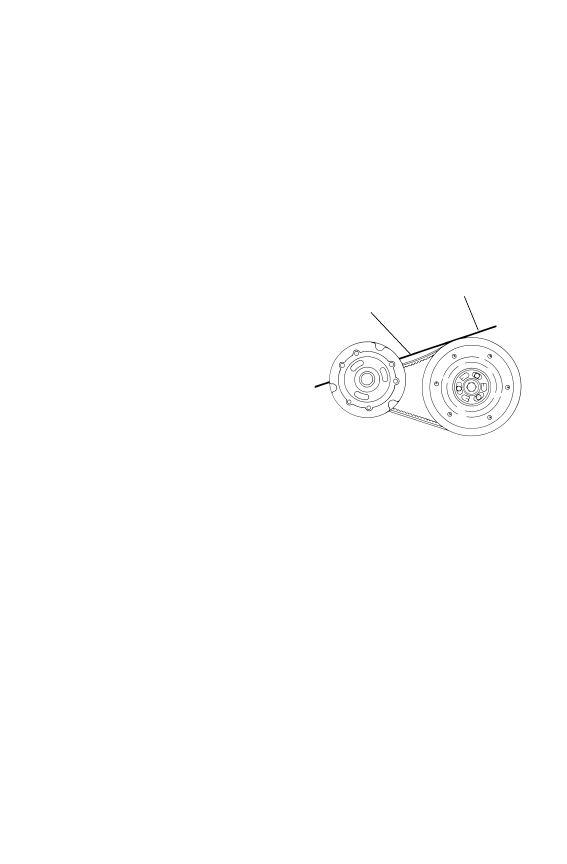
Drive Belt Deflection

Measure belt deflection with both 

clutches at rest and in their full 

neutral position.
Place a straight edge on the belt 

and apply downward pressure 

while measuring at point A. This 

measurement should be 1 1/4" 

(3.2 cm).

Drive Belt Adjustment

1. Install the L-wrench into the open threaded hole in the outer sheave 

of the clutch (see page 106). Turn the wrench clockwise slightly to 

remove pressure from the sheaves.

2. Loosen the 7/16" jam nut on the belt width adjuster.
3. Using a 1/8" Allen wrench, adjust the threaded set screw as needed.

Tip: Turn the set screw in (clockwise) to increase the distance between the 

sheaves and out (counterclockwise) to decrease the distance.

4. Tighten the jam nut.

Straight 

Edge

Measure

A

106

MAINTENANCE

Clutch System

Drive Belt Removal

NOTICE: Do not attempt to remove the drive belt after operating in reverse. The 

snowmobile must be stopped after forward motion to prevent damage 

to components during belt removal.

1. Stop the engine after operat-

ing in a forward motion.

2. Turn the ignition key off. 

Wait for the engine to come 

to a complete stop.

3. Lock the parking brake.
4. Open the hood.
5. Remove the left side panel.
6. Rotate the driven clutch 

counterclockwise 1/4 turn 

by hand to ensure forward 

engagement before attempting to remove the belt.

7. Locate the L-wrench in the tool kit. Install the wrench into the open 

threaded hole in the outer sheave of the clutch (+).

8. Turn the wrench clockwise until the sheaves open far enough to 

remove the belt.  If the wrench does not turn readily, rotate the 

driven clutch counterclockwise an additional 1/4 turn by hand and 

try again.

9. Grasp the belt at the lower edge and remove it.

+

107

MAINTENANCE

Clutch System

Drive Belt Installation

1. Drop the drive belt over the drive 

clutch and pull back the slack. 

Tip: To ensure satisfactory belt life, install 

belts so they operate in the same 

direction of rotation by positioning the 

identification numbers so that you 

can read them. If required, separate 

the sheaves as outlined in the belt 

removal procedures.

2. Rotate the L-wrench counter-

clockwise to tighten the sheaves while working the belt to the outer 

edge of the sheaves.

3. Remove the wrench.
4. Reinstall the side panel.
5. Close and secure the hood.

Torque Stop

Periodically check torque stop clearance. 

With clutches in proper alignment, the 

torque stop clearance should be .010I-

.030I (.25-.75 mm) from the engine case. 

Adjust if necessary. Lock the jam nut.

.010

I

-.030

I

(.25-.75 mm)

108

MAINTENANCE

Track Replacement

When replacing the track, always install a track having the lug size rec-

ommended for your model. See your Polaris dealer.

NOTICE: Installing tracks with larger lugs on machines equipped with coolers 

will result in damage to the cooler or tunnel. Always install a track 

having the lug size recommended for your model.

Track Inspection

WARNING! Broken track rods can cause a rotating track to come off the 

machine, which could cause serious injury or death. Never operate with a 

damaged track. Never rotate a damaged track under power.

1. Using a hoist, safely lift and sup-

port the rear of the snowmobile 

off the ground.

2. Rotate the track by hand to check 

for damage.

3. Carefully examine the track along 

the entire length of each rod. 

Bend the track to check for break-

age. 

4. Replace the track if any rod dam-

age is found.

Rods


Content   ..  24  25  26  27   ..