SAAB 9000. Manual - part 49
11 •12 Bodywork and fittings
16.4 Unplug the wiring at the multi-plug
connector
Refitting
6 Refit the catch assembly by reversing the
removal procedure. Upon completion, test the
operation of the catch; if excessive force is
required to engage the tailgate catch, or if the
catch appears loose when the tailgate is
closed, then refer to the following sub-section
and adjust the striker plate.
Striker plate
Removal
7 Remove the retaining screws, and lift off the
loadspace scuff plate.
8 Slacken and withdraw the two mounting
bolts (see illustration), then remove the
striker plate.
Refitting
9 Refitting is a reversal of removal, adjusting
the position of the striker as described below.
Adjustment
10 The mounting holes for the striker plate
bolts are elongated, to allow a degree of
adjustment. Slacken the bolts slightly, and
move the striker plate to suit; slide the plate
downwards to tighten the catch, or upwards to
loosen it, then re-tighten the bolts, close the
tailgate and check the security of the catch.
Lock cylinder
Removal
11 Remove the tailgate interior trim panel, as
described in Section 25. Remove the two
16.5 Disconnect the lock cylinder link cable
from the catch assembly by twisting the
metal hook at the end of the cable out of
the actuator lever
retaining screws from the lock cylinder
assembly (see illustration). Turn the cylinder
to allow it to be withdrawn through the hole in
the tailgate.
12 Unhook the link cable nipple from the
pulley, and remove the cylinder (see
illustration).
Refitting
13 Refit the lock cylinder by reversing the
removal procedure.
16.8 Striker plate mounting bolts (arrowed)
Refitting
6 Refit the unit by reversing the removal
procedure.
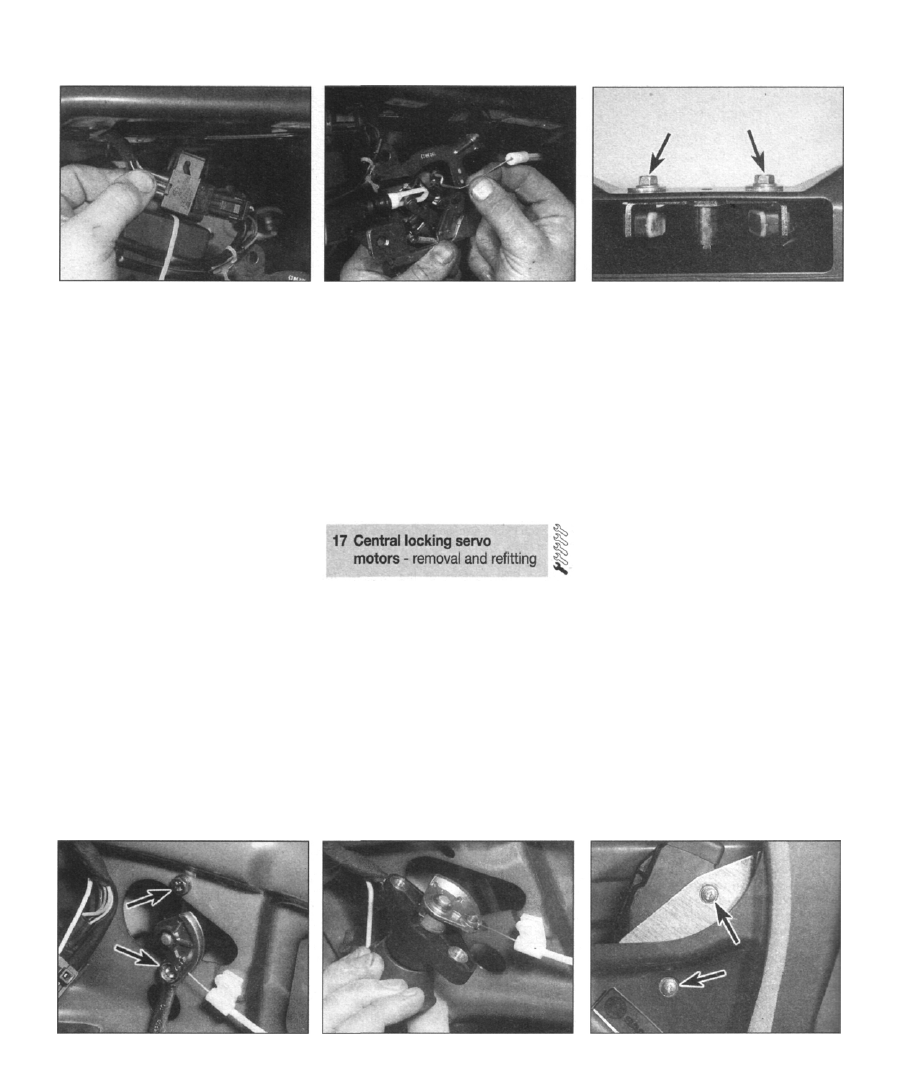
Tailgate/boot lock servo motor
Removal
7 Disconnect the battery negative cable, and
position it away from the terminal.
8 Refer to Section 12 and remove the tailgate
interior trim panel.
9 Unplug the servo motor wiring from the
wiring harness at the connector.
10 Remove the two servo motor retaining
screws (refer to illustration 16.3).
11 Unhook the plunger from the lock
mechanism, and lift out the servo motor.
Refitting
12 Refit the unit by reversing the removal
procedure.
Fuel filler lock servo motor
Removal
13 Disconnect the battery negative cable,
and position it away from the terminal.
14 Refer to Section 25 and remove the
loadspace side trim panels.
15 Unplug the servo motor wiring from the
wiring harness at the connector.
16 The servo motor is mounted on a metal
bracket, which is bolted to the inside of the
wing. Remove the three retaining nuts to free
the bracket, then separate the servo motor
from it by extracting the two screws.
16.11 Remove the two retaining screws
from the lock cylinder assembly (arrowed)
16.12 Unhook the link cable nipple from the
pulley, and remove the cylinder
17.4 Remove the two servo motor retaining
screws (arrowed)
Door lock servo motors
Note: This procedure is applicable to both
front and rear doors.
Removal
1 Disconnect the battery negative cable, and
position it away from the terminal.
2 Refer to Section 12 and remove the door
interior trim panel.
3 Unplug the servo motor wiring from the
wiring harness at the connector (refer to
illustration 13.26).
4 Remove the two servo motor retaining
screws (see illustration).
5 Unhook the plunger from the lock
mechanism, and lift out the servo motor.