Dacia Solenza (engine E7J). Manual - part 107
52
52 - 2
MECHANISMS OF NON LATERAL OPENINGS
7
5
6
8
4
11
10
9
9
3
1
2
6
10
11
7
5
4
8
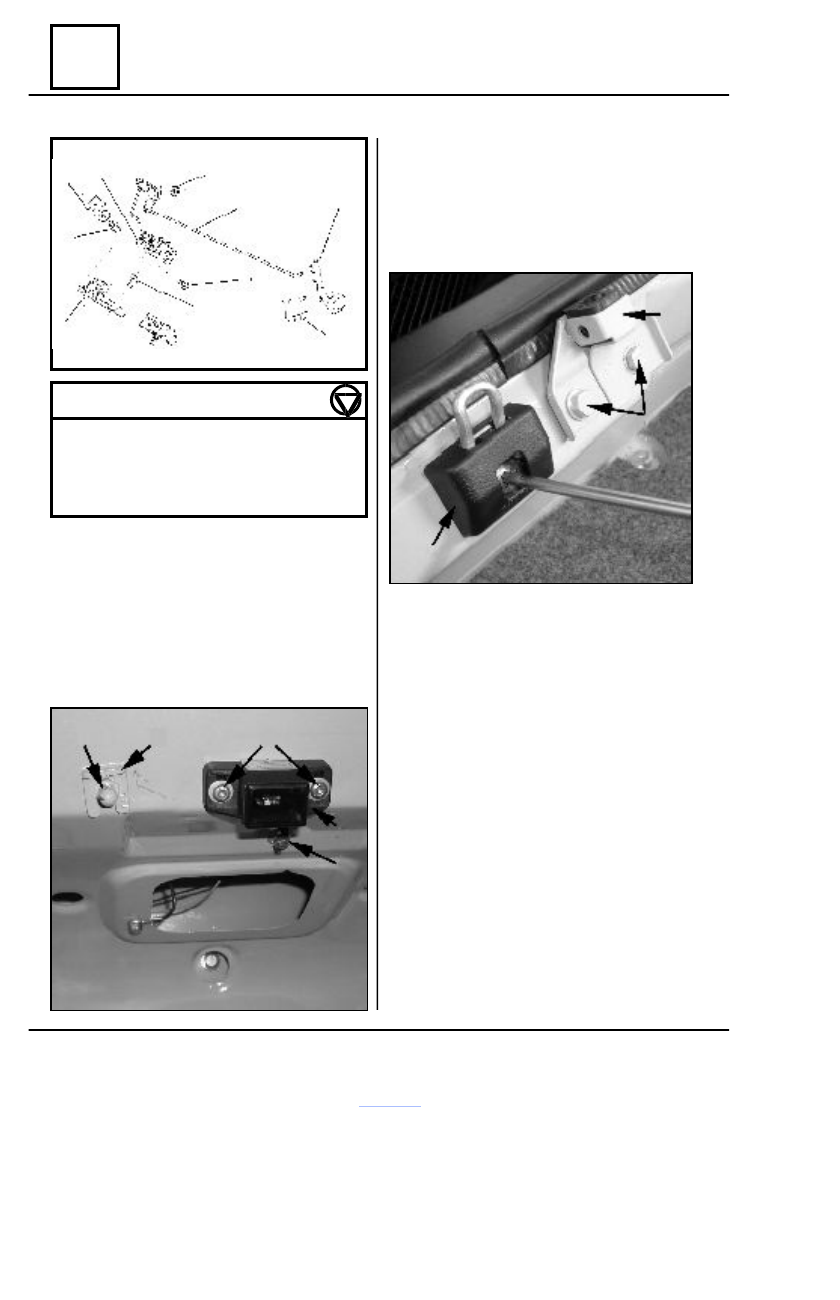
Hatchback lock
TIGHTENING MOMENTS (daNm)
Hatchback latch attachment screw 2.1
Guiding support attachment screw 0.7
Hatchback lock attachment screw 0.6
Changer attachment nut 0.5
DISMOUNTING
Dismount :
- hatchback lock cylinder (1) by remov-
ing the fork (2) and detaching from clips the
changer rod from its arm;
- attachment nut (4) of the hatchback
opening control changer (3) on the hatchback
lining;
- attachment screws (6) of the hatchback
lock on the hatchback lining;
- guiding element (8) and adjustment
washer (7) of the guiding element;
- attachment screws (10) of the guiding
support (9) on the hatchback frame.
- special screw attaching hatchback latch
(11) on the hatchback frame.
REMOUNTING
Perform the dismounting operations in the
reverse order.