Nissan Frontier D40. Manual - part 778
 

  Index      Nissan     Nissan Frontier D40 (2010 year) - Service and Repair Manual


Search            


Content   ..  776  777  778  779   ..


Nissan Frontier D40. Manual - part 778


ILLUMINATION

INL-67

< ON-VEHICLE REPAIR >

[WITH POWER DOOR LOCKS]

C

D

E

F

G

H

I

J

K

M

A

B

INL

N

O

P

ILLUMINATION

Removal and Installation

INFOID:0000000005272835

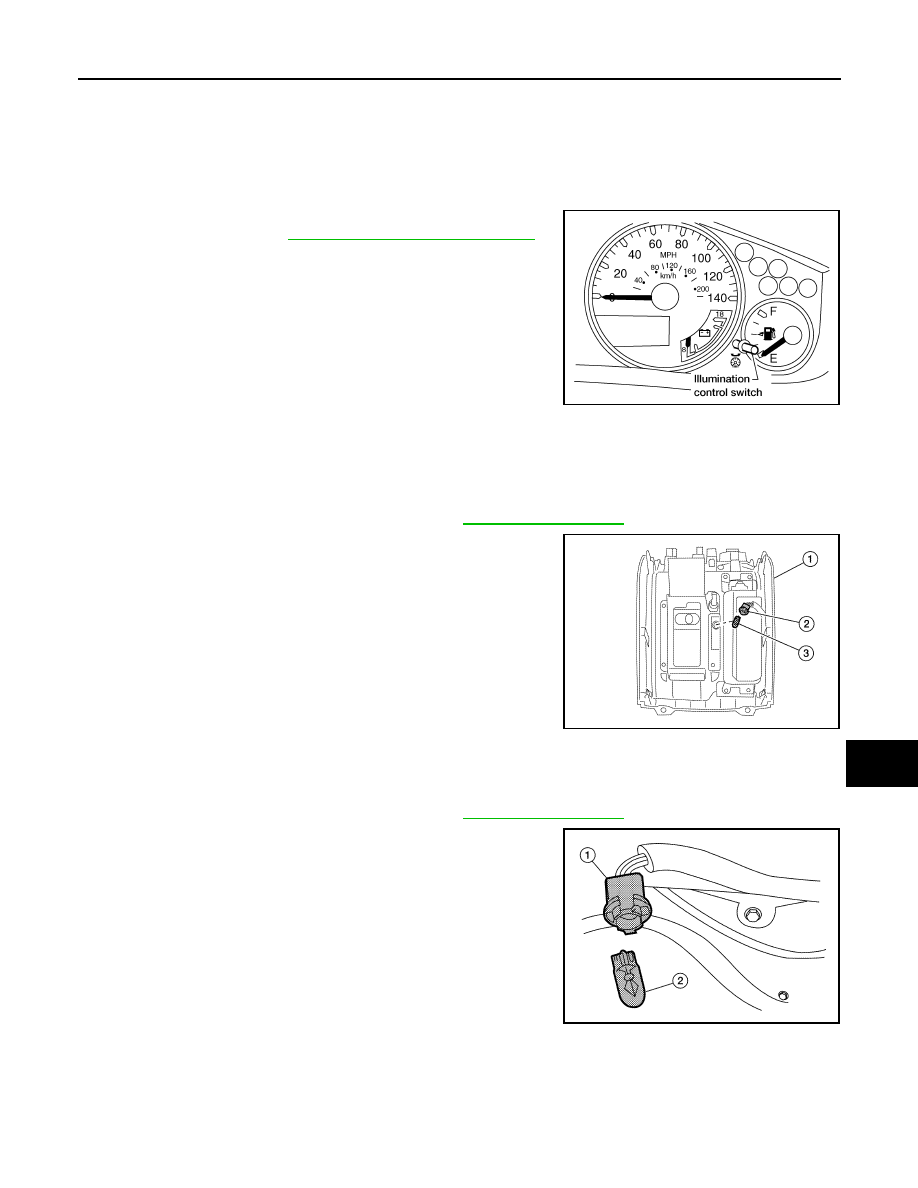
ILLUMINATION CONTROL SWITCH

Removal

The illumination control switch is replaced as a part of the combina-
tion meter assembly. Refer to 

MWI-95, "Removal and Installation"

.

Installation

Installation is in the reverse order of removal.

A/T FINISHER LAMP

Removal

1.

Remove A/T finisher from center console. Refer to 

IP-17, "Exploded View"

.

2.

Rotate A/T finisher lamp socket (2) with bulb (3) counterclock-
wise, then pull away from finisher (1).

Installation

Installation is in the reverse order of removal. 

Bulb Replacement

1.

Remove A/T finisher from center console. Refer to 

IP-17, "Exploded View"

.

2.

Remove A/T finisher lamp socket (1), then pull bulb (2) straight
out away from socket.

LKIA0579E

ALLIA0590ZZ

AT finisher lamp bulb

: 12V - 3W

ALLIA0321ZZ

INL-68

< SERVICE DATA AND SPECIFICATIONS (SDS) 

[WITH POWER DOOR LOCKS]

BULB SPECIFICATIONS

SERVICE DATA AND SPECIFICATIONS (SDS)

BULB SPECIFICATIONS

Interior Lamp/Illumination

INFOID:0000000005272836

*: Always check with the Parts Department for the latest parts information.

Item

Wattage (W)*

Map lamp

8

Vanity lamp

*

Glove box lamp

3.4

Room lamp

8

A/T finisher lamp

3

DIAGNOSIS AND REPAIR WORKFLOW

INL-69

< BASIC INSPECTION >

[WITHOUT POWER DOOR LOCKS]

C

D

E

F

G

H

I

J

K

M

A

B

INL

N

O

P

BASIC INSPECTION

DIAGNOSIS AND REPAIR WORKFLOW

Work Flow

INFOID:0000000005550764

OVERALL SEQUENCE

AWLIA1661GB

INL-70

< BASIC INSPECTION >

[WITHOUT POWER DOOR LOCKS]

DIAGNOSIS AND REPAIR WORKFLOW

DETAILED FLOW

1.

INTERVIEW FOR MALFUNCTION

Find out what the customer's concerns are.

>> GO TO 2

2.

SYMPTOM CHECK

Verify the symptom from the customer's information.

>> GO TO 3

3.

BASIC INSPECTION

Check the operation of each part. Check that any concerns occur other than those mentioned in the customer
interview.

>> GO TO 4

4.

SELF-DIAGNOSIS WITH CONSULT-III

Perform the self-diagnosis with CONSULT-III. Check that any DTC is detected.

Is any DTC detected?

YES

>> GO TO 5

NO

>> GO TO 6

5.

TROUBLE DIAGNOSIS BY DTC

Perform the trouble diagnosis for the detected DTC. Specify the malfunctioning part.

>> GO TO 9

6.

FAIL-SAFE ACTIVATION CHECK

Determine if the customer’s concern is related to fail-safe activation.

Does the fail-safe activate?

YES

>> GO TO 7

NO

>> GO TO 8

7.

SYSTEM DIAGNOSIS

Perform the system diagnosis for the system in which the fail-safe activates. Specify the malfunctioning part.

>> GO TO 9

8.

SYMPTOM DIAGNOSIS

Perform the symptom diagnosis. Specify the malfunctioning part.

>> GO TO 9

9.

MALFUNCTION PART REPAIR

Repair or replace the malfunctioning part.

>> GO TO 10

10.

REPAIR CHECK (SELF-DIAGNOSIS WITH CONSULT-III)

Perform the self-diagnosis with CONSULT-III. Verify that no DTCs are detected. Erase all DTCs detected prior
to the repair. Verify that DTC is not detected again.

Is any DTC detected?

YES

>> GO TO 5


Content   ..  776  777  778  779   ..