Nissan Altima L32. Manual - part 857
 

  Index      Nissan     Nissan Altima L32 (2007-2009 year) - Service and Repair Manual


Search            


Content   ..  855  856  857  858   ..


Nissan Altima L32. Manual - part 857


HEADLINING

INT-21

< ON-VEHICLE REPAIR >

[COUPE]

C

D

E

F

G

H

I

K

L

M

A

B

INT

N

O

P

1. Recline the front seats to the fully reclined position.
2. Disconnect the negative and positive battery terminals.
3. Remove front pillar finisher (RH/LH). Refer to 

INT-15, "Removal and Installation"

.

4. Remove rear seat cushion and seatbacks. Refer to 

SE-25, "Removal and Installation"

.

5. Remove door welts (RH/LH).
6. Remove upper and lower rear pillar finishers. Refer to 

INT-15, "Removal and Installation"

.

7. Disconnect headlining harness and antenna feeder connectors.
8. Disconnect antenna amplifier and rear window defogger connectors. 
9. Release the molded clip, then remove assist grips.

10. Remove the sunvisor covers and screws, and then remove sunvisors (RH/LH).
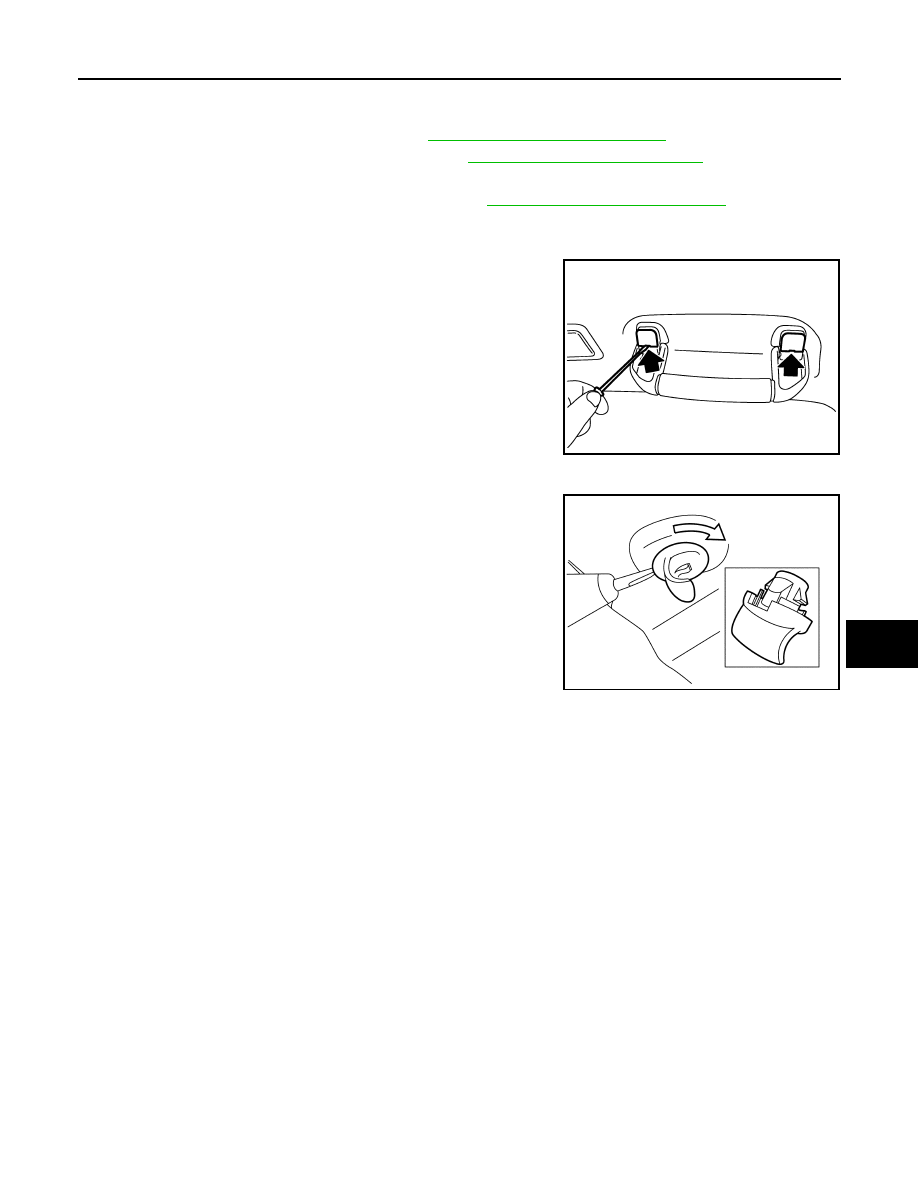
11. Insert a suitable thin tool into the sunvisor holder notch and

press in to release the locking tab.

• Rotate sunvisor holder 90 degrees and pull away from head-

lining to remove.

12. Remove map lamp bracket and map lamp assembly.
13. For sunroof equipped vehicles, use a suitable tool to release dual lock fastener(s) around the sunroof

opening and release the sunroof clip. 

14. Remove rear view mirror.
15. Release the three hidden clips near the rear edge of headliner using a suitable clip removal tool.
16. Drop headlining down and carefully rotate into position. Remove headlining through door opening.

CAUTION:

• When removing, two workers are required. (one for each front and rear of headlining)

• Cover center console finisher upper surface with a shop cloth to prevent damage.

INSTALLATION

Installation is in the reverse order of removal.

PIIB3585J

SIIA0224J

INT-22

< ON-VEHICLE REPAIR >

[COUPE]

TRUNK ROOM TRIM & TRUNK LID FINISHER

TRUNK ROOM TRIM & TRUNK LID FINISHER

Exploded View

INFOID:0000000004205965

TRUNK ROOM TRIM

1.

Upper trunk finisher

2.

Trunk lid finisher 

3.

Trunk side finisher (RH) 

4.

Trunk floor carpet 

5.

Trunk side finisher (LH) 

6.

Trunk spacer (LH) 

7.

Spare tire cover

8.

Trunk net rear

9.

Trunk spacer (RH)

10. Trunk rear finisher

11. Trunk net side

Clip

Vehicle front

AWJIA0420ZZ

TRUNK ROOM TRIM & TRUNK LID FINISHER

INT-23

< ON-VEHICLE REPAIR >

[COUPE]

C

D

E

F

G

H

I

K

L

M

A

B

INT

N

O

P

Removal and Installation

INFOID:0000000004205966

REMOVAL

TRUNK ROOM TRIM

1. Release the clips, then remove trunk floor carpet.
2. Remove trunk net rear and trunk net side (if equipped).
3. Release the clips, then remove trunk rear finisher.
4. Release the clips, then remove upper trunk finisher. 
5. Release the clips, then remove trunk side finisher (RH/LH).
6. Remove spare tire cover and trunk spacers (RH/LH).
7. Release the clips and remove trunk lid finisher.

INSTALLATION

Installation is in the reverse order of removal.

INT-24

< SYMPTOM DIAGNOSIS >

[SEDAN]

SQUEAK AND RATTLE TROUBLE DIAGNOSES

SYMPTOM DIAGNOSIS

SQUEAK AND RATTLE TROUBLE DIAGNOSES

Work Flow

INFOID:0000000004205967

CUSTOMER INTERVIEW

Interview the customer if possible, to determine the conditions that exist when the noise occurs. Use the Diag-

nostic Worksheet during the interview to document the facts and conditions when the noise occurs and any

customer's comments; refer to 

INT-28, "Diagnostic Worksheet"

. This information is necessary to duplicate the

conditions that exist when the noise occurs.

• The customer may not be able to provide a detailed descriptions or the location of the noise. Attempt to

obtain all the facts and conditions that exist when the noise occurs (or does not occur).

• If there is more than one noise in the vehicle, be sure to diagnose and repair the noise that the customer is

concerned about. This can be accomplished by test driving the vehicle with the customer.

• After identifying the type of noise, isolate the noise in terms of its characteristics. The noise characteristics

are provided so the customer, service adviser and technician are all speaking the same language when

defining the noise.

• Squeak —(Like tennis shoes on a clean floor)

Squeak characteristics include the light contact/fast movement/brought on by road conditions/hard surfaces

= higher pitch noise/softer surfaces = lower pitch noises/edge to surface = chirping

• Creak—(Like walking on an old wooden floor)

Creak characteristics include firm contact/slow movement/twisting with a rotational movement/pitch depen-

dent on materials/often brought on by activity.

• Rattle—(Like shaking a baby rattle)

Rattle characteristics include the fast repeated contact/vibration or similar movement/loose parts/missing

clip or fastener/incorrect clearance.

• Knock —(Like a knock on a door)

Knock characteristics include hollow sounding/sometimes repeating/often brought on by driver action.

• Tick—(Like a clock second hand)

Tick characteristics include gentle contacting of light materials/loose components/can be caused by driver

action or road conditions.

• Thump—(Heavy, muffled knock noise)

Thump characteristics include softer knock/dead sound often brought on by activity.

• Buzz—(Like a bumble bee)

Buzz characteristics include high frequency rattle/firm contact.

• Often the degree of acceptable noise level will vary depending upon the person. A noise that you may judge

as acceptable may be very irritating to the customer.

• Weather conditions, especially humidity and temperature, may have a great effect on noise level.

DUPLICATE THE NOISE AND TEST DRIVE

SBT842


Content   ..  855  856  857  858   ..