Nissan Silvia. Manual - part 290
SLC494A
SLC495A
SLC450AA
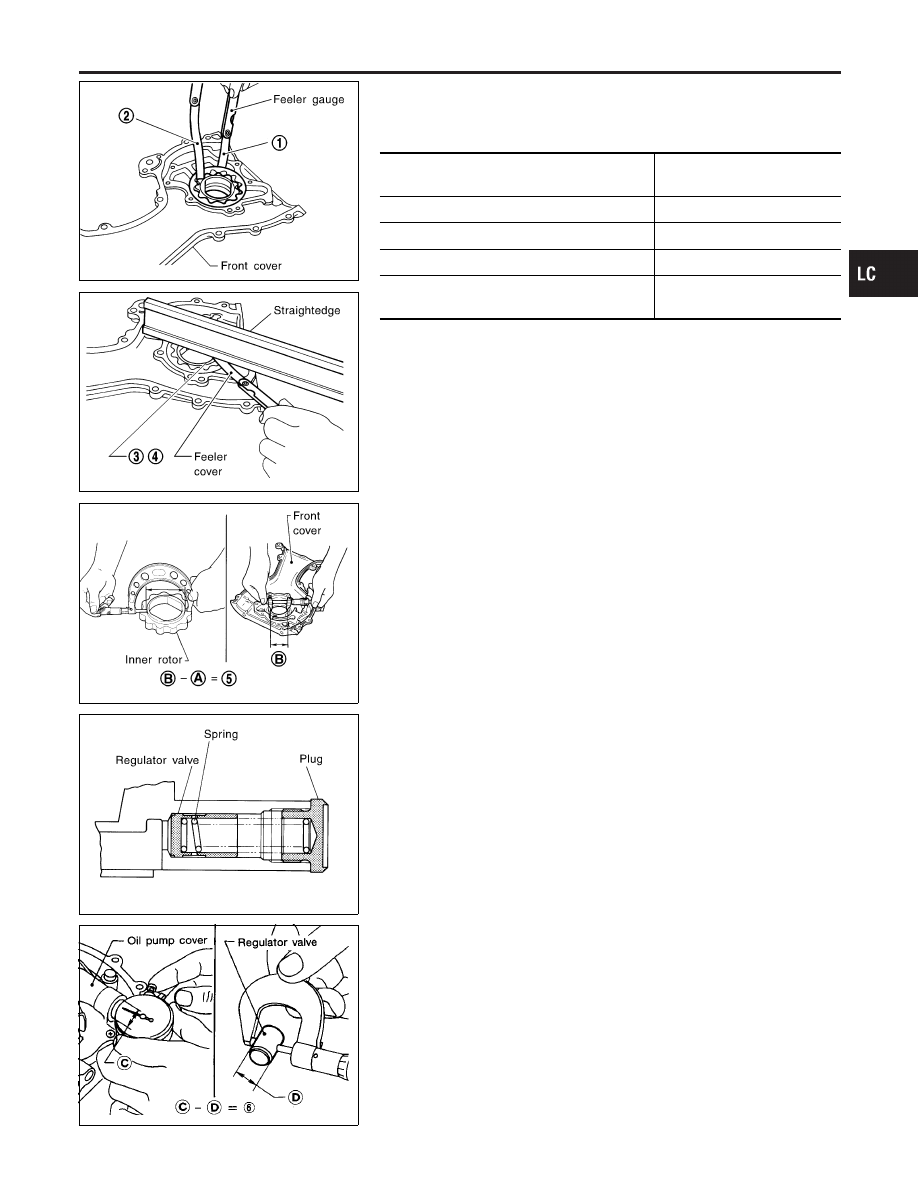
INSPECTION
NMLC0007
Using a feeler gauge, check the following clearances:
Standard clearance:
Unit: mm (in)
Body to outer rotor radial clearance 1
0.114 - 0.200
(0.0045 - 0.0079)
Inner rotor to outer rotor tip clearance 2
Below 0.18 (0.0071)
Body to inner rotor clearance 3
0.05 - 0.09 (0.0020 - 0.0035)
Body to outer rotor axial clearance 4
0.05 - 0.11 (0.0020 - 0.0043)
Inner rotor to brazed portion of housing clear-
ance 5
0.045 - 0.091
(0.0018 - 0.0036)
I
If the tip clearance (2) exceeds the limit, replace rotor set.
I
If body to rotor clearances (1, 3, 4, 5) exceed the limit,
replace front cover assembly.
SLC403B
REGULATOR VALVE INSPECTION
NMLC0008
1.
Visually inspect components for wear and damage.
2.
Check oil pressure regulator valve sliding surface and valve
spring.
3.
Coat regulator valve with engine oil. Check that it falls
smoothly into the valve hole by its own weight.
I
If damaged, replace regulator valve set or oil pump assem-
bly.
SLC451A
4.
Check regulator valve to oil pump cover clearance.
Clearance:
6: 0.040 - 0.097 mm (0.0016 - 0.0038 in)
I
If it exceeds the limit, replace oil pump cover.
GI
MA
EM
EC
FE
CL
MT
AT
PD
AX
SU
BR
ST
RS
BT
HA
SC
EL
IDX
ENGINE LUBRICATION SYSTEM
Oil Pump (Cont’d)
LC-5