содержание .. 303 304 305 306 ..
Nissan X-Trail 32. Manual - part 305
CO-46
< REMOVAL AND INSTALLATION >
[QR25DE]
RADIATOR
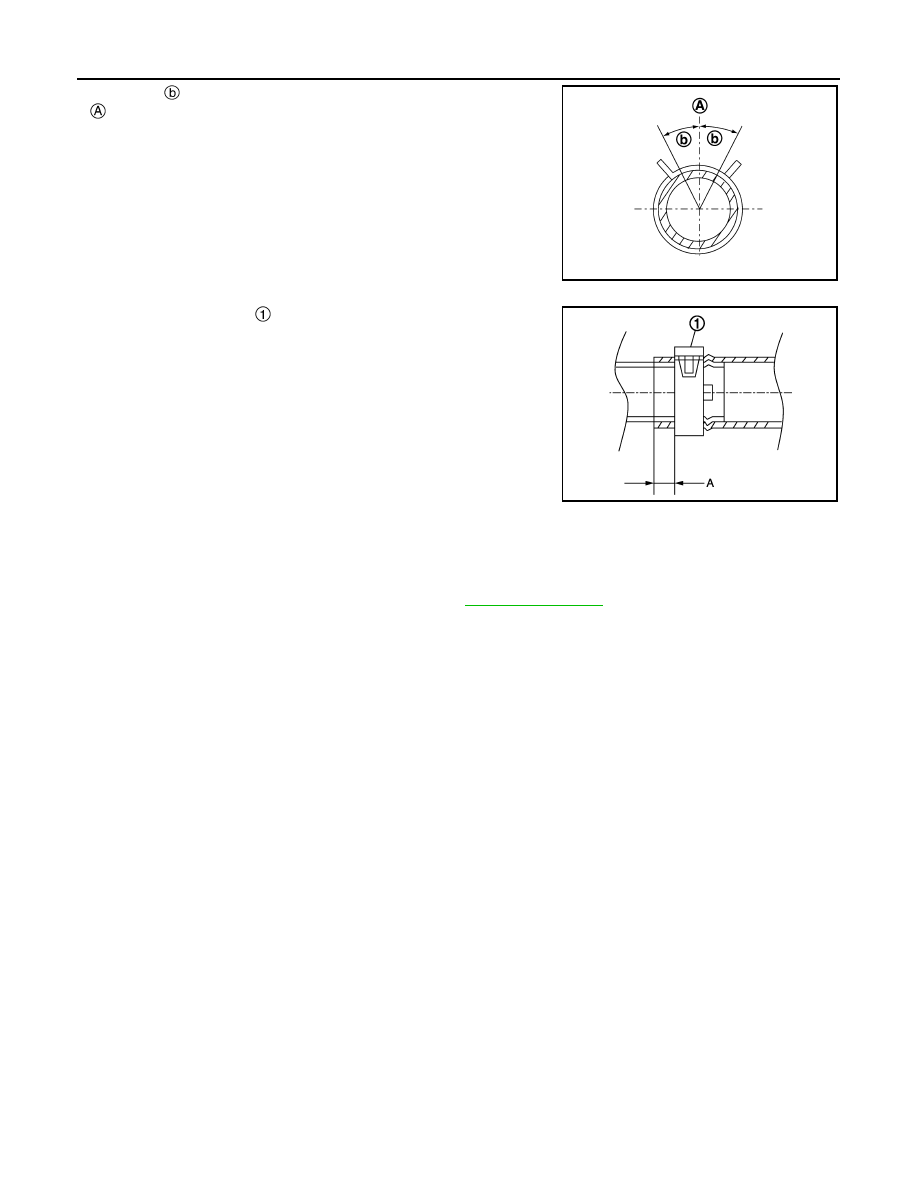
• The angle
created by the hose clamp pawl and the specified line
must be within
±
30
°
as shown in the figure.
• To install hose clamps
, check that the dimension (A) from the
hose end to the hose clamp is within the reference value.
Inspection
INFOID:0000000010782970
INSPECTION AFTER INSTALLATION
• Check for leakage of engine coolant using the radiator cap tester adapter (commercial service tool) and the
radiator cap tester (commercial service tool). Refer to
.
• Start and warm up the engine. Visually check that there is no leakage of engine coolant.
JPBIA4295ZZ
Dimension “A”
3 - 5 mm
0.12 - 0.20 in
JPBIA3527ZZ