Mitsubishi L200. Manual - part 419


  Index      Mitsubishi     Mitsubishi L200 - service repair manual 2012 year


Search            


Content   ..  417  418  419  420   ..


Mitsubishi L200. Manual - part 419


REAR DRUM BRAKE

BASIC BRAKE

35A-40

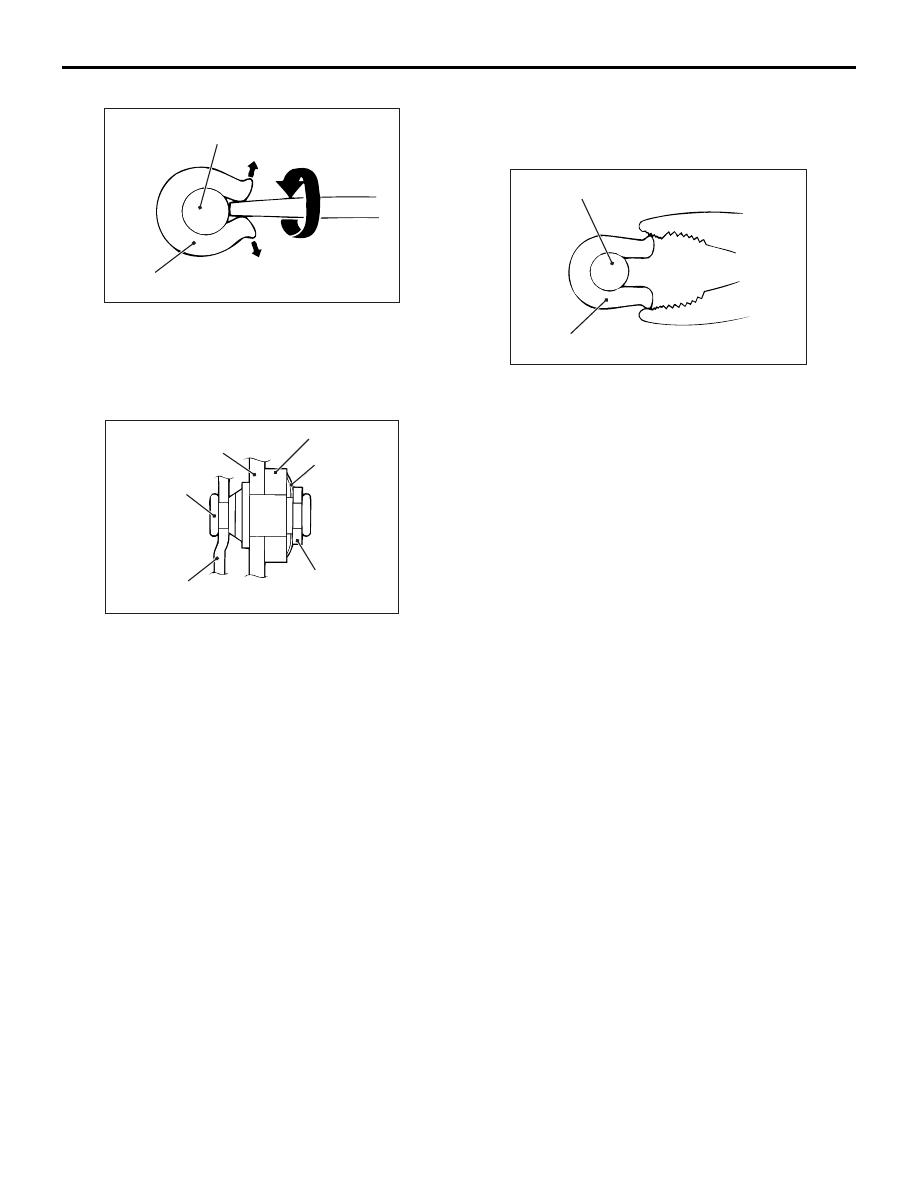
<<A>> RETAINER REMOVAL

AC000924AF

Pin of shoe assembly

Retainer

Use a flat-tipped screwdriver or a similar tool to open 
up the retainer joint. Then remove the retainer.

INSTALLATION SERVICE POINTS

>>A<< WAVE WASHER INSTALLATION

AC006291AE

Shoe and lining assembly

Pin

Adjuster lever

Retainer

Parking lever

Wave washer

Install the wave washer in the direction shown in the 
illustration.

>>B<< RETAINER INSTALLATION

AC000926

Pin of shoe assembly

Retainer

AH

Use pliers or a similar tool to close the retainer end 
onto the pin.

INSPECTION

M1351007600190

BRAKE LINING THICKNESS CHECK
Refer to 

P.35A-17

.

BRAKE DRUM INSIDE DIAMETER CHECK
Refer to 

P.35A-17

.

BRAKE LINING AND BRAKE DRUM CONTACT 
CHECK
Refer to 

P.35A-17

.

REAR DRUM BRAKE

BASIC BRAKE

35A-41

DISASSEMBLY AND REASSEMBLY <2WD 
(except High rider)>

M1351007700711

AC903970

2

7

2

Grease: Repair kit grease, 
              Hyrex No.2 or equivalent

1

4

Wheel cylinder repair kit

Grease

6

9.8 ± 2.0 N·m

N

1

3

4

N

2

7

5

4

N

3

2

N

1

AB

Brake fluid:  DOT 3 or DOT 4

2

Disassembly steps 

1. Boots
2. Piston assembly

>>

A

<< 3. Piston

>>

A

<< 4. Piston cup

5. Spring
6. Bleeder screw
7. Wheel cylinder body

REASSEMBLY SERVICE POINT

>>A<< PISTON CUP/PISTON ASSEMBLY
1. Use brake fluid DOT 3 or DOT 4 to clean the 

wheel cylinder and the piston.

AC000929AM

MB990623

Piston

Lip must face upwards.

REAR DRUM BRAKE

BASIC BRAKE

35A-42

CAUTION

In order to keep the piston cup from becoming 
twisted or slanted, slide the piston cup down 
special tool MB990623 slowly and carefully, with-
out stopping.
2. Apply brake fluid DOT 3 or DOT 4 to the piston 

cups and special tool installer (MB990623).

3. Set the piston cup on special tool with the lip of 

the cup facing up. Fit the cup onto special tool, 
and then slide it down the outside of special tool 
into the piston groove.

DISASSEMBLY AND REASSEMBLY <2WD 
(High rider), 4WD>

M1351007700722

AC503111

2

7

2

Grease: Repair kit grease

1

4

Wheel cylinder repair kit

Grease

6

6.9 ± 1.0 N·m

N

1

3

4

N

2

7

5

4

N

3

2

N

1

AB

Brake fluid:  DOT 3 or DOT 4

2

Disassembly steps 

1. Boots
2. Piston assembly

>>

A

<< 3. Piston

>>

A

<< 4. Piston cup

5. Spring
6. Bleeder screw
7. Wheel cylinder body

REAR DRUM BRAKE

BASIC BRAKE

35A-43

REASSEMBLY SERVICE POINT

>>A<< PISTON CUP/PISTON ASSEMBLY
1. Use brake fluid DOT 3 or DOT 4 to clean the 

wheel cylinder and the piston.

AC000929AN

MB990621

Piston

Lip must face upwards.

CAUTION

In order to keep the piston cup from becoming 
twisted or slanted, slide the piston cup down 
special tool MB990621 slowly and carefully, with-
out stopping.
2. Apply brake fluid DOT 3 or DOT 4 to the piston 

cups and special tool installer (MB990621).

3. Set the piston cup on special tool with the lip of 

the cup facing up. Fit the cup onto special tool, 
and then slide it down the outside of special tool 
into the piston groove.

INSPECTION

M1351007800309

Check the piston and wheel cylinder walls for rust, 
pitting, or damage. If there is any abnormality, 
replace the entire wheel cylinder assembly.


Content   ..  417  418  419  420   ..