Freelander 1. Manual - part 225
SUNROOF
REPAIRS
76-6-5
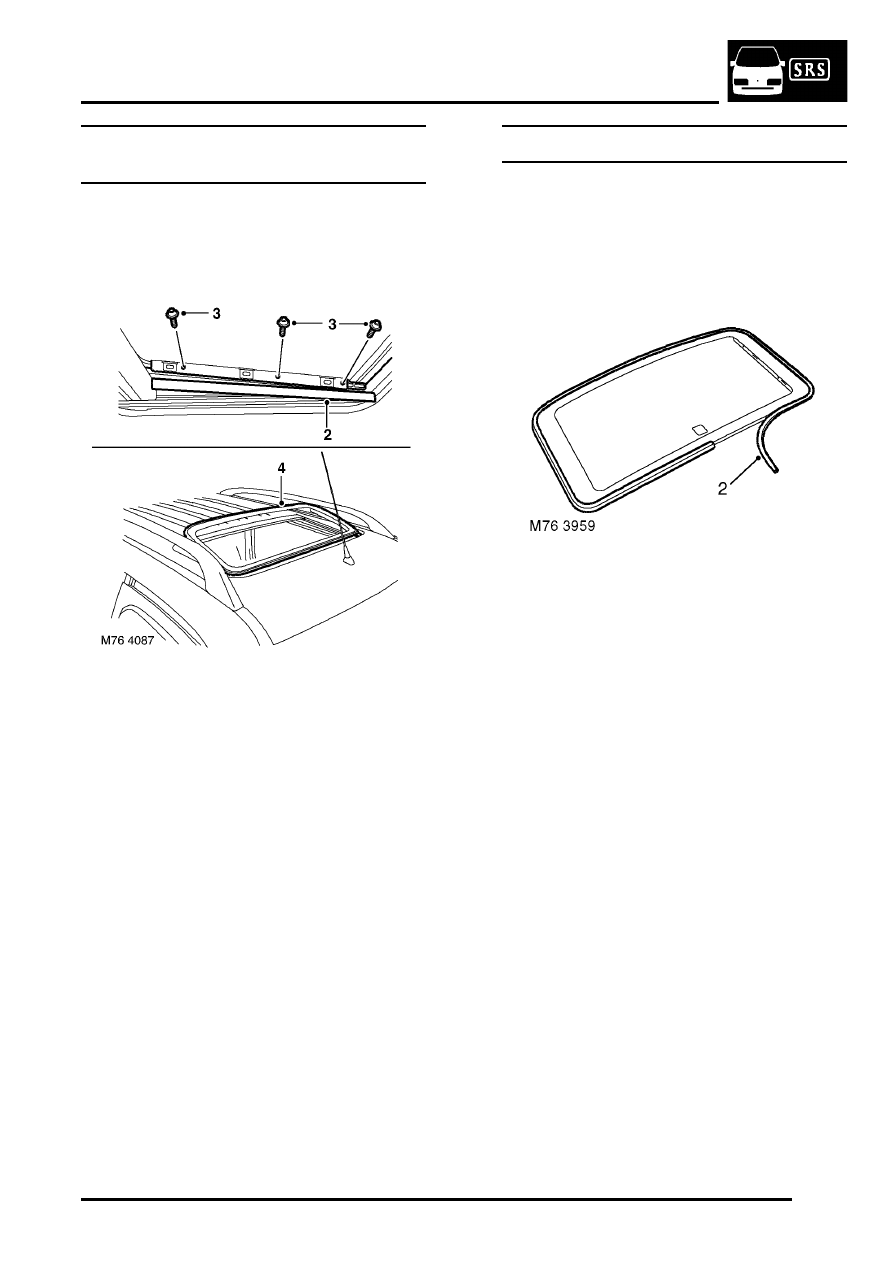
Glass panel - sun/sliding roof - front - 5
door
$% 76.84.03
Remove
1. Open sun roof blind.
2. Remove covers from glass securing screws.
3. Remove 6 screws securing glass.
4. Remove glass.
Refit
1. Position glass, fit screws but do not tighten at
this stage.
2. Align glass to roof and tighten screws,
alignment points should be measured 300 mm
either side of the centre line.
3. Set front of glass, flush to roof panel to 1.0 mm
down.
4. Set rear of glass, flush to roof panel to 1.0 mm
up.
5. Fit screw covers.
6. Operate sunroof to check alignment.
7. Close sun roof blind.
Seal - panel glass - sun roof - 5 door
$% 76.84.05
Remove
1. Remove glass panel.
SUNROOF, REPAIRS, Glass panel -
sun/sliding roof - front - 5 door.
2. Release ends of seal from glass and remove
seal .
Refit
1. Clean adhesive from glass.
2. Position seal, apply adhesive to ends of seal
and secure to glass panel.