Content .. 1783 1784 1785 1786 ..
Jeep Grand Cherokee WK. Manual - part 1785
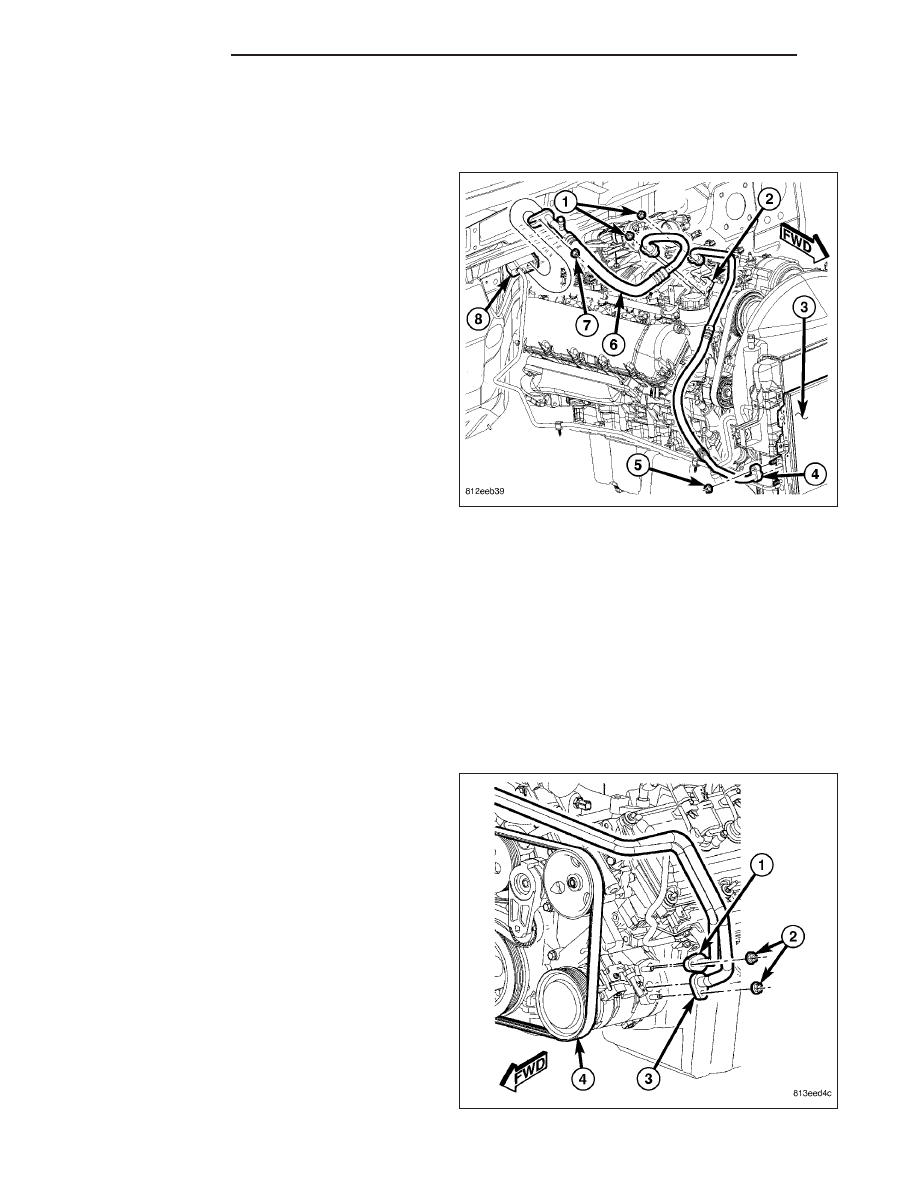
INSTALLATION
3.7L/4.7L ENGINES
1. Position the A/C suction line (6) into the engine
compartment.
2. Remove the tape or plugs from the suction line fit-
tings and the A/C compressor (2) and A/C expan-
sion valve (8).
3. Lubricate a new O-ring and a dual plane seal with
clean refrigerant oil and install them onto the A/C
suction line. Use only the specified seals as they
are made of a special material for the R-134a sys-
tem. Use only refrigerant oil of the type recom-
mended for the A/C compressor in the vehicle.
4. Install the A/C suction line onto the A/C compres-
sor.
5. Install the nut (1) that secures the A/C suction line
to the A/C compressor. Tighten the nut to 20 N·m
(15 ft. lbs.).
6. Install the A/C suction line onto the A/C expansion
valve.
7. Install the nut (7) that secures the A/C suction line to the A/C expansion valve. Tighten the nut to 23 N·m (17 ft.
lbs.).
8. Install the air intake tube and the resonator (Refer to 9 - ENGINE/AIR INTAKE SYSTEM/AIR CLEANER HOUS-
ING - INSTALLATION).
9. Reconnect the negative battery cable.
10. Evacuate the refrigerant system (Refer to 24 - HEATING & AIR CONDITIONING/PLUMBING - STANDARD
PROCEDURE - REFRIGERANT SYSTEM EVACUATE).
11. Charge the refrigerant system (Refer to 24 - HEATING & AIR CONDITIONING/PLUMBING - STANDARD PRO-
CEDURE - REFRIGERANT SYSTEM CHARGE).
5.7L ENGINE
1. Position the A/C suction line (3) into the engine
compartment.
2. Remove the tape or plugs from the opened suction
line fittings and the compressor and expansion
valve ports.
3. Lubricate a new O-ring and a new dual plane seal
with clean refrigerant oil and install them onto the
A/C suction line. Use only the specified seals as
they are made of a special material for the R-134a
system. Use only refrigerant oil of the type recom-
mended for the A/C compressor in the vehicle.
4. Install the A/C suction line onto the A/C compressor
(4).
5. Install the nut (2) that secures the A/C suction line
to the A/C compressor. Tighten the nut to 20 N·m
(15 ft. lbs.).
24 - 488
PLUMBING
WK