Jaguar XJ (2008 year). Manual - part 22
89
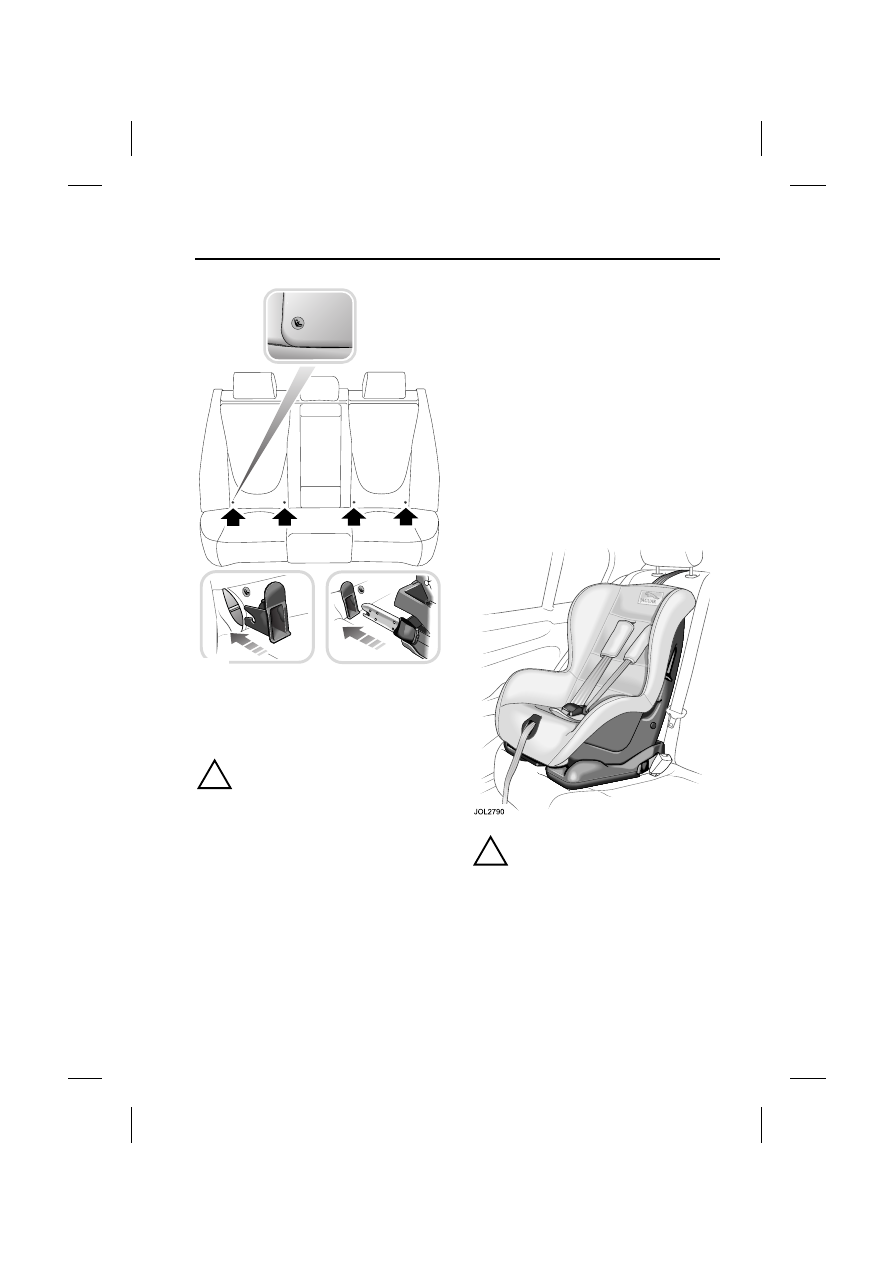
Child Safety
R
The anchorage loops are accessible
through the gap between the rear seat
back and cushion.
Installing the LATCH seat
!
WARNING:
Always follow the manufacturer’s
instructions supplied with the LATCH
child seat. The following is to be
considered only as a guide.
Always ensure the child seat attachment
legs and the vehicle anchorage loops are
kept clean and free of dirt.
1. Raise or remove the head restraint.
2. Slide the child seat into the locking
mechanism.
3. Test the security of the child restraint.
To do this attempt to pull the restraint
away from the vehicle seat and twist
the restraint from side to side. Even if
the restraint appears secure you
should still check the anchor points
visually to ensure correct attachment.
Note: Always ensure that if an upper
tether is provided, it is fitted and tightened
correctly.
Seat with tether straps - Clip the flexible
lower straps to the two anchorage points.
Adjust the length of each strap until the
seat is held firmly against the vehicle seat
back.
!
WARNING:
Do not install a child seat with flexible
lower attachments in the vehicle centre
seat position. The anchorage loops are
only provided to install a compatible
child seat in the vehicle outboard seat
positions.
E86298