Isuzu Amigo / Axiom / Trooper / Rodeo / VehiCross. Manual - part 1652


  Index      Isuzu     Isuzu Amigo / Axiom / Trooper / Rodeo / VehiCross - service repair manual 1999-2002 year


Search            


Content   ..  1650  1651  1652  1653   ..


Isuzu Amigo / Axiom / Trooper / Rodeo / VehiCross. Manual - part 1652


8F–50

BODY STRUCTURE

Installation

To install, follow the removal steps in the reverse order,
noting the following points:

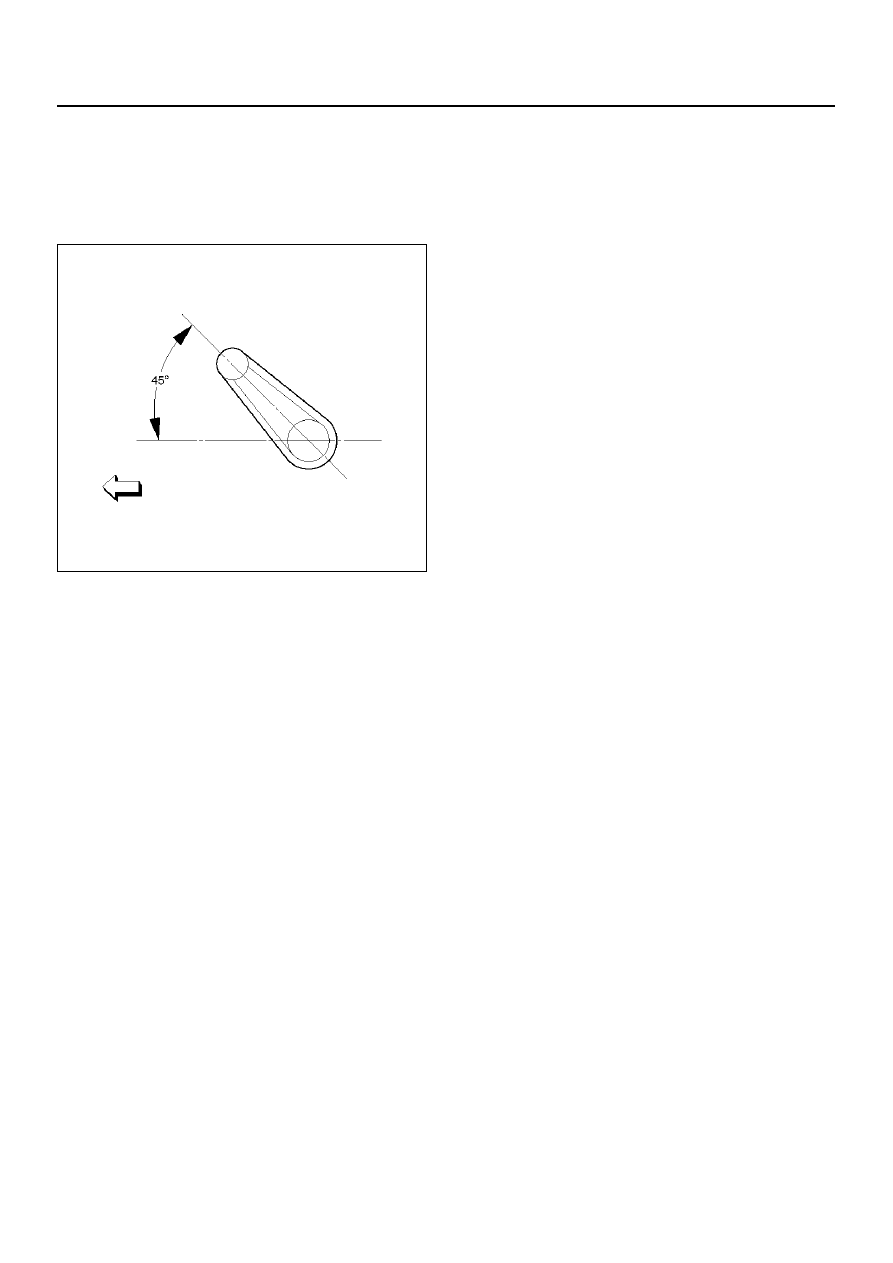
1. Install the regulator handle as shown in the figure, if

equipped without power windows.

631RW005

2. Check to see that the window regulator operates

smoothly and the glass opens and closes properly. 

3. Install the waterproof sheet tightly against the door

panel.

BODY STRUCTURE

8F–51

Rear Window Regulator, Glass and Glass Run

Parts Location

655R100001

EndOFCallout

Legend

(1) Glass Run
(2) Glass
(3) Fixed Glass
(4) Window Regulator
(5) Outside Handle
(6) Door Lock Assembly
(7) Speaker Bracket
(8) Speaker

(9) Bracket

(10) Rear Corner Garnish

(11) Door Trim Panel

(12) Power Window Switch and Pull Case/Window 

Regulator Handle

(13) Inside Handle
(14) Waterproof Sheet
(15) Waist Seal

8F–52

BODY STRUCTURE

Removal

1. Disconnect the battery ground cable.

2. Remove the rear corner garnish.

• Pull the garnish to disconnect the retaining clip.

3. Remove the window regulator handle.

• Remove the clip on the rear side of the regulator

handle using a wire.

651RW003

4. Remove the screw while pulling the inside lever

toward you and then remove the inside handle.

5. Remove the 1 screw at the pull case.

655R100002

6. Pull out the trim panel at the 8 clip positions.

• Disconnect the power window switch connector.

655R100003

7. Remove the power window switch and pull case, if

equipped.

• Remove the fixing screws from back side of the

rear door trim panel.

8. Remove the bracket.

9. Disconnect the speaker harness connector.

10. Remove the speaker with the speaker harness

connector from the door inner panel.

11. Remove the waterproof sheet (1).

• Taking notice of the door harness, peel the

waterproof sheet off the door panel carefully.

651RS002

BODY STRUCTURE

8F–53

12. Remove the speaker bracket.

• Remove the six fixing screws.

13. Remove the fixied glass.

• Remove one bolt and screw as shown in the

figure, then pull it upward.

651RW002

14. Remove the glass.

• First, align the height of regulator to the access

hole. Remove 2 screws attaching bottom channel
and regulator, then remove the glass.

651RW006

• Remove the window glass by tilting it as

necessary.

651RW007

15. Remove the window regulator.

• Remove the window regulator fixing bolts and pull

the regulator out from the lower hole of the door
panel.

651RW005

16. Remove the glass run.

• Pull the glass run out from the door frame.


Content   ..  1650  1651  1652  1653   ..