Isuzu Amigo / Axiom / Trooper / Rodeo / VehiCross. Manual - part 59
REAR SUSPENSION
3D–7
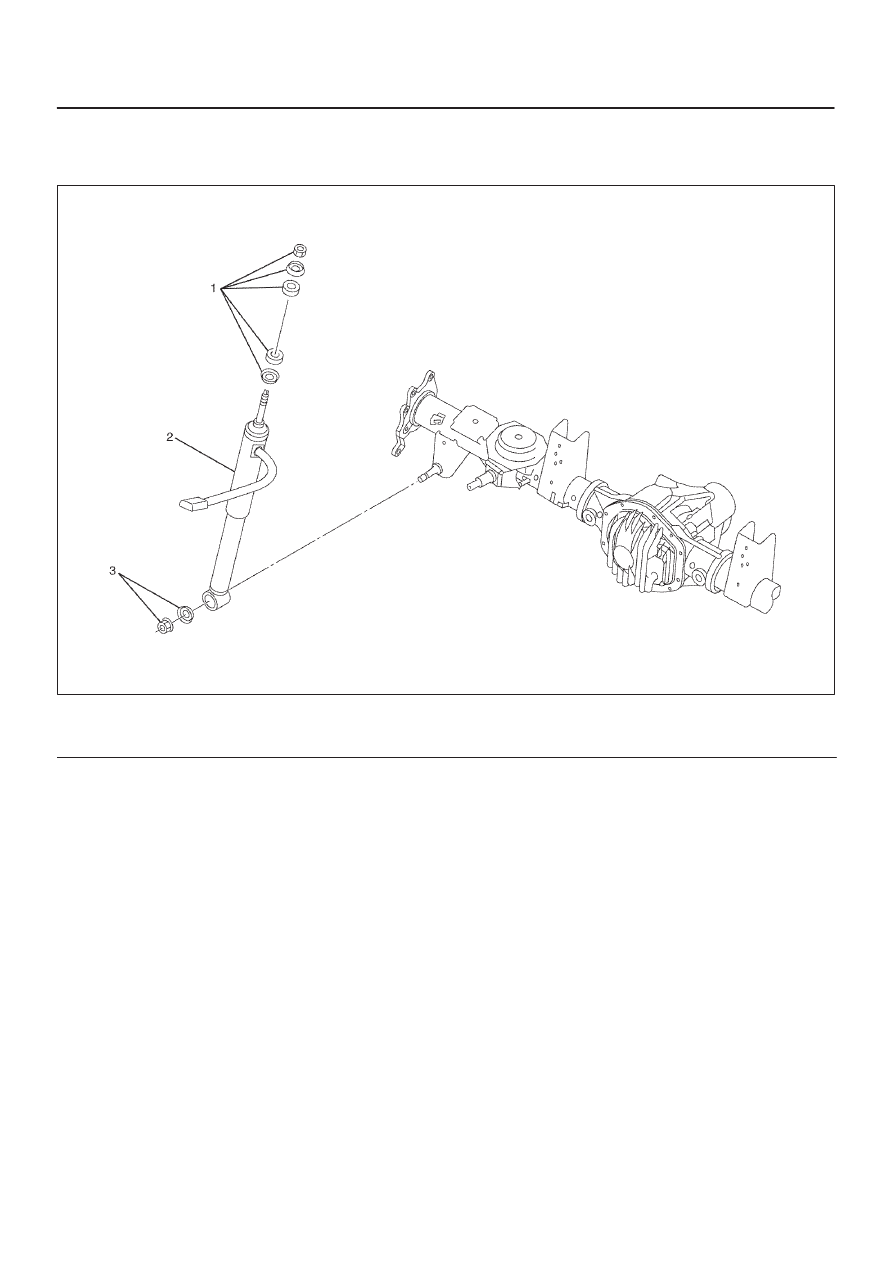
Shock Absorber
Shock Absorber and Associated Parts
461R200001
Legend
(1) Nut, Bush and Washer
(2) Shock Absorber
(3) Nut and Washer
Removal
1. Remove shock absorber fixing nut, bush and washer
(upper side).
2. Remove shock absorber fixing nut and washer (lower
side).
3. Remove shock absorber.
Inspection and Repair
Make necessary correction or parts replacement if wear,
damage, corrosion or any other abnormal condition are
found through inspection.
Check the following parts:
D
Shock absorber
D
Rubber bushing
NOTE: When mounting rubber bushings, be sure not to
use grease on bushings or any other nearby part.
Installation
1. Install shock absorber. When mounting shock
absorber, make sure to be installed in the proper
position and not to use grease on bushings or any
other nearby part. (Refer to
Intelligent Suspension)
2. Install nut and washer (lower side), then tighten the
nut lightly. Retighten to the bolt and nut specified
torque after the vehicle is at curb height.
Torque: 78 N·m (58 lb ft)
3. Install nut, bush and washer (upper side), then tighten
the nut lightly. Retighten to the nut specified torque
after the vehicle is at curb height.
Torque: 20 N·m (14 lb ft)