Infiniti M35/M45 Y50. Manual - part 815
SIDE WINDOW GLASS
GW-57
C
D
E
F
G
H
J
K
L
M
A
B
GW
SIDE WINDOW GLASS
PFP:83300
Removal and Installation
NIS00226
REMOVAL
1.
Remove the rear pillar finisher. Refer to .
2.
Remove the headlining. Refer to
.
3.
Apply protective tape around the side window to protect the painted surface from damage.
4.
Remove the side window glass using piano wire or power cutting tool and an inflatable pump bag.
WARNING:
When cutting the glass from the vehicle, always wear safety glasses and heavy gloves to help pre-
vent glass splinters from entering your eyes or cutting your hands.
CAUTION:
●
Be careful not to scratch the glass when removing.
●
Do not set or stand the glass on its edge. Small chips may develop into cracks.
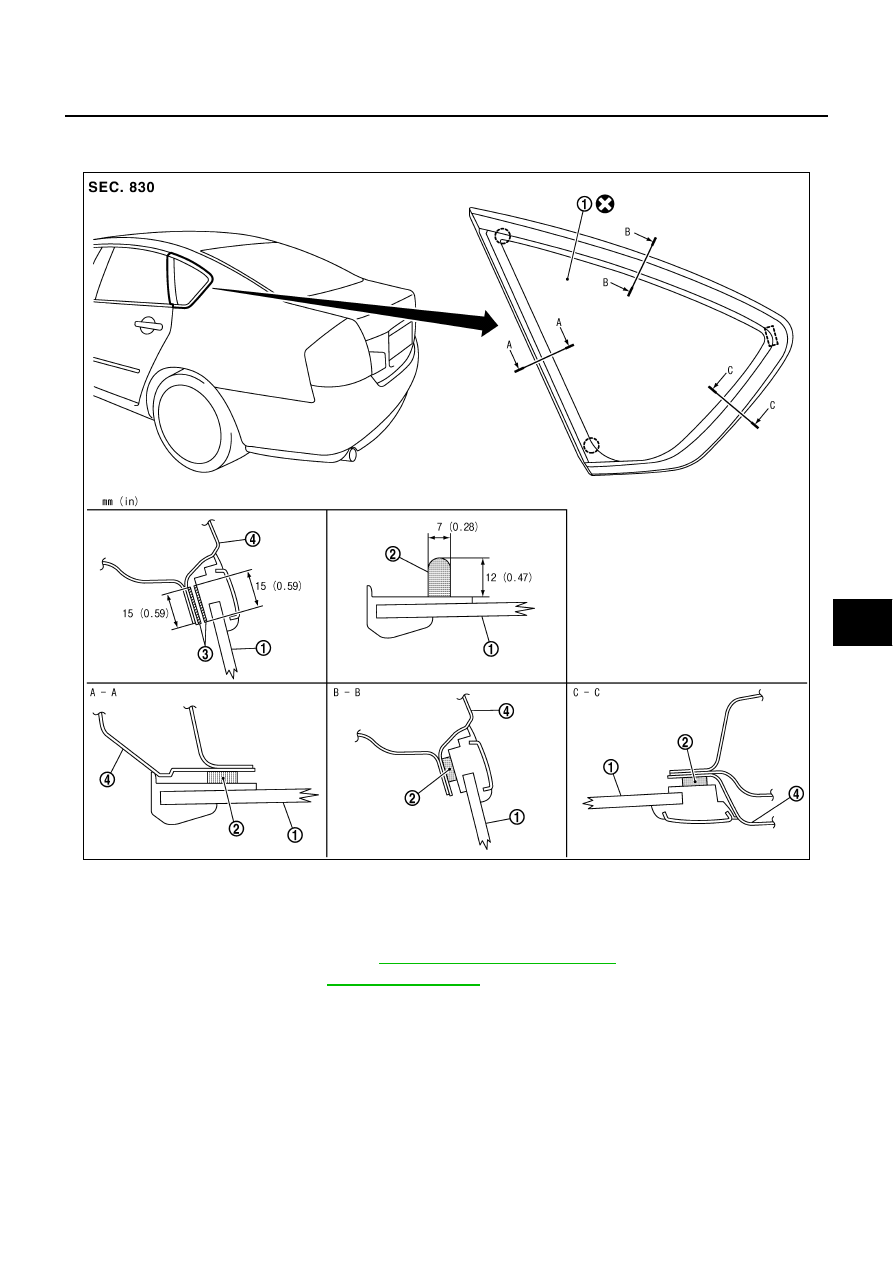
PIIB3285J
1.
Side window glass
2.
Adhesive
3.
Primer
4.
Body side outer panel