Hyundai Atos: Body Repair Manual - part 27
113
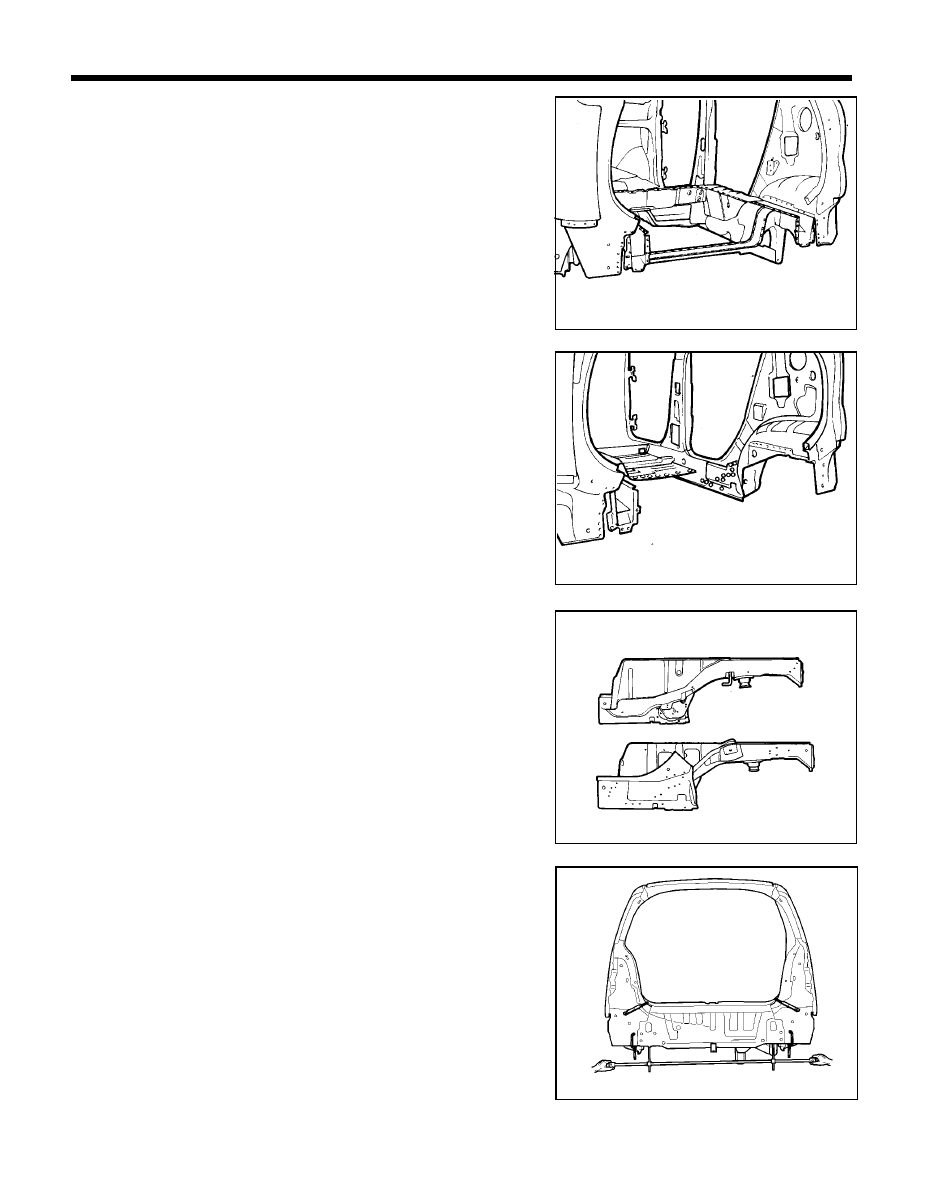
BODY PANEL REPAIR PROCEDURE - Rear floor and rear side member (Assembly)
5.
Remove the rear floor panel and rear side member from the rear
body.
INSTALLATION
1.
Transcribe the cutline to the new rear side members. Drill out the
spotwelds attaching the inner reinforcements.
Remove remaining portions of side members.
2.
Temporarily fit and clamp the rear side members in place.
NOTE
When installing the rear floor side member, temporarily
install the back panel to measure each measurement point.
3.
Measure each measurement point (Refer to BODY DIMEN-
SIONS) and correct the installation position.
4.
If necessary, make temporarily welds, and then check to confirm
that the fit of rear floor panel is correct.
PRO-1580
PRO-1590
PRO-1600
PRO-1610