Hummer H3. Manual - part 11


  Index      Hummer     Hummer H3 - service repair manual 2006-2009 year


Search            


Content   ..  9  10  11  12   ..


Hummer H3. Manual - part 11


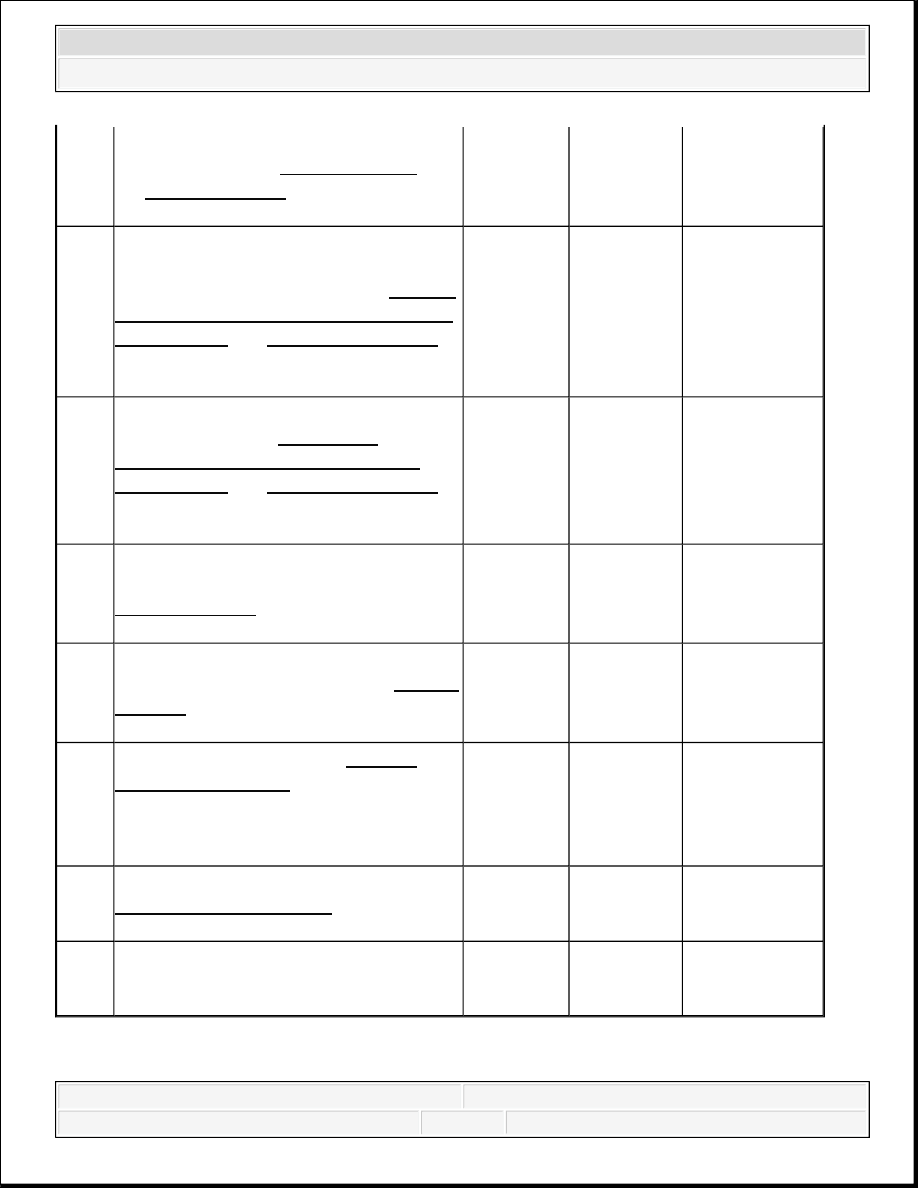
CHARGE INDICATOR ALWAYS ON 

12

circuit, if equipped, for an open or high 
resistance. Refer to Circuit Testing 
andWiring Repairs in Wiring Systems. 
Did you find and correct the condition?

-

Go to Step 

19 

Go to Step 14 

13

Inspect for poor connections at the 
harness connector of the powertrain 
control module (PCM). Refer to Testing 
for Intermittent Conditions and Poor 
Connections
 and Connector Repairs in 
Wiring Systems. 
Did you find and correct the condition?

-

Go to Step 

19 

Go to Step 17 

14

Inspect for poor connections at the 
generator. Refer to Testing for 
Intermittent Conditions and Poor 
Connections
 and Connector Repairs in 
Wiring Systems. 
Did you find and correct the condition?

-

Go to Step 

19 

Go to Step 18 

15

Repair the high resistance or open in the 
ground circuit of the generator. Refer to 
Wiring Repairs in Wiring Systems. 
Did you complete the repair?

-

Go to Step 

19 

-

16

Repair the high resistance or open in the 
generator output circuit. Refer to Wiring 
Repairs
 in Wiring Systems. 
Did you complete the repair?

-

Go to Step 

19 

-

17

Replace the PCM. Refer to Control 
Module References
 in 
Computer/Integrating Systems for 
replacement, setup, and programming. 
Did you complete the replacement?

-

Go to Step 

19 

-

18

Replace the generator. Refer to 
Generator Replacement
Did you complete the replacement?

-

Go to Step 

19 

-

19

Operate the vehicle in order to verify the 
repair. 
Did you correct the condition?

-

System OK

Go to Step 2 


2006 Hummer H3 

2006 ENGINE Engine Electrical - H3


Charge Indicator Always On 

CHARGE INDICATOR INOPERATIVE 

Charge Indicator Inoperative 

Step

Action

Yes

No

1

Did you perform the Diagnostic System Check - 
Vehicle?

Go to Step 2 

Go to 

Diagnostic 

System Check - 

Vehicle in 

Vehicle DTC 

Information

2

1. Turn ON the ignition, with the engine OFF.  

2. Observe the Charge indicator on the 

instrument panel cluster (IPC).  

Does the charge indicator illuminate?

Go to Step 3 

Go to 

Symptoms - 

Engine 

Electrical

3

1. Turn OFF the ignition.  

2. Disconnect the generator connector.  

3. Turn ON the ignition, with the engine OFF.  

Does the charge indicator illuminate?

Go to Step 4 

Go to Charging 

System Test

4

Test the charge indicator control circuit for a short 
to ground. Refer to Circuit Testing and Wiring 
Repairs
 in Wiring Systems. 
Did you find and correct the condition?

Go to Step 6 

Go to Step 5 

5

Replace the powertrain control module (PCM). 
Refer to Control Module References in 
Computer/Integrating Systems for replacement, 
setup, and programming. 
Did you compete the replacement?

Go to Step 6 

-

6

Operate the system in order to verify the repair. 
Did you correct the condition?

System OK

Go to Step 3 

Step

Action

Yes

No

1

Did you perform the Diagnostic System Check - 
Vehicle?

Go to 

Diagnostic 

System Check - 

Vehicle in 


2006 Hummer H3 

2006 ENGINE Engine Electrical - H3


GENERATOR NOISE DIAGNOSIS 

Diagnostic Aids 

Noise from a generator may be due to electrical or mechanical noise. Electrical noise, magnetic 
whine, usually varies with the electrical load placed on the generator and is a normal operating 
characteristic of all generators. When diagnosing a noisy generator, it is important to remember 
that loose or misaligned components around the generator may transmit the noise into the 
passenger compartment and that replacing the generator may not solve the problem. 

Generator Noise Diagnosis 

Go to Step 2 

Vehicle DTC 

Information

2

Turn ON the ignition, with the engine OFF 
observe the charge indicator on the instrument 
panel cluster (IPC). 
Is the charge indicator illuminated?

Go to Testing 

for 

Intermittent 

Conditions and 

Poor 

Connections in 

Wiring Systems

Go to Step 3 

3

Replace the IPC. Refer to Control Module 
References
 in Computer/Integrating Systems for 
replacement, setup, and programming. 
Did you complete the replacement?

Go to Step 4 

-

4

Operate the system in order to verify the repair. 
Did you correct the condition?

System OK

Go to Step 2 

Step

Action

Yes

No

1

Test the generator for proper operation using the 
Generator Tester. Refer to Charging System 
Test

Is the generator operating properly?

Go to Step 2 

Go to Step 11 

2

1. Start the engine. Verify that the noise can 

be heard.  

2. Turn OFF the engine.  

3. Disconnect the 4-way connector from the 

generator.  

4. Start the engine.  


2006 Hummer H3 

2006 ENGINE Engine Electrical - H3


5. Listen for the noise.  

Has the noise stopped?

Go to Step 11 

Go to Step 3 

3

1. Turn OFF the engine.  

2. Remove the drive belt. Refer to Drive Belt 

Replacement (Without A/C) or Drive 
Belt Replacement (With A/C)
 for the 
3.5L engine.  

3. Spin the generator pulley by hand.  

Does the generator shaft spin smoothly and 
without any roughness or grinding noise?

Go to Step 4 

Go to Step 11 

4

Inspect the generator for a loose pulley and/or 
pulley nut. 
Is the generator pulley or pulley nut loose?

Go to Step 11 

Go to Step 5 

5

1. Loosen all of the generator mounting bolts.  

2. Tighten the generator mounting bolts to 

specifications and in the proper sequence, 
if necessary. Refer to Generator 
Replacement
.  

3. Install the drive belt. Refer to Drive Belt 

Replacement (Without A/C) or Drive 
Belt Replacement (With A/C)
 for the 
3.5L engine.  

4. Start the engine.  

Has the noise decreased or stopped?

System OK

Go to Step 6 

6

Inspect the generator for the following 
conditions: 


Strained or stretched electrical connections 


Hoses or other vehicle equipment resting 
on the generator, which may cause the 
noise to be transmitted into the passenger 
compartment  


2006 Hummer H3 

2006 ENGINE Engine Electrical - H3


Content   ..  9  10  11  12   ..