Honda Ridgeline. Manual - part 199


  Index      Honda     Honda Ridgeline - service repair manual 2006-2008 year


Search            


Content   ..  197  198  199  200   ..


Honda Ridgeline. Manual - part 199


01

SJC8A00E10400000000FEAT00

14-181

Road Test

A

1. Warm up the engine to normal operating

temperature (the radiator fan comes on).

2. Apply the parking brake, and block both rear

wheels.

3. Start the engine, then shift to D while pressing the

brake pedal. Press the accelerator pedal, and
release it suddenly. The engine should not stall.

4. Repeat step 3 in all shift lever positions.

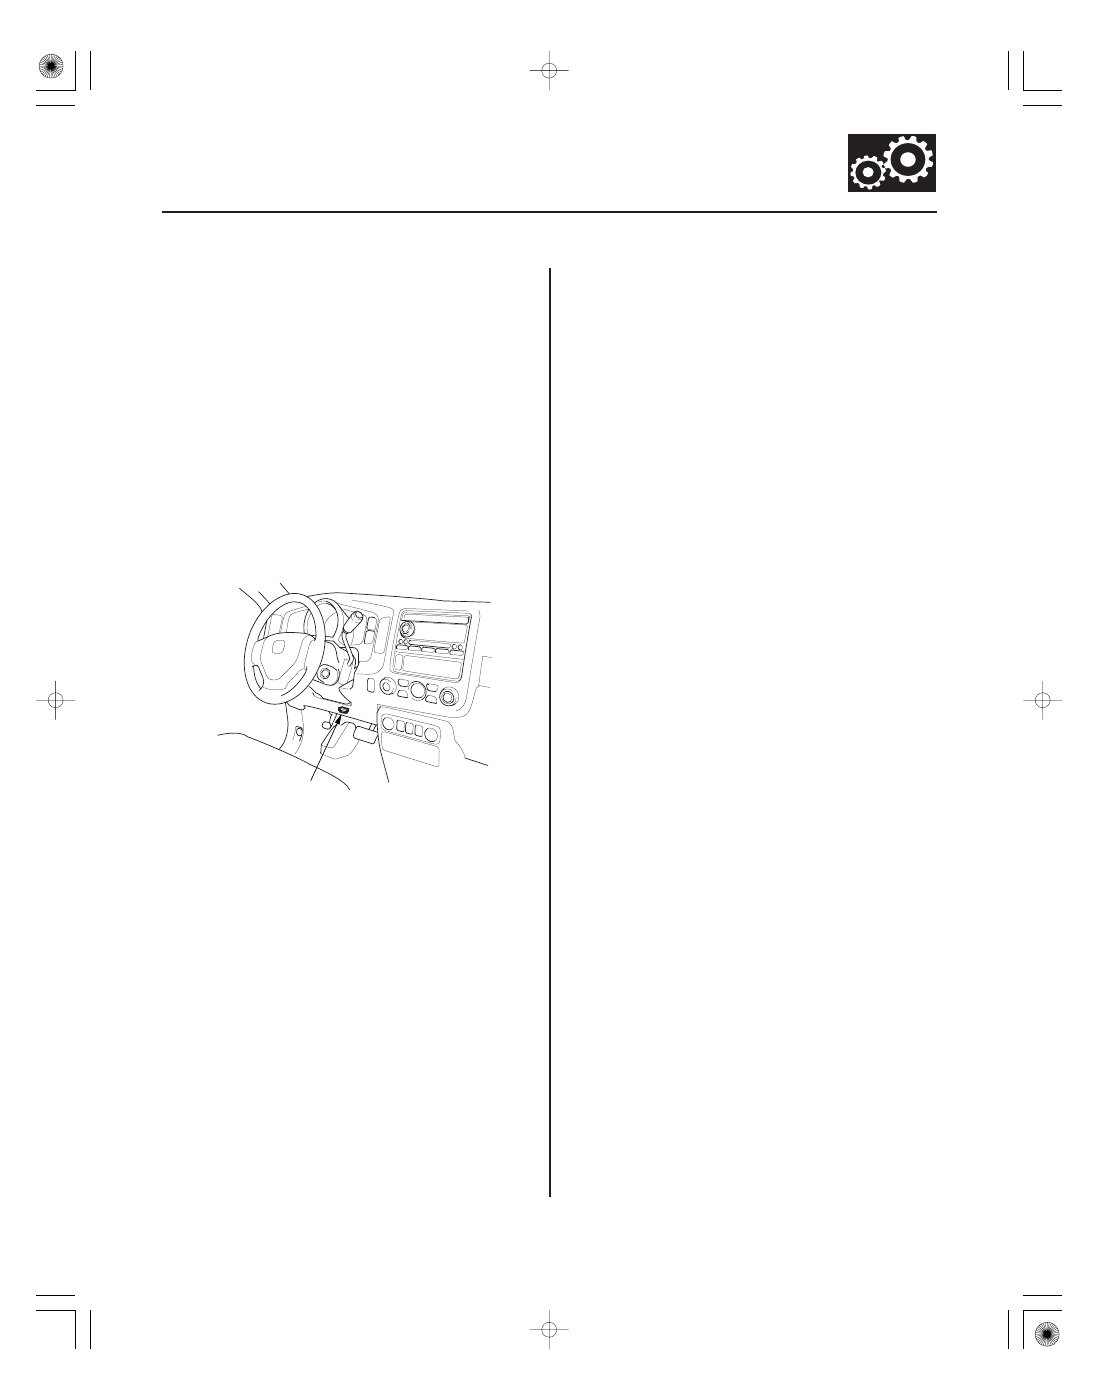
5. Connect the HDS to the DLC (A), and go to the A/T

Mode Menu.

NOTE: If the HDS does not communicate with the
PCM, troubleshoot the DLC circuit (see page
11-194).

6. Prepare the HDS to take a HIGH SPEED SNAPSHOT

(Refer to the HDS user’s guide for more details if
needed):

• Select High Speed icon.
• Select these parameters:

– VSS veh speed
– Output Shaft (Countershaft) Speed
– Input Shaft (Mainshaft) Speed (rpm)
– RPM engine speed
– Relative TP Sensor
– APP Sensor A
– ATF Temp sensor
– Battery voltage
– Shift control
– Brake Switch

• Set the Trigger Type to Parameter.
• Adjust the Parameter setting to APP Sensor A

above 1.0 V.

• Set the recording time to 60 seconds.
• Set the Trigger point to

30 seconds.

7. Find a suitable level road. When you are ready to

do the test, press OK on the HDS.

8. Monitor the HDS, and accelerate quickly until the

APP Sensor B reads 1.0 V. Maintain a steady
throttle until the transmission shifts to 5th gear,
then slow the vehicle and come to a stop.

9. Save the snapshot if the entire event was recorded,

or increase the recording time setting as necessary,
and repeat step 8.

10. Adjust the Parameter setting to 2.5 V. Retest-drive

the vehicle. While monitoring the HDS accelerate
quickly until the APP Sensor B reads 2.5 V.
Maintain a steady throttle until the transmission
shifts to 5th gear (or reasonable speed), then slow
the vehicle and come to a stop.

11. Save the snapshot if the entire event was recorded,

or increase the recording time setting as necessary,
and repeat step 10.

12. Accelerate quickly until the accelerator pedal is to

the floor. Maintain a steady pedal until the
transmission shifts to 3rd gear, then slow to a stop,
and save the snapshot.

(cont’d)

Upshift: D Position

Accelerator pedal position sensor voltage:
0.75 V

Accelerator pedal position sensor voltage:
2.5 V

Fully-opened throttle
Accelerator pedal position sensor voltage:
4.5 V

Downshift: D Position

Accelerator pedal position sensor voltage:
0.75 V

Accelerator pedal position sensor voltage:
2.5 V

Fully-opened throttle
Accelerator pedal position sensor voltage:
4.5 V

14-182

Automatic Transmission

Road Test (cont’d)

13. Review each snapshot individually, and compare

the Shift control, Accelerator pedal position sensor
B voltage, and VSS veh speed to the table below.

1st

2nd

12

13 mph (19

21 km/h)

2nd

3rd

19

21 mph (31

33 km/h)

3rd

4th

25

29 mph (40

46 km/h)

4th

5th

45

49 mph (72

78 km/h)

Lock-up ON

47

50 mph (76

80 km/h)

1st

2nd

29

32 mph (47

51 km/h)

2nd

3rd

50

54 mph (80

86 km/h)

3rd

4th

76

80 mph (121

127 km/h)

4th

5th

94

98 mph (151

157 km/h)

Lock-up ON

102

106 mph (164

170 km/h)

1st

2nd

36

40 mph (58

64 km/h)

2nd

3rd

64

68 mph (102

108 km/h)

3rd

4th

100

104 mph (160

166 km/h)

Lock-up OFF

44

48 mph (70

77 km/h)

5th

4th

39

41 mph (62

66 km/h)

4th

3rd

18

21 mph (29

33 km/h)

2nd

1st

9

11 mph (14

18 km/h)

Lock-up OFF

90

94 mph (145

151 km/h)

5th

4th

73

76 mph (118

122 km/h)

4th

3rd

53

56 mph (86

90 km/h)

3rd

2nd

25

29 mph (40

46 km/h)

2nd

1st

9

11 mph (14

18 km/h)

4th

3rd

89

93 mph (142

148 km/h)

3rd

2nd

58

62 mph (93

99 km/h)

2nd

1st

32

34 mph (51

55 km/h)

14. Drive the vehicle in 4th or 5th gear in D, then shift

to 2. The vehicle should immediately begin to slow
down from engine braking.

15. Shift to 1, accelerate from a stop at full throttle, and

check for abnormal noise and clutch slippage.
Upshifts should not occur in this position.

16. Shift to 2, accelerate from a stop at full throttle, and

check for abnormal noise and clutch slippage.
Upshifts and downshifts should not occur in this
position.

17. Shift to R, accelerate from a stop at full throttle

momentarily, and check for abnormal noise and
clutch slippage.

18. Park the vehicle on a slope (about 16 degrees),

apply the brake, and shift into P. Release the brake;
the vehicle should not move.

NOTE: Always use the parking brake to hold the
vehicle when stopped on an incline in gear.
Depending on the grade of the incline, the vehicle
could roll backwards if the brake is released.

01

SJC8A00E10474000000FEAT00

Stall Speed rpm
Specification: 1,950 rpm
Service Limit: 1,800

2,100 rpm

Problem

Probable causes

14-183

Stall Speed Test

A

1. Apply the parking brake, and block all four wheels.

2. Connect the HDS to the DLC (A), and go to the A/T

data list.

3. Make sure the A/C switch OFF.

4. After the engine has warmed up to normal

operating temperature (the radiator fan comes on),
shift to the 2 position.

5. Firmly press the brake pedal, then fully press the

accelerator pedal for 6 to 8 seconds, and note
engine speed. Do not move the shift lever while
raising engine speed.

6. Allow 2 minutes for cooling, then repeat the test in

D, 1, and R.

NOTE:

• Do not test stall speed for more than 10 seconds

at a time.

• Stall speed tests should be used for diagnostic

purposes only.

• Stall speed tests should be the same in D, 2, 1,

and R.

• Do not test stall speed with the A/T pressure

gauges installed.

7. If any of the stall speeds are out of the service limit,

problems and probable causes are listed in the
table.


Stall speed rpm high
in D, 2, 1, and R

Low fluid level
ATF pump output
low
Clogged ATF strainer
Regulator valve stuck
Slipping clutch

Stall speed rpm high
in 1

Slippage of 1st clutch
Slippage of 1st gear
one-way clutch

Stall speed rpm high
in 2

Slippage of 2nd clutch

Stall speed rpm high
in R

Slippage of 5th clutch

Stall speed rpm low
in D, 2, 1, and R

Engine output low
Engine throttle valve
closed
Torque converter
one-way clutch
slipping

01

02

03

SJC8A00E10410800000FEAT00

Special Tools Required

Pressure

Fluid Pressure

Standard

Service Limit

14-184

Automatic Transmission

Pressure Test

A

A/T OIL PRESSURE
GAUGE SET W/PANEL
07406-0020400 or
07406-0020401

A/T PRESSURE
HOSE, 2,210 mm
07MAJ-PY4011A
(4 required)

A/T PRESSURE
HOSE ADAPTER
07MAJ-PY40120
(4 required)

A

• A/T clutch pressure gauge set

07406-0020400 or 07406-0020401

• A/T pressure hose, 2,210 mm 07MAJ-PY4011A
• A/T pressure hose adapter 07MAJ-PY40120

1. Before testing, make sure the transmission fluid is

filled to the proper level.

2. Raise the vehicle on a lift, and make sure it is

securely supported.

3. Allow the all four wheels to rotate freely.

4. Remove the splash shield (see page 20-179).

5. Warm up the engine (the radiator fan comes on).

Turn off the engine, and connect the HDS to the
DLC (A).

6. Connect the oil pressure gauge to the line pressure

inspection port (A). Do not allow dust or other
foreign particles to enter the hole while connecting
the gauge.

7. Start the engine, and run it at 2,000 rpm in P or N.

8. Measure the line pressure at the line pressure

inspection hole (A).

NOTE: Higher pressure may be indicated if
measurements are made in shift lever positions
other than P or N.

Line (A)

900 kPa
(9.2 kgf/cm ,
130 psi)

950 1,010 kPa
(9.7 10.3 kgf/cm ,
140 146 psi)

2

2


Content   ..  197  198  199  200   ..