Honda Civic. Manual - part 677


  Index      Honda     Honda Civic - service repair manual 2006-2009 year


Search            


Content   ..  675  676  677  678   ..


Honda Civic. Manual - part 677


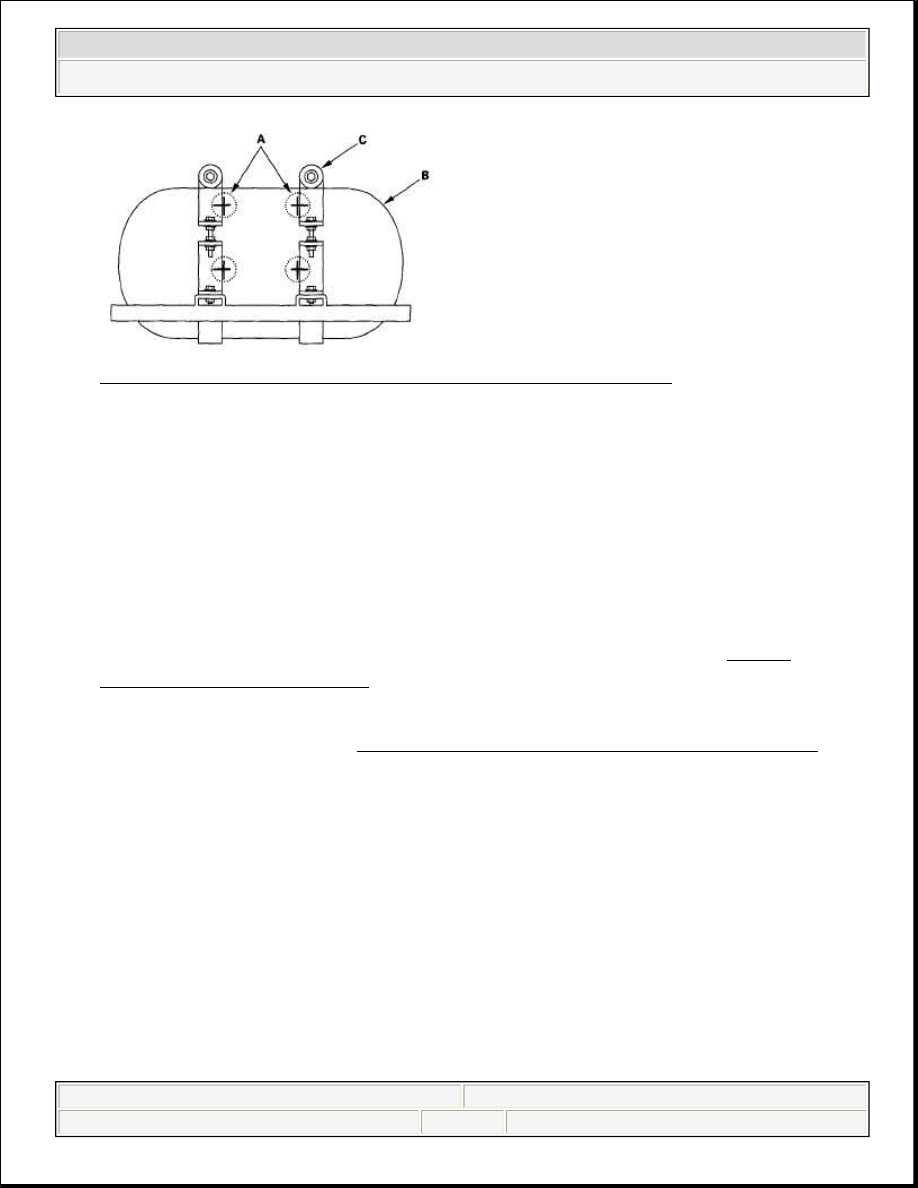
Fig. 85: Identifying Alignment Marks, Tank And Bands 

5. If the tank has any problems listed in step 4, refer to the NGV Fuel Container 

Inspection Guidelines booklet for further information.  

FUEL TANK SCRAPPING 

1. Slowly remove the manual lock-down valve. Install the manual override vent 

tool in its place. Relieve the fuel pressure from the fuel tank (see FUEL 
PRESSURE RELIEVING
 ).  

2. Purge any remaining fuel from the tank with compressed air.  
3. Remove the fuel tank (see FUEL TANK REMOVAL/INSTALLATION ).  
4. Dispose of the fuel tank according to your local regulations.  

FUEL PIPE CONNECTOR O-RING REPLACEMENT 

1. Remove the old O-ring.  

NOTE:

The fuel tank must be replaced 15 years after its production 
date.

NOTE:

a. To prevent O-ring contamination, be sure O-rings and 

mating surfaces are clean just before assembly.  

b. Install O-rings with clean hands. Do not install O-rings 

while wearing fibrous gloves.  

c. Do not twist O-rings.  


2008 Honda Civic GX 

2006-08 ENGINE PERFORMANCE Fuel Supply System - Civic GX


2. Wrap vinyl tape around the threads, and coat the surface of the tape with 

silicone oil or grease. 

Fig. 86: Identifying Vinyl Tape 

3. Install a new O-ring (A) into the groove. 

Fig. 87: Identifying O-Ring 

4. Using a small brush, apply silicone oil or grease to the outer surface of the O-

ring.  

5. Remove the vinyl tape.  

FUEL PRESSURE REGULATOR P1 REPLACEMENT 

NOTE:

Wrap the vinyl tape (A) so that there is no stepped 
portion.

NOTE:

Be careful not damage the sealing face of the O-ring.

WARNING:

Compressed natural gas is flammable and highly 


2008 Honda Civic GX 

2006-08 ENGINE PERFORMANCE Fuel Supply System - Civic GX


1. Relieve fuel pressure between the engine and the manual shut-off valve (see 

FUEL PRESSURE RELIEVING ).  

2. Drain the engine coolant, refer to the COOLANT REPLACEMENT .  
3. Remove the cowl cover and under-cowl panel, refer to the COWL COVER 

REPLACEMENT .  

4. Remove the fuel pressure regulator protector (A). 

Fig. 88: Exploded View Of Fuel Pressure Regulator With Torque 
Specifications
 

5. Remove the fuel feed hose (B), then disconnect the hoses (C) and the fuel line 

(D). 

explosive. You could be killed or seriously injured if 
leaking natural gas is ignited. 
Stop the engine, and keep heat, sparks and flames 
away.

NOTE:

Always use two wrenches when removing or installing 
the fuel line nuts (see FUEL LINE INSPECTION ).


2008 Honda Civic GX 

2006-08 ENGINE PERFORMANCE Fuel Supply System - Civic GX


6. Disconnect the connectors (E), and remove the bolt (F) and the nut (G).  
7. Lift the vehicle and support it with jackstands.  
8. Remove exhaust pipe A, refer to the EXHAUST PIPE AND MUFFLER 

REPLACEMENT .  

9. Remove the heat shield (A). 

Fig. 89: Identifying Heat Shield With Torque Specifications 

10. Remove fuel pressure regulator P1 (A) from the bracket (B). 

Fig. 90: Removing Fuel Pressure Regulator From Bracket 

11. Move fuel pressure regulator P1 (A) as shown. 


2008 Honda Civic GX 

2006-08 ENGINE PERFORMANCE Fuel Supply System - Civic GX


Content   ..  675  676  677  678   ..