Dodge Durango (HB). Manual - part 25


  Index      Dodge     Dodge Durango (HB) - service repair manual 2005 year


Search            


Content   ..  23  24  25  26   ..


Dodge Durango (HB). Manual - part 25


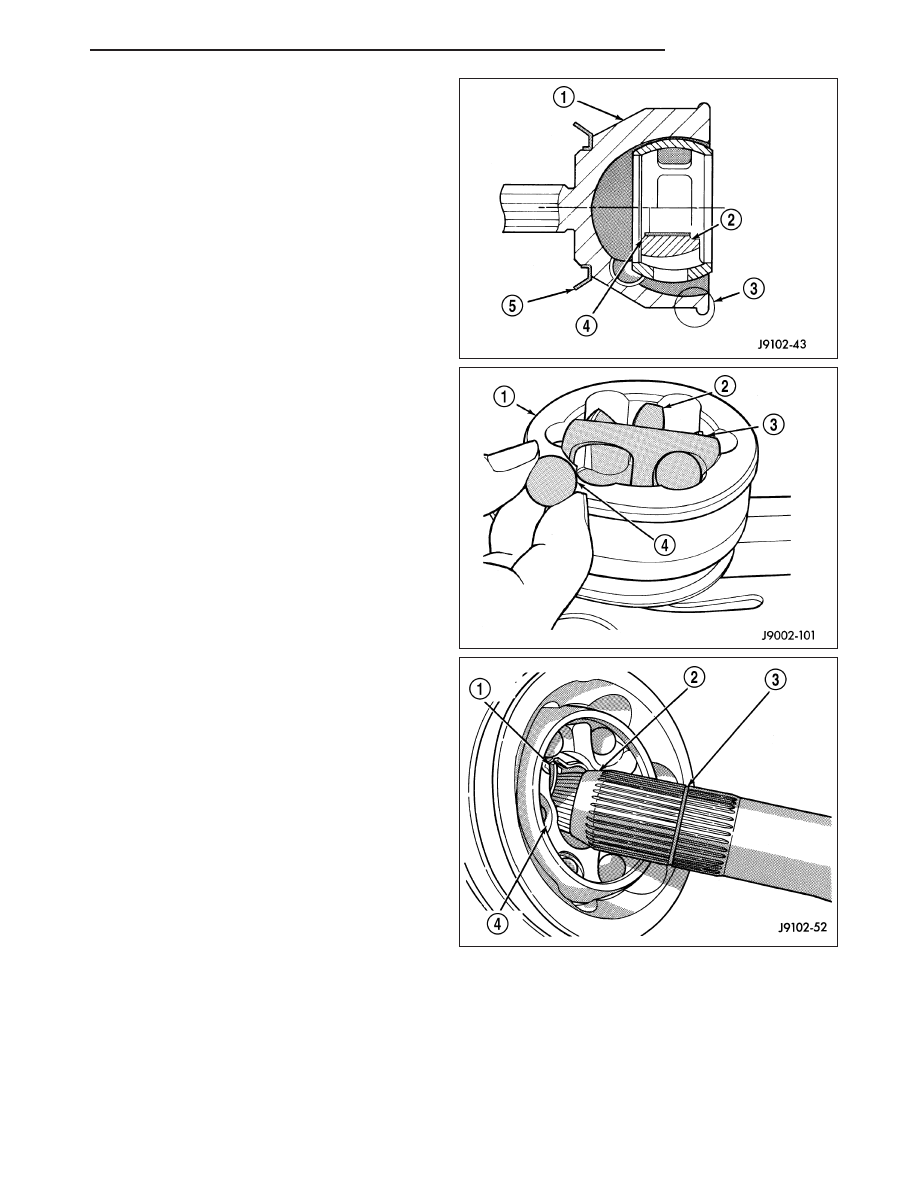
6. Rotate cage 90° into the housing (1).

7. Apply lubricant included with replacement boot/joint

to the ball races. Spread lubricant equally between
all the races.

8. Tilt inner race/hub (2) and cage (3) and install the

balls (4).

9. Place new clamps onto new boot and slide boot

onto the shaft to it’s original position.

10. Apply the rest of lubricant to the C/V joint and

boot.

11. Push the joint onto the shaft until the snap ring (1)

seats in the groove (3). Pull on the joint to verify
the span ring has engaged.

HB

HALF SHAFT

3 - 27

12. Position boot on the joint in it’s original position.

Ensure boot is not twisted and remove any
excess air.

13. Secure both boot clamps (2) (4) with Clamp

Installer C-4975A. Place tool on clamp bridge and
tighten tool until the jaws of the tool are closed.

C/V JOINT/BOOT-INNER

REMOVAL

1. Place shaft in vise with soft jaws and support C/V

joint.

2. Remove clamps (2) (4) with a cut-off wheel or

grinder.

NOTE: Do not damage C/V housing or half shaft
with cut-off wheel or grinder.

3. Remove housing (1) from the half shaft and slide

boot (2) down shaft.

3 - 28

HALF SHAFT

HB

4. Remove housing bushing from the housing.

5. Remove tripod (2) snap ring (1).

6. Remove tripod and boot from the half shaft.

7. Clean and inspect C/V components for excessive

wear and damage. Replace the tripod as a unit
only if necessary.

INSTALLATION

1. Slide new boot down the half shaft.

2. Install tripod (1) and tripod snap ring on the half

shaft.

3. Pack grease supplied with the joint/boot into the

housing and boot.

4. Coat tripod with supplied grease.

5. Install new bushing (2) onto the housing (1).

HB

HALF SHAFT

3 - 29

6. Insert tripod and shaft in the housing.

7. Position boot (2) on the joint in it’s original position.

NOTE: Verify boot is not twisted and remove any
excess air.

8. Secure both boot clamps with Clamp Installer

C-4975A. Place tool on clamp bridge and tighten
tool until the jaws of the tool are closed.

3 - 30

HALF SHAFT

HB


Content   ..  23  24  25  26   ..