DAF LF45, LF55 Series. Manual - part 656


  Index      DAF     DAF LF45, LF55 Series - service repair manual


Search            


Content   ..  654  655  656  657   ..


DAF LF45, LF55 Series. Manual - part 656


©

 200515

4-15

Removal and installation

EXPLANATORY NOTES ON THE MAINTENANCE ACTIVITIES

ΛΦ45/55 series

5

4.11 REMOVAL AND INSTALLATION, F36/F48 FRONT AXLE HUB SEAL

Removing the hub seal
1.

Remove the seal from the hub using the 

special tool (DAF no. 1329458). Make sure 

that the chamber is not damaged during this.

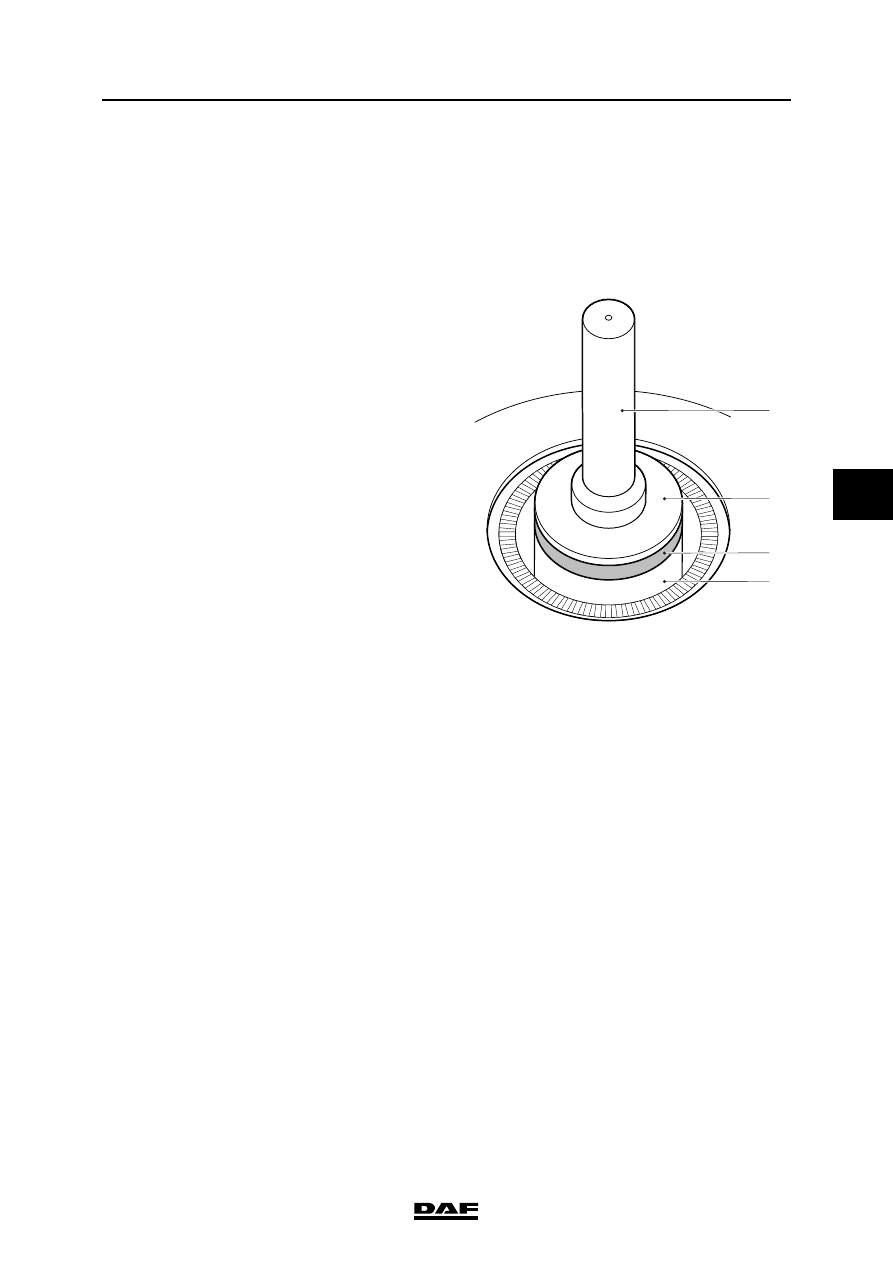
Installing the hub seal
1.

Fit special tool (A) (DAF no. 1329485) for 

the F36 front axle and (DAF no. 1329484) 

for the F48 front axle) in the driving tool (B) 

(DAF no. 0499809).

2.

Using the special tool, fit the new seal (1) in 

the hub (2). The open side of the seal (1) 

must face the hub (2). Apply a little grease to 

the sealing lip of seal (1).

Drive and chassis

A

B

1

2

S7 00 588

EXPLANATORY NOTES ON THE MAINTENANCE ACTIVITIES

4-16

©

 200515

Removal and installation

5

ΛΦ45/55 series

4.12 REMOVAL AND INSTALLATION, AUTOMATIC GEARBOX OIL FILTERS

Allison 1000 & 2000 series automatic gearbox

To prevent skin injury, avoid 

unnecessary contact with the 

drained oil.

Removing the oil filters
1.

Clean the oil filter (1) and filter (5), if present, 

as well as the surrounding area.

2.

Loosen the oil filters on the gearbox and heat 

exchanger. Collect any oil that is flowing out.

3.

Remove the magnetic rings (2) and (4) and 

check them for wear particles.

Note:

If there are larger wear particles in the wear 

swarf, this points to advanced wear in the 

gearbox. The cause must be tracked down.

4.

Clean the magnetic rings and the contact 

surfaces on the gearbox housing and the 

heat exchanger.

Installing the oil filters
1.

Fit the magnetic rings (2) and (4) on the 

gearbox housing and the heat exchanger.

2.

Lightly lubricate the new oil filter (1) and filter 

(5), if present, with clean gearbox oil and 

place the oil filters on the gearbox and heat 

exchanger.

3.

Tighten the oil filters until they touch the 

contact surface. Manually tighten the oil 

filters another 360

.

4.

Check the oil level, see chapter "Inspection 

and adjustment".

}

1

2

V3 00 480

5

4

6

3

V3 00 556

©

 200515

4-17

Removal and installation

EXPLANATORY NOTES ON THE MAINTENANCE ACTIVITIES

ΛΦ45/55 series

5

Allison MD 3060 automatic gearbox

Removing the oil filters
1.

Remove the attachment bolts from the filter 

covers (2) and remove the filter covers. 

Collect any oil that is flowing out. 

2.

Remove the oil filters from the oil sump. 

3.

Remove the various O-rings and the gasket 

from the filter covers.

4.

Remove any traces of gasket from the filter 

covers and the contact surfaces.

Installing the oil filters
1.

Lightly lubricate the new O-rings with clean 

gearbox oil and fit the various O-rings to the 

filter covers.

Note:

Compare the new O-rings to the old O-rings 

to ensure that the correct O-rings are used.

2.

Fit a new gasket to the filter covers.

3.

Lightly lubricate the rubber inner ring of the 

oil filters with clean gearbox oil and fit the oil 

filters to the filter covers. 

4.

Fit the filter covers together with the oil filters 

to the gearbox and tighten the attachment 

bolts to the specified torque, see "Technical 

data".

5.

Check the oil level, see chapter "Inspection 

and adjustment".

V300371

2

1

EXPLANATORY NOTES ON THE MAINTENANCE ACTIVITIES

4-18

©

 200515

Removal and installation

5

ΛΦ45/55 series


Content   ..  654  655  656  657   ..