DAF LF45, LF55 Series. Manual - part 575


  Index      DAF     DAF LF45, LF55 Series - service repair manual


Search            


Content   ..  573  574  575  576   ..


DAF LF45, LF55 Series. Manual - part 575


8

LF45/55 series

Removal and installation

SINGLE REAR AXLE 5.10

4-9

7.

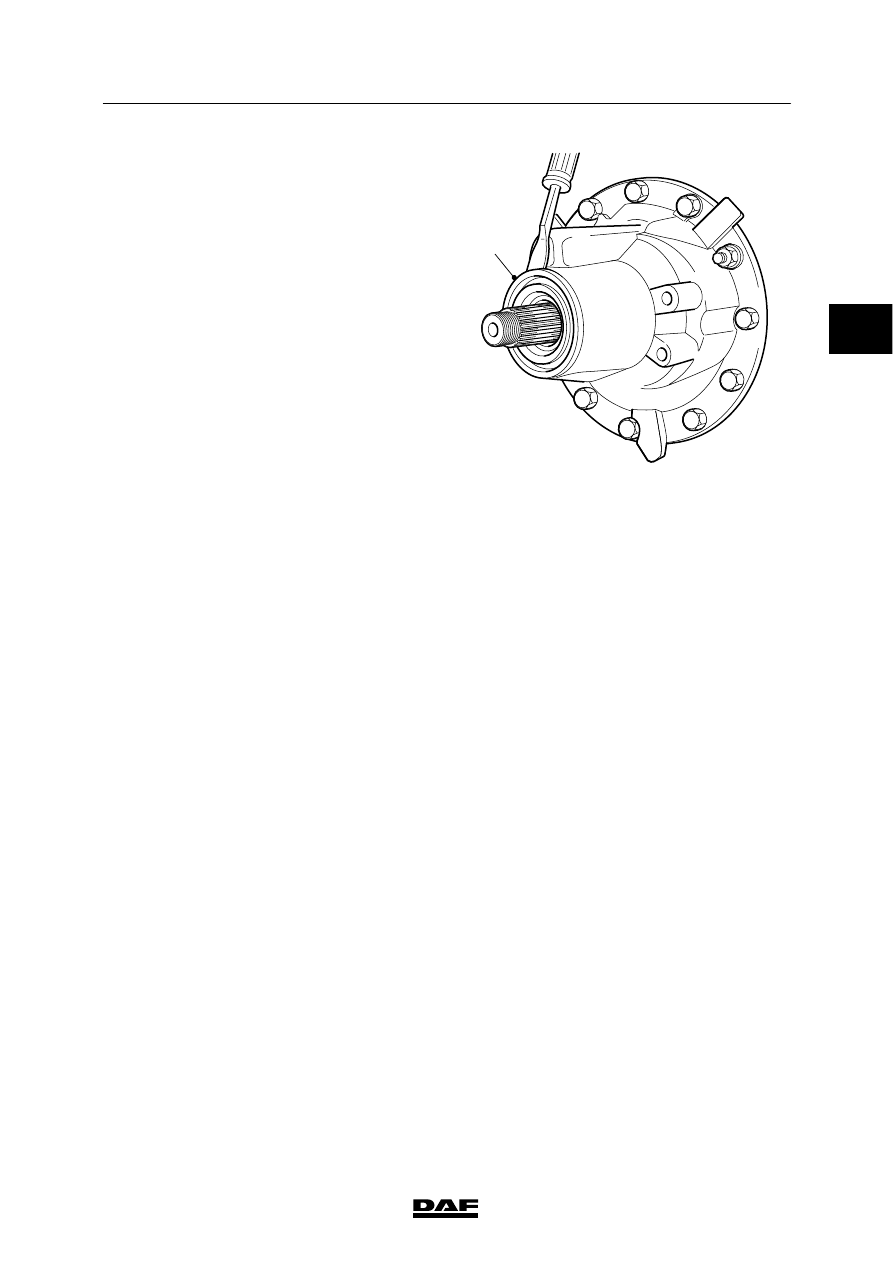
Remove the oil seal (1) from the differential
housing.

A8 00 441

1

Installing pinion oil seal
1.

Use the special tool (DAF No. 1453141) to
fit the oil seal. Make sure that the steel
outer ring of the oil seal abuts fully against
the differential housing.

2.

Check the dust seal ring of the drive flange.
If required, replace the dust seal ring.

3.

Check the drive flange at the oil seal
running surface for grooves and/or sharp
edges. If required, replace the drive flange.

4.

Clean the splines of the pinion and drive
flange.

5.

Apply the specified sealant to the splines of
the pinion. See main group “Technical data”.

6.

Fit the drive flange.

7.

Fit a new drive flange nut.

2

ᓻ 200313

8

SINGLE REAR AXLE 5.10

Removal and installation

LF45/55 series

4-10

8.

Fit the special tool (B) (DAF No. 0484977)
on the drive flange to prevent it from
turning. Tighten the drive flange nut using a
12-sided socket and a torque amplifier (A)
until no play is noticeable on the pinion.

9.

Turn the drive flange a number of times to
“seat” the pinion bearings.

10. Tighten the drive flange until the slip torque

of the drive flange nut exceeds the noted
value by 0.4 - 0.6 Nm.

Note:
If the slip torque of the drive flange nut
exceeds the noted value increased by
0.4 - 0.6 Nm, loosen the drive flange nut a
few strokes and repeat the setting
procedure.

11. Fit the stub axles.

12. Fit the prop shaft to the drive flange.

A

B

A8 00 386

2

ᓻ 200313

8

LF45/55 series

Removal and installation

SINGLE REAR AXLE 5.10

4-11

4.8 REMOVAL AND INSTALLATION, DIFFERENTIAL

Removing differential
1.

Drain the oil from the differential. See
chapter “Draining and filling”.

2.

Remove the prop shaft from the drive
flange.

3.

Remove the stub axles.

4.

Attach the differential securely to a lifting
device.

5.

Remove the attachment bolts and nuts from
the differential.

6.

Remove the differential from the axle
housing by carefully pressing the differential
off the axle housing using a pry bar at the
indicated places.

Installing differential
1.

Clean the mating surfaces of the axle
housing and the differential housing.
Regrind the mating faces lightly. Do not
damage the mating faces in the process.

2.

Clean and degrease the bolts. Check the
bolts and stud bolts for signs of damage.

3.

Apply a thin, even layer of sealant to the
mating surface and around the bolt holes of
the axle housing.

4.

Apply locking compound to the attachment
bolts. See main group “Technical data”.

5.

Fit the differential into the axle housing. Fit
the attachment bolts and nuts and tighten
them evenly. Tighten the attachment bolts
and nuts to the specified tightening torque.
See “Technical data”.

6.

Fit the stub axles.

7.

Fit the prop shaft to the drive flange.

8.

Fill the differential with oil. See chapter
“Draining and filling”.

A8 00 440

2

ᓻ 200313

8

SINGLE REAR AXLE 5.10

Removal and installation

LF45/55 series

4-12

ᓻ 200313

2


Content   ..  573  574  575  576   ..