DAF LF45, LF55 Series. Manual - part 319


  Index      DAF     DAF LF45, LF55 Series - service repair manual


Search            


Content   ..  317  318  319  320   ..


DAF LF45, LF55 Series. Manual - part 319


©

 200416

5-11

Removal and installation

CE ENGINE FUEL SYSTEM

ΛΦ45/55 series

4

5

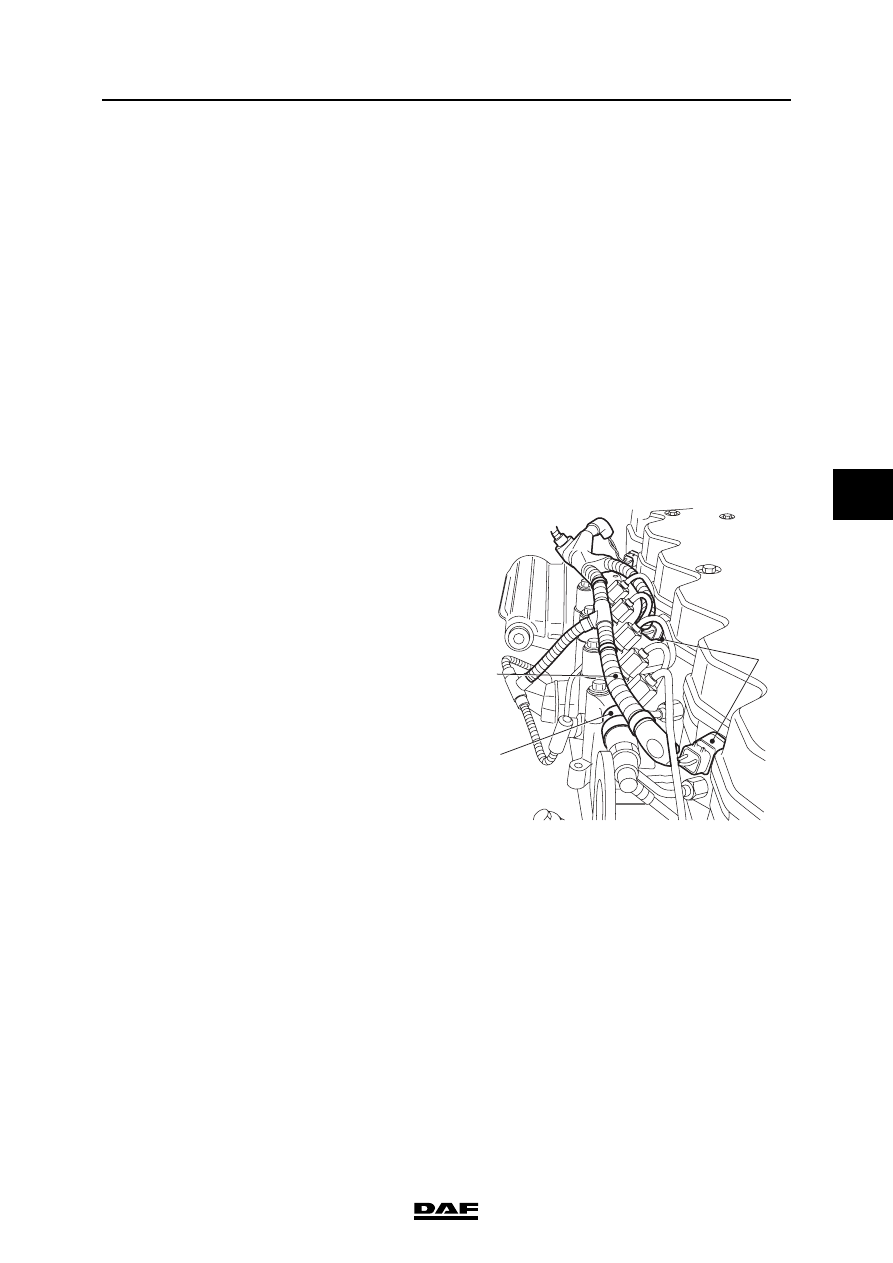
5.4 REMOVAL AND INSTALLATION, FUEL RAIL

When removing the fuel rail, fuel will 

escape. Collect the fuel and avoid 

the risk of fire. 

Dirt in the fuel system can lead to 

significant damage to parts of the 

system. Prevent this by cleaning the 

parts before disassembly and then 

sealing all open connections.

Removing the fuel rail
1.

Remove the connector from the fuel rail 

pressure sensor.

2.

If necessary, remove the plug of the inlet air 

temperature/boost pressure sensor by 

loosening the connector.

3.

Remove the connectors of the injectors (1) 

from the valve sleeve.

4.

Disconnect the cable harness (3) on the fuel 

rail (2) and bend the cable harness away 

from the fuel rail.

}

}

i400809

3

1

2

CE ENGINE FUEL SYSTEM

5-12

©

 200416

Removal and installation

5

ΛΦ45/55 series

4

5.

Remove the fuel return pipe from the 

pressure-limiting valve on the fuel rail 

6.

Loosen the pipe clamps from the high-

pressure pipe to the fuel rail.

7.

Loosen the high-pressure pipe from the high-

pressure pump to the fuel rail on the fuel rail 

side by unscrewing the union.

8.

Disconnect the injector pipes.

9.

Remove the fuel rail attachment bolts (2).

10. Remove the fuel rail (3).

Installing the fuel rail
1.

Ensure that the fuel rail is clean.

2.

Fit the fuel rail (3) and hand-tighten the 

attachment bolts (2).

3.

Fit the fuel return pipe (1) onto the pressure-

limiting valve on the fuel rail.

4.

Fit the injector pipes.

5.

Fit the pipe clamps from the high-pressure 

pipe to the fuel rail. Do not tighten them yet.

6.

Fit the high-pressure pipe unions from the 

high-pressure pump to the fuel rail. For the 

specified tightening torques of the unions, 

see "Technical data".

7.

Tighten the attachment bolts (2) of the fuel 

rail to the specified torque. See "Technical 

data".

8.

Tighten the bolt connections of the high-

pressure pipe clamps.

i400814

1

3

2

i400814

1

3

2

©

 200416

5-13

Removal and installation

CE ENGINE FUEL SYSTEM

ΛΦ45/55 series

4

5

9.

Install the cable harness (3) to the fuel rail (2) 

and secure it using cable ties.

10. Fit the connectors of the injectors (1) in the 

valve sleeve.

11. If it has been removed, fit the plug of the inlet 

air temperature/boost pressure sensor to the 

sensor.

12. Fit the connector of the fuel rail pressure 

sensor.

13. Start the engine and check the fuel system 

for leaks.

i400809

3

1

2

CE ENGINE FUEL SYSTEM

5-14

©

 200416

Removal and installation

5

ΛΦ45/55 series

4

5.5 REMOVAL AND INSTALLATION, FUEL RAIL PRESSURE-LIMITING VALVE

When removing the pressure-

limiting valve, fuel will escape. 

Collect the fuel and avoid the risk of 

fire. 

Dirt in the fuel system can lead to 

significant damage to parts of the 

system. Prevent this by cleaning the 

parts before disassembly and then 

sealing all open connections.

Removing fuel rail pressure-limiting valve
1.

Clean the pressure-limiting valve (2) and the 

surrounding area.

2.

Remove the fuel return pipe (3) from the 

pressure-limiting valve (2).

3.

Remove the pressure-limiting valve (2) from 

the fuel rail (1).

Installing fuel rail pressure-limiting valve
1.

Check the sealing surface and the screw 

thread of the pressure-limiting valve and the 

fuel rail.

2.

Install the pressure-limiting valve in the fuel 

rail and tighten the valve to the specified 

torque. See "Technical data".

3.

Fit the fuel return pipe on the pressure-

limiting valve.

4.

Start the engine and check the pressure-

limiting valve for leaks.

}

}

i400779

1

2

3


Content   ..  317  318  319  320   ..