Chrysler Pacifica. Manual - part 907


  Index      Chrysler     Chrysler Pacifica - service repair manual 2005 year


Search            


Content   ..  905  906  907  908   ..


Chrysler Pacifica. Manual - part 907


(4) Remove EGR tube from gasket (Fig. 7).

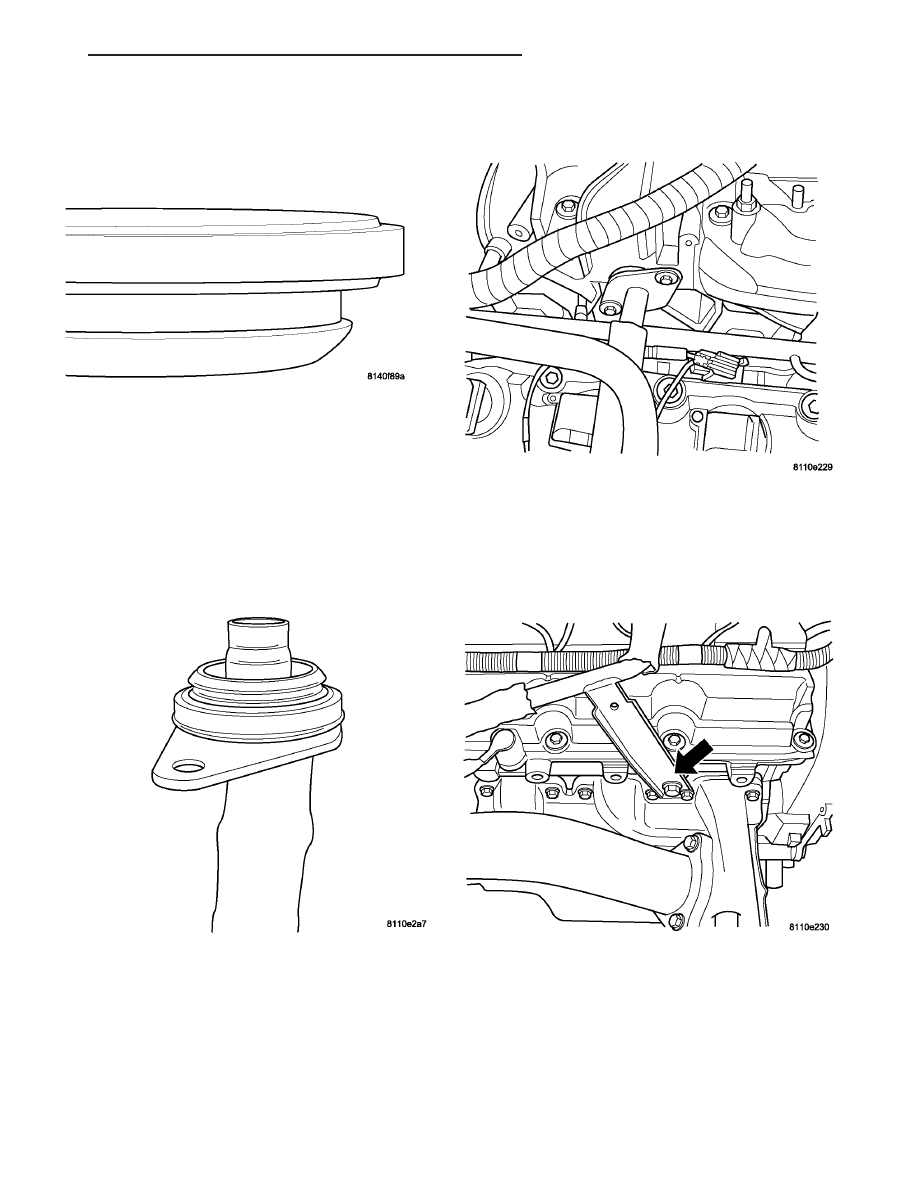
(5) Remove gasket (Fig. 8).

INSTALLATION

3.5L

(1) Inspect rubber silicone seals on intake manifold

end of EGR tube.

(2) Install upper tube into the intake manifold

(Fig. 10), being careful that the silicone rubber seals
are correctly installed and undamaged (Fig. 9).

(3) Tighten the EGR upper tube to EGR valve

bolts to 11.3 N·m (100 in. lbs.) torque (Fig. 3).

(4) Install the EGR tube bracket bolt and tighten

(Fig. 11).

Fig. 8 GASKET PROFILE

Fig. 9 EGR TUBE GASKET

Fig. 10 EGR AT INTAKE MANIFOLD

Fig. 11 TUBE BRACKET

CS

EXHAUST GAS RECIRCULATION

25 - 19

TUBE (Continued)

3.8L

(1) Inspect rubber silicone seals on intake manifold

end of EGR tube (Fig. 12).

(2) Install upper tube into the intake manifold

(Fig. 13), being careful that the silicone rubber seals
are correctly installed and undamaged.

(3) Tighten the tube to intake manifold bolts to 5.6

N·m (50 in. lbs.) torque

(4) Install bracket and screws (Fig. 14).

(5) Tighten the EGR upper tube to EGR valve

bolts to 11.3 N·m (100 in. lbs.) torque (Fig. 15).

Fig. 12 GASKET PROFILE

Fig. 13 INTAKE GASKET

Fig. 14 EGR TUBE AT INTAKE MANIFOLD

Fig. 15 EGR VALVE LOCATION & TUBE

25 - 20

EXHAUST GAS RECIRCULATION

CS

TUBE (Continued)

(6) Tighten tube bracket bolts to 5.6 N·m (50 in.

lbs.) torque (Fig. 16).

VALVE

REMOVAL

3.5L

(1) Disconnect the negative and then the positive

battery cable.

(2) Remove battery.
(3) Unlock and disconnect the electrical connector

from the EGR valve (Fig. 17).

(4) Remove the 2 EGR tube bolts (Fig. 18).

(5) Remove the 2 mounting bolts for the EGR

valve and gasket (Fig. 19).

Fig. 16 EGR TUBE BRACKET

Fig. 17 EGR VALVE

Fig. 18 EGR VALVE AND TUBE

Fig. 19 EGR VALVE REMOVED

CS

EXHAUST GAS RECIRCULATION

25 - 21

TUBE (Continued)

3.8L

(1) Disconnect negative battery cable.
(2) Unlock and disconnect the electrical connector

from the EGR valve (Fig. 20).

(3) Remove EGR tube bracket bolt (Fig. 21).

(4) Remove the 2 EGR tube bolts (Fig. 22).

(5) Remove the 2 mounting bolts for the EGR

valve and gasket (Fig. 23).

Fig. 20 EGR VALVE LOCATION & TUBE

Fig. 21 EGR TUBE BRACKET

Fig. 22 EGR VALVE MOUNTED

Fig. 23 EGR VALVE GASKET

25 - 22

EXHAUST GAS RECIRCULATION

CS

VALVE (Continued)


Content   ..  905  906  907  908   ..