Chrysler Stratus Convertible. Manual - part 7
 

  Index      Chrysler     Chrysler Stratus Convertible - service repair manual 1995-2000 year


Search            


Content   ..  5  6  7  8   ..


Chrysler Stratus Convertible. Manual - part 7


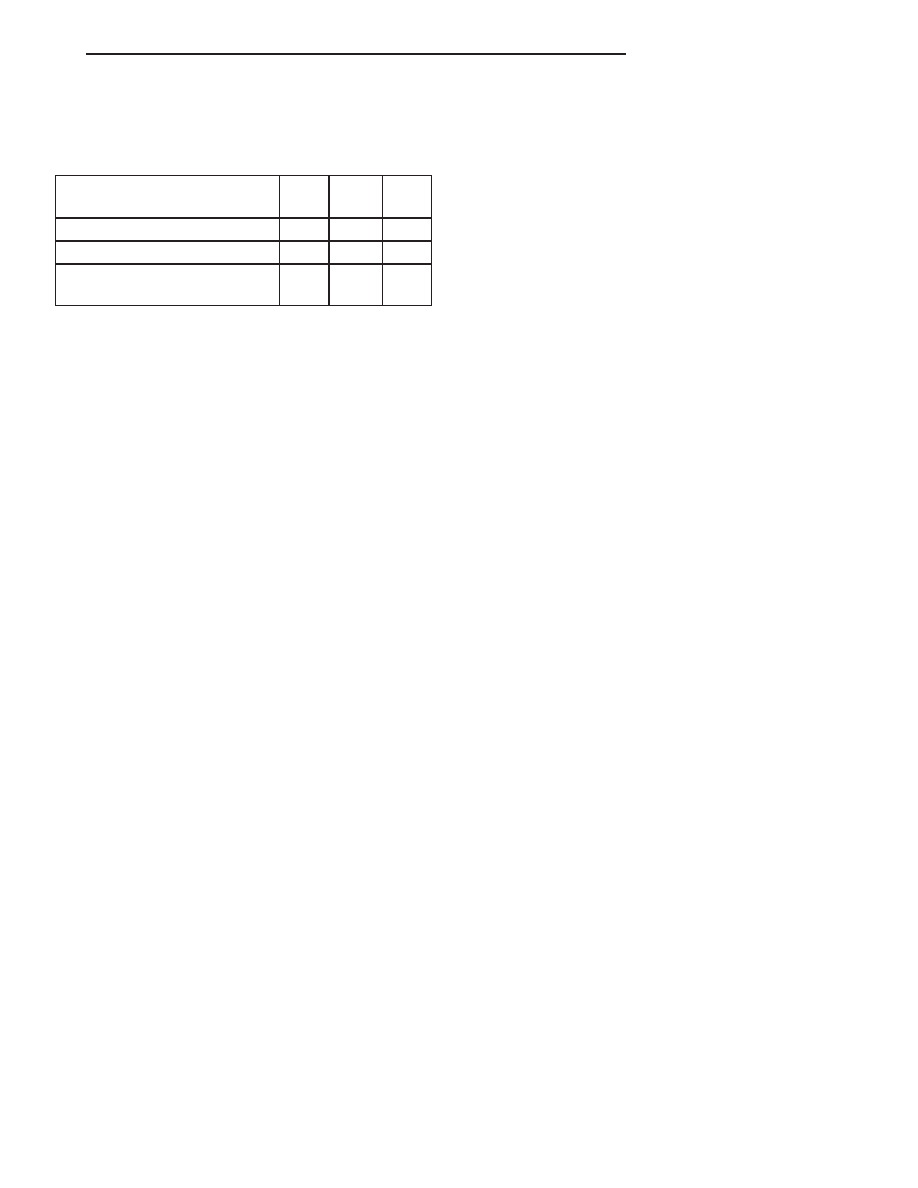
SPECIFICATIONS

TORQUE

DESCRIPTION

N·m

Ft.

Lbs.

In.

Lbs.

Band Clamps—Fastener

54

40

Body Heat Shield—Fasteners

5

40

Catalytic Converter to Exhaust
Manifold Flange—Fasteners

28

250

JX

EXHAUST SYSTEM

11 - 7

FRAME AND BUMPERS

TABLE OF CONTENTS

page

page

BUMPERS . . . . . . . . . . . . . . . . . . . . . . . . . . . . . . . . 1

FRAME . . . . . . . . . . . . . . . . . . . . . . . . . . . . . . . . . . 4

BUMPERS

TABLE OF CONTENTS

page

page

REMOVAL AND INSTALLATION

FRONT BUMPER FASCIA . . . . . . . . . . . . . . . . . . . 1
HEADLAMP ADAPTER ASSEMBLY . . . . . . . . . . . . 2

REAR BUMPER FASCIA . . . . . . . . . . . . . . . . . . . . 2
REAR BUMPER REINFORCEMENT . . . . . . . . . . . . 3

REMOVAL AND INSTALLATION

FRONT BUMPER FASCIA

It is not necessary to remove the headlamp assem-

blies to remove the front bumper fascia.

REMOVAL

(1) Release hood latch and open hood.
(2) Remove screws holding top of grille to head-

lamp adapter assembly (Fig. 1).

(3) Hoist and support vehicle on safety stands.

Refer to Group 0, Lubrication and Maintenance, for
proper hoisting and jacking procedures.

(4) Remove push-in fasteners holding fascia to

underside of bumper reinforcement.

(5) Remove inner wheelhouse as necessary to

access nuts holding fascia wings to fender.

(6) Remove nuts holding fascia wings to fender.
(7) Slide fascia forward and separate fascia from

vehicle.

(8) Disengage fog lamp wire connectors from back

of fog lamps, if so equipped.

INSTALLATION

(1) Ensure that energy management foam is prop-

erly installed in front fascia (Fig. 2).

(2) Engage fog lamp wire connectors to back of fog

lamps, if so equipped.

(3) Position fascia on vehicle and slide rearward,

being careful to ensure that the grille slides between
hood latch handle and headlamp adapter assembly.

(4) Install nuts holding fascia wings to fender.
(5) Install inner wheelhouse.
(6) Install push-in fasteners holding fascia to

underside of bumper reinforcement.

(7) Install screws holding top of grille to headlamp

adapter assembly.

Fig. 1 Front Bumper Fascia

1 – HEADLAMP ADAPTER ASSEMBLY
2 – GRILLE
3 – FASCIA
4 – FENDER
5 – FRONT BUMPER REINFORCEMENT

JX

FRAME AND BUMPERS

13 - 1

HEADLAMP ADAPTER ASSEMBLY

REMOVAL

(1) Remove headlamp assemblies. Refer to Group

8L, Lamps, for proper procedure.

(2) Remove front fascia.
(3) Remove bolts holding headlamp adapter to

radiator closure panel from headlamp cavities (Fig.
3).

(4) Remove bolts holding underside of adapter

assembly to upper radiator crossmember.

(5) Separate headlamp adapter assembly from

vehicle.

INSTALLATION

(1) Position headlamp adapter assembly on vehi-

cle.

(2) Loosely install bolts holding headlamp adapter

to radiator closure panel from headlamp cavities.

(3) Loosely

install

bolts

holding

underside

of

adapter assembly to upper radiator crossmember.

(4) Tighten all bolts.
(5) Install front fascia.
(6) Install headlamp assemblies. Refer to Group

8L, Lamps, for proper procedures.

REAR BUMPER FASCIA

REMOVAL

(1) Release decklid latch and open decklid.
(2) Remove trunk lining as necessary to access nut

attaching rear fascia to rear closure panel.

(3) Remove screws attaching fascia to rear closure

panel and nuts securing to inner quarter panel (Fig.
4).

(4) Hoist and support vehicle on safety stands.

Refer to Group 0, Lubrication and Maintenance, for
proper procedure.

(5) Remove push-in fasteners attaching bottom of

fascia to rear bumper reinforcement.

(6) Disengage license plate lamp wire connector.
(7) Remove rear wheelhouse splash shields as nec-

essary to access nuts attaching fascia to quarter pan-
els.

(8) Remove nuts attaching rear fascia to quarter

panels.

(9) Remove screw attaching fascia to right rear

quarter panel.

(10) Slide fascia rearward and remove from vehi-

cle.

INSTALLATION

(1) Ensure that the energy management foam is

properly installed in rear fascia (Fig. 5).

(2) Position fascia on vehicle and slide forward to

engage studs on quarter panel.

CAUTION: Ensure that license plate wire connector
is properly routed through energy management
foam and fascia.

(3) Install nuts attaching rear fascia to quarter

panels, starting with the rearward nut working for-
ward.

(4) Install screw attaching rear fascia to right rear

quarter panel.

NOTE: Hold fascia completely forward until first nut
is secured.

Fig. 2 Front Bumper Energy Management Foam

1 – FRONT BUMPER ENERGY MANAGEMENT FOAM
2 – FRONT FASCIA

Fig. 3 Headlamp Adapter Assembly

1 – FRONT BUMPER REINFORCEMENT
2 – UPPER RADIATOR SUPPORT CROSSMEMBER
3 – HEADLAMP ADAPTER ASSEMBLY

13 - 2

FRAME AND BUMPERS

JX

REMOVAL AND INSTALLATION (Continued)


Content   ..  5  6  7  8   ..