Chery Tiggo. Manual - part 33
 

  Index      Chery     Chery Tiggo - service repair manual 2009 year


Search            


Content   ..  31  32  33  34   ..


Chery Tiggo. Manual - part 33


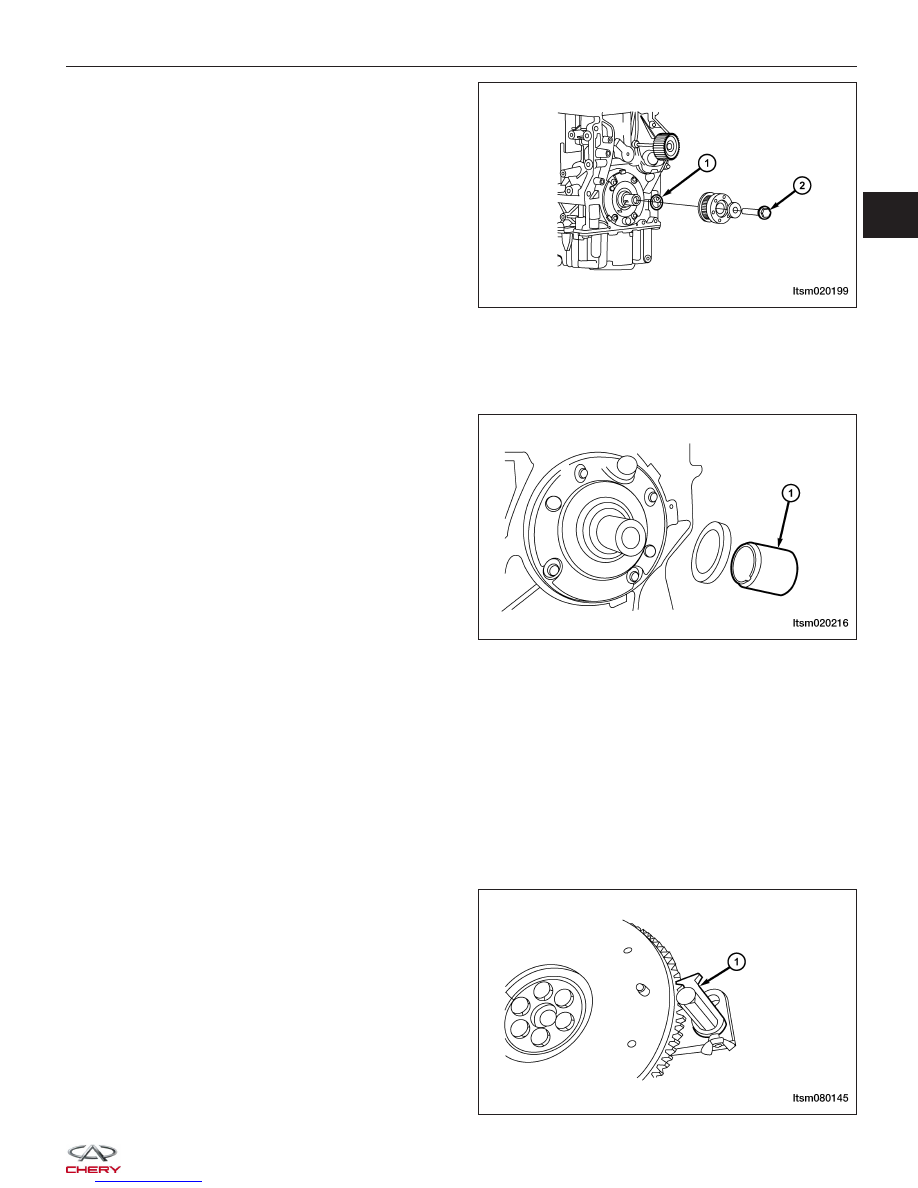
4. Remove the crankshaft timing belt pulley bolt (2)

from the crankshaft.
(Tighten: Crankshaft timing belt pulley bolt to 130
N·m and an additional 65°)

5. Remove the key-way from the crankshaft.

6. Using an appropriate tool, remove the front crank-

shaft oil seal (1).

CAUTION:
Be careful not to damage the front cover seal
surface while removing the seal.

7. Installation is in the reverse order of removal.

Installation Notes:
• Lubricate the new front seal with engine oil prior to assembly.

• Use the front crankshaft seal installer CH-20007

(1), to install the new seal.

Rear Crankshaft Oil Seal

Removal & Installation

NOTE :
The following special tools are required to perform the repair procedure:
• CH-20005 - Rear Crankshaft Oil Seal Installer

• CH-20006 - Rear Crankshaft Oil Seal Guide

• CH-20043 - Flywheel Fixture

1. Remove the transaxle assembly (See Transaxle Assembly Removal & Installation in Section 08 Transaxle and

Transfer Case).

2. Using special tool CH-20043 (1), hold the flywheel.

ON-VEHICLE SERVICE

LTSM020199

LTSM020216

LTSM080145

02


3. If equipped with manual transaxle, remove clutch

pressure plate retaining bolts (1) and remove the
clutch pressure plate.
(Tighten: Clutch pressure plate bolts to 25 N·m)

4. If equipped with manual transaxle, remove the fly-

wheel bolts (1) and then remove the flywheel.
(Tighten: Flywheel bolts to 75 N·m)

5. If equipped with automatic transaxle, remove the

drive plate retaining bolts (1) and then remove
drive plate.
(Tighten: Drive plate bolts to 75 N·m)

6. Remove the rear oil seal using a suitable tool.

7. Installation is in the reverse order of removal.

ON-VEHICLE SERVICE

BESM080046

BESM020058

BESM020031


Installation Notes:
• When installing seal, lubricate seal guide with clean

engine oil.

• Position the seal over the rear crankshaft seal

guide.

• Use special tool CH-20005 (2) and CH-20006 (1),

to install the rear crankshaft oil seal.

• Ensure that the lip of the seal is facing toward the

crankcase during installation.

ON-VEHICLE SERVICE

LTSM020217

02


Engine Mounts

Removal & Installation - Left Mount

NOTE :
The following special tools are required to perform the repair procedure:
• Engine Hoist

1. Disconnect the negative battery cable.

2. Support the engine with the engine hoist.

3. Remove the air cleaner housing. (See Air Cleaner

Housing Removal & Installation in Section 02
Engine).

4. Remove the engine left mount retaining bolts (2)

and remove the engine left mount bracket bolts (1).
(Tighten: Engine left mount bolts to 70 N·m)

5. Installation is in the reverse order of removal.

ON-VEHICLE SERVICE

LTSM020156


Content   ..  31  32  33  34   ..