Acura CSX. Manual - part 417


  Index      Acura     Acura CSX - P/NO. 61SNR03 - service repair manual 2006-2009 year


Search            


Content   ..  415  416  417  418   ..


Acura CSX. Manual - part 417


01

SNR9AC7D52100065301KBAT02

Special Tools Required

Front

19-173

Wheel Speed Sensor Replacement
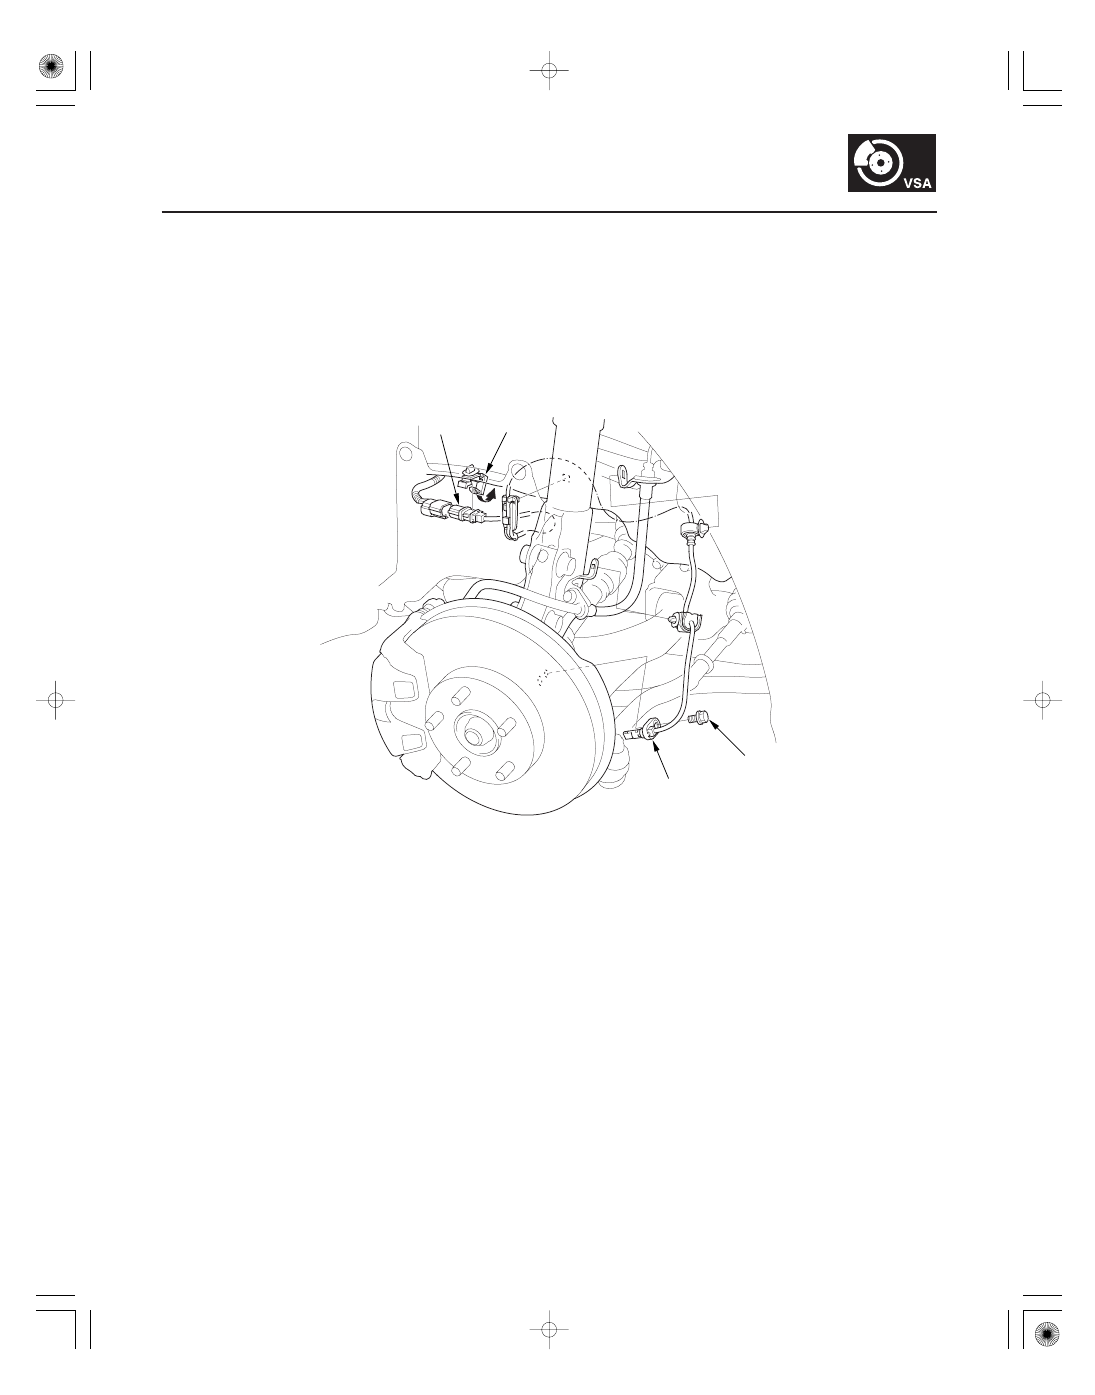
A

B

C

9.8 N·m
(1.0 kgf·m,
7.2 lbf·ft)

Guide pin tool 07AAG-SVBA100

1. Turn the ignition switch to LOCK (0).

2. Release the clamp (A), then disconnect the wheel speed sensor connector (B).

3. Remove the clips, the bolt, and the wheel speed sensor (C).

4. Install the wheel speed sensor in the reverse order of removal, and note these items:

• Install the sensor carefully to avoid twisting the wires.
• If the wheel speed sensor comes in contact with the wheel bearing, it is faulty, investigate the cause before

replacing the sensor.

5. Start the engine, and make sure the ABS and the VSA indicators go off.

6. Test-drive the vehicle, and make sure the ABS and the VSA indicators do not come on.

08/08/21 15:06:47 61SNR030_190_0173

*01

Rear

19-174

VSA System Components

Right side

9.8 N·m
(1.0 kgf·m,
7.2 lbf·ft)

A

B

C

1. Turn the ignition switch to LOCK (0).

2. Release the clamp (A), then disconnect the wheel speed sensor connector (B).

3. Remove the clips, the bolt, and the wheel speed sensor (C).

08/08/21 15:06:47 61SNR030_190_0174

*02

*03

*04

19-175

A

B

A
07AAG-SVBA100

B
07AAG-SVBA100

A

4. Apply multi-purpose grease to the wheel speed

sensor O-ring (A) and the sensor hole in the knuckle
(B).

5. Insert the guide pin tool (A) into the wheel speed

sensor bolt hole until the shoulder of the tool
contacts the wheel speed sensor bracket.

NOTE: To prevent O-ring damage, the wheel speed
sensor must be installed with the guide pin tool.

6. Insert the wheel speed sensor (A) and the guide pin

tool (B) into the bolt hole on the knuckle.

NOTE: To ensure proper alignment when pushing
the wheel speed sensor into the knuckle housing,
do not hold the sensor bracket during installation,
hold the sensor wire.

7. Gently push and pull the wheel speed sensor in and

out to make sure the O-ring is sliding properly in its
housing. While you are doing this, make sure the
sensor doesn’t come out of the knuckle assembly. If
the sliding effort is too high, remove the wheel
speed sensor, inspect the O-ring for damage, and
start the installation process again.

8. Remove the guide pin tool, then install the bolt, and

tighten it to specified torque.

9. Clean the mating surfaces between the brake disc

and the inside of the wheel, then install the front
wheel.

10. Start the engine, and make sure the ABS and the

VSA indicators go off.

11. Test-drive the vehicle, and make sure the ABS and

the VSA indicators do not come on.

08/08/21 15:06:48 61SNR030_190_0175

SNR9AC70000000J1901ZAAT00

08/08/21 15:06:48 61SNR030_190_0176


Content   ..  415  416  417  418   ..