Acura CSX. Manual - part 122
01
02
SNR9AA7K72100091298FAAT00
−
−
−
−
−
−
DTC P1298:
YES
NO
YES
NO
YES
NO
11-162
PGM-FI System
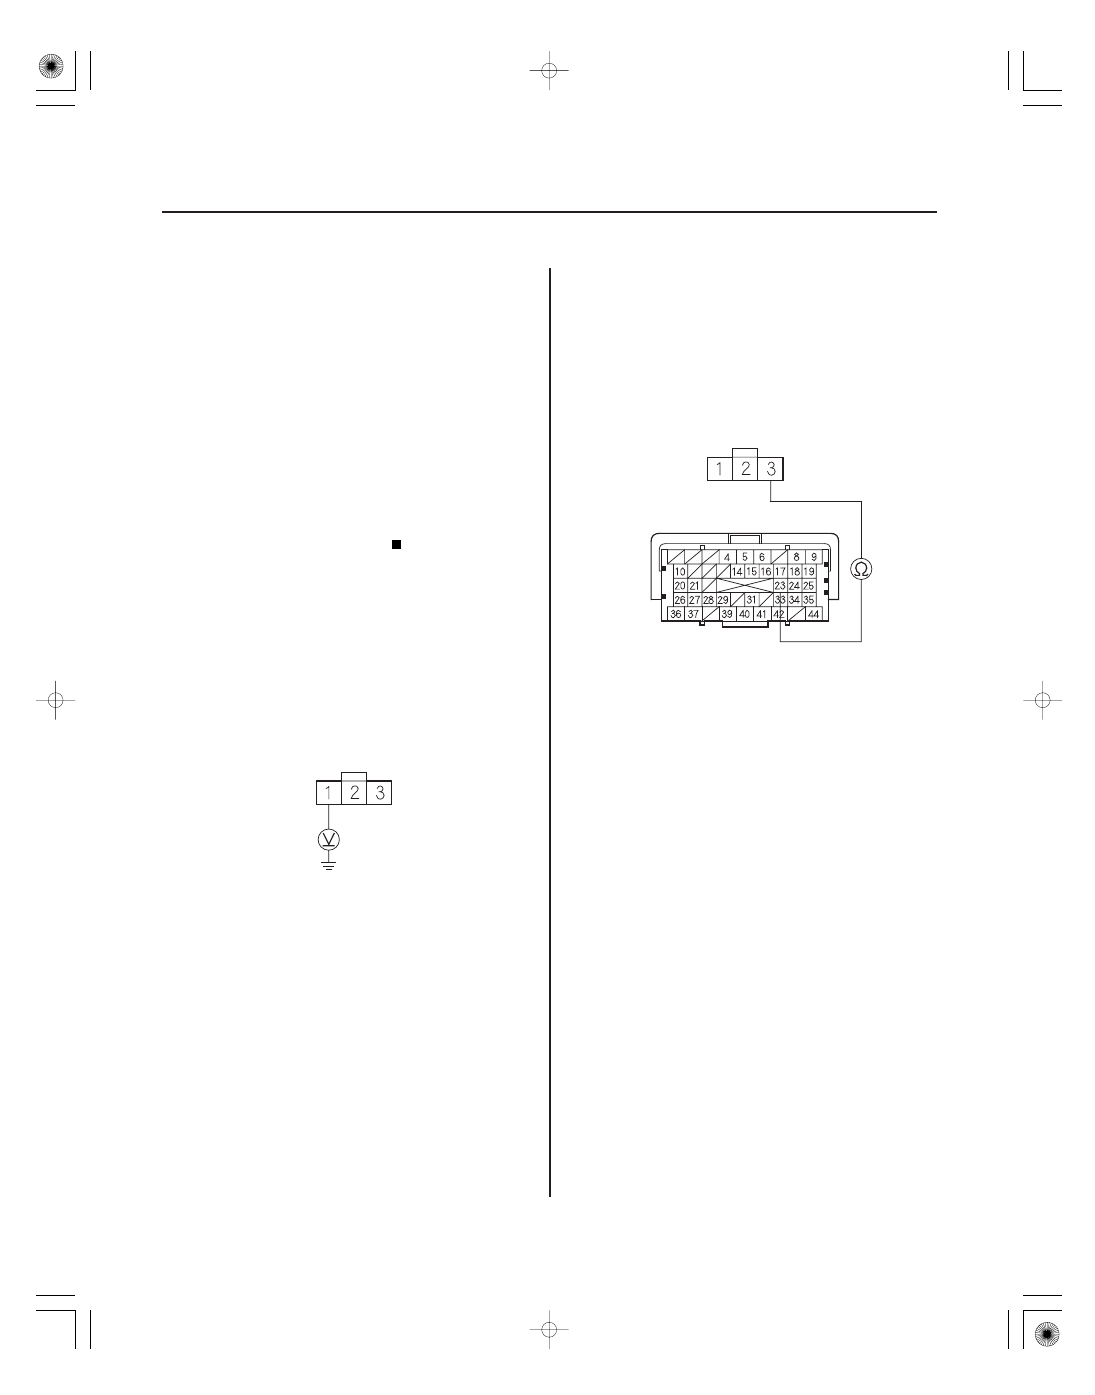
ELD 3P CONNECTOR
IG1 (YEL)
ELD 3P CONNECTOR
ECM/PCM CONNECTOR A (44P)
ELD (ORN)
ELD (ORN)
ELD Circuit High Voltage
NOTE: Before you troubleshoot, record all freeze data
and any on-board snapshot, and review the general
troubleshooting information (see page 11-3).
1. Turn the ignition switch to ON (II).
2. Check the ELD in the DATA LIST with the HDS.
Go to step 3.
Intermittent failure, the system is OK at this
time. Check for poor connections or loose terminals
at the ELD and the ECM/PCM.
3. Turn the ignition switch to LOCK (0).
4. Disconnect the ELD 3P connector.
5. Turn the ignition switch to ON (II).
6. Measure the voltage between ELD 3P connector
terminal No. 1 and body ground.
Go to step 7.
Check the No. 3 ALTERNATOR (10 A) fuse in
the under-dash fuse/relay box. If the fuse is OK,
repair open in the wire between the No. 3
ALTERNATOR (10 A) fuse and the ELD, then go to
step 13.
7. Turn the ignition switch to LOCK (0).
8. Jump the SCS line with the HDS.
9. Disconnect ECM/PCM connector A (44P).
10. Check for continuity between ELD 3P connector
terminal No. 3 and ECM/PCM connector terminal
A23.
Go to step 11.
Repair open in the wire between the ECM/
PCM (A23) and the ELD, then go to step 13.
Wire side of female terminals
Wire side of female terminals
Terminal side of female terminals
Is 0.2 A or less indicated?
Is ther e batter y voltage?
Is ther e continuity?
08/08/21 14:20:24 61SNR030_110_0162