Porshe 911 (997). Manual - part 158
Item
Designation
Explanation
1
Catalytic converter
2
Oxygen sensor behind catalytic converter
Grease threads for re-installation
3
Oxygen sensor ahead of catalytic converter
Grease threads for re-installation
4
CO removal position
Replace seal if opened
5
Flange seal
Replace; observe installation and beading position!
6
Hexagon nut, M8
Replace
7
Exhaust manifold
8
Catalytic converter holder to engine carrier
9
Clamps on catalytic converter holder
Clamping sleeve, rear silencer to catalytic converter
1. Screw off M8 fastening nuts on clamping sleeve and slide sleeve onto the silencer pipe. If corroded,
spray sleeve with penetrating oil or heat it up.
2. Loosen clamp on catalytic converter
holder.
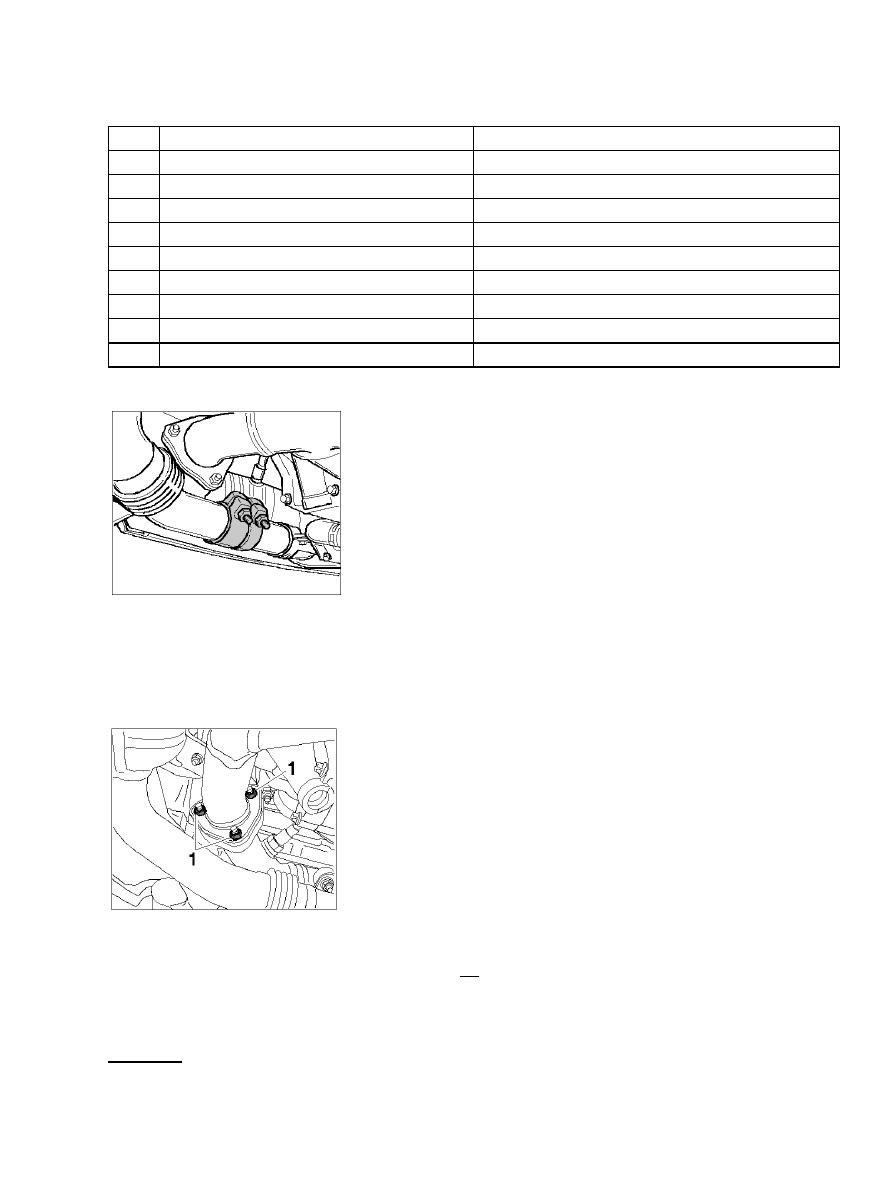
Catalytic converter flange joint
3. Loosen threaded flange joint to exhaust manifold -1- . Replace lock nuts.
4. Lift catalytic converter out of the
vehicle.
Diagnostic system: reading out fault memory and activating systems
Removing catalytic converter
789